Acrylic nail designs in 2025 are all about formidable creativity, colourful hues, and customized flair. Whether you’re into traditional French pointers or edgy chrome flames, this 12 months’s tendencies offer something for each temper and fashion. In this blog, we’ve rounded up 52 need to-strive acrylic nail designs that are placing Pinterest and salons on fire. From soft pastels to high-shine metallics, get equipped to discover the final nail idea in order to preserve your palms searching gorgeous all 12 months long. Let’s dive into the most stunning acrylic nail thoughts trending right now!
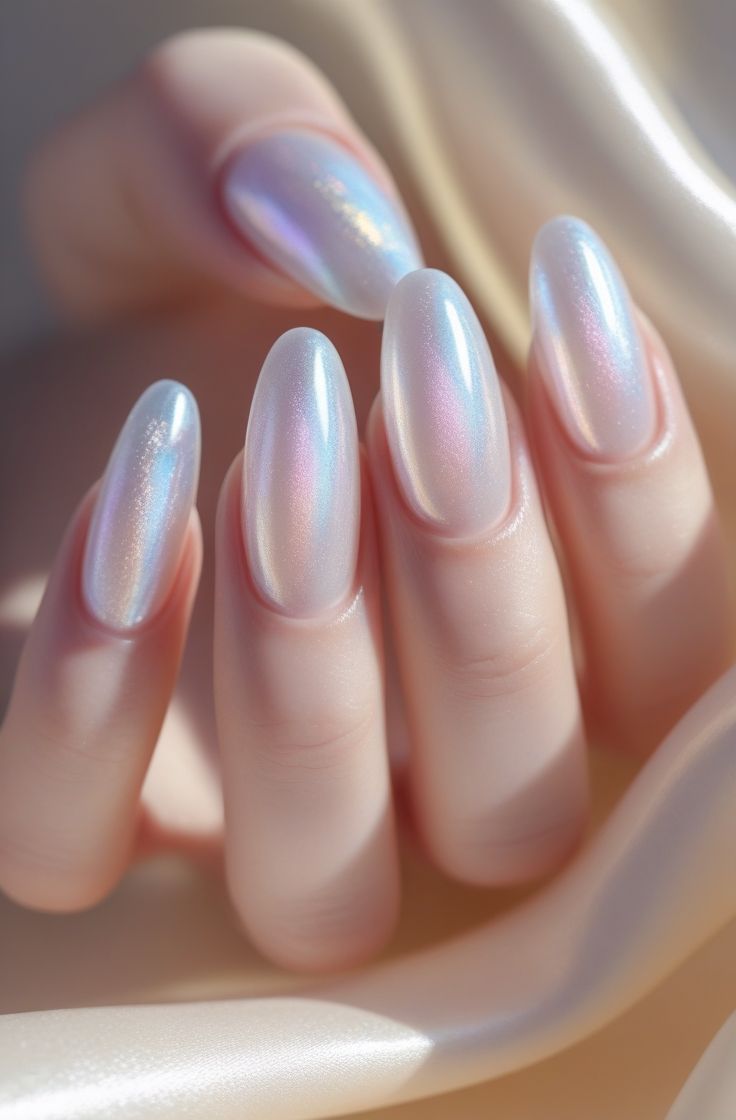
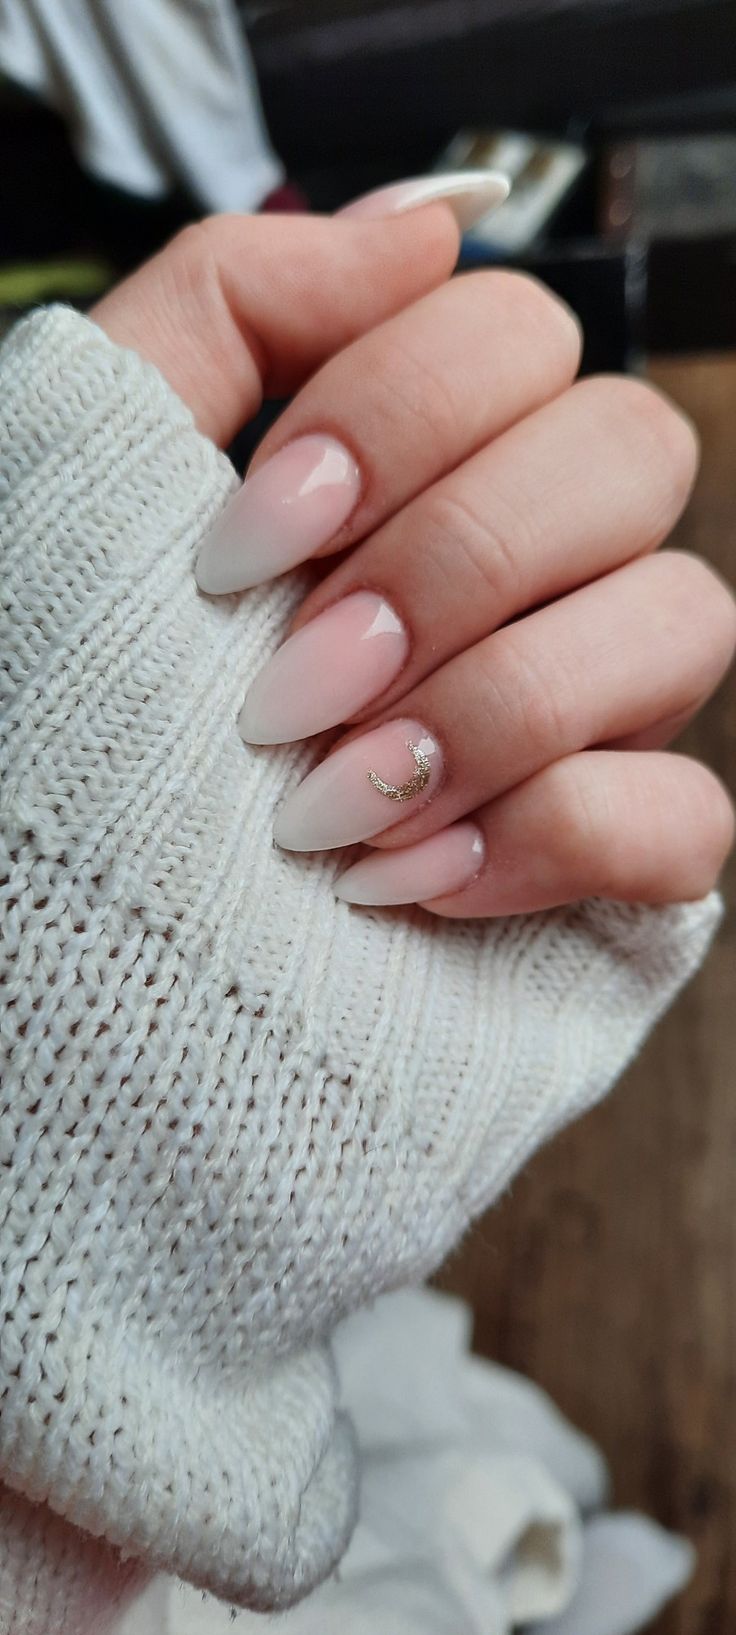
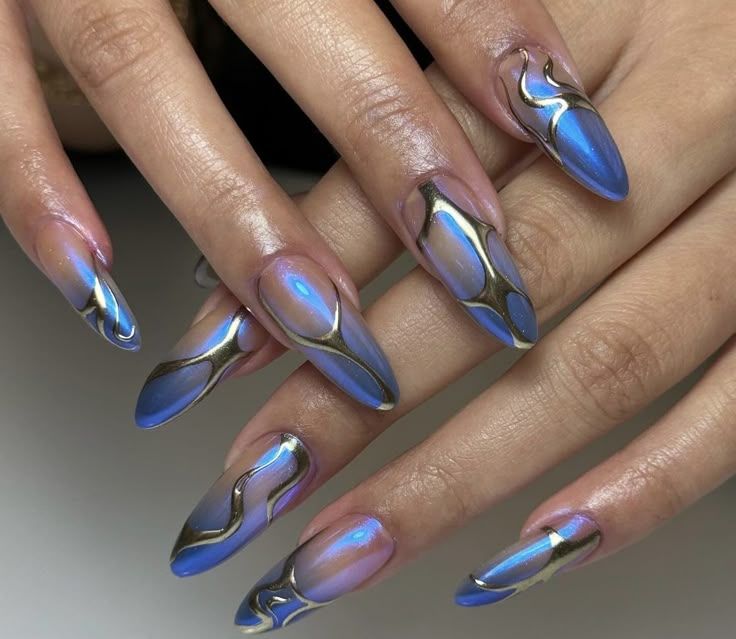
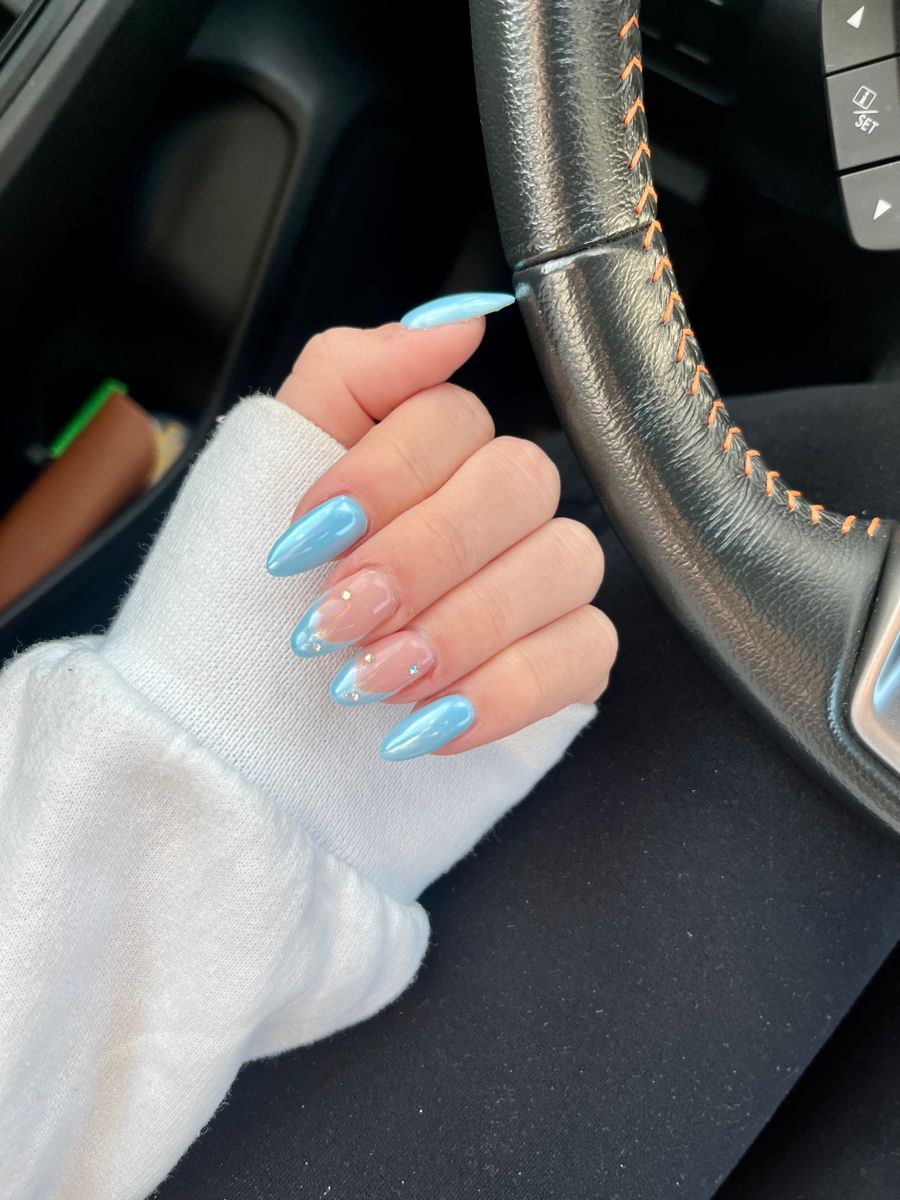
Milky Chrome Drip Acrylic Nails
When tallied together, milky chrome drip nails are the combination of graceful, soft subtlety, packed with a futuristic glow. In this acrylic nail design, the milky base design blends a unique twist with accent milky chrome accents that shine and dance under the light with a glowing sheen. Stylish, chic, and trendy, milky chrome drip nails are the ultimate way to enjoy a little subtle glam in your nails, and are a fun option for acrylic nail lovers everywhere!

Jelly Aura Acrylic Nails
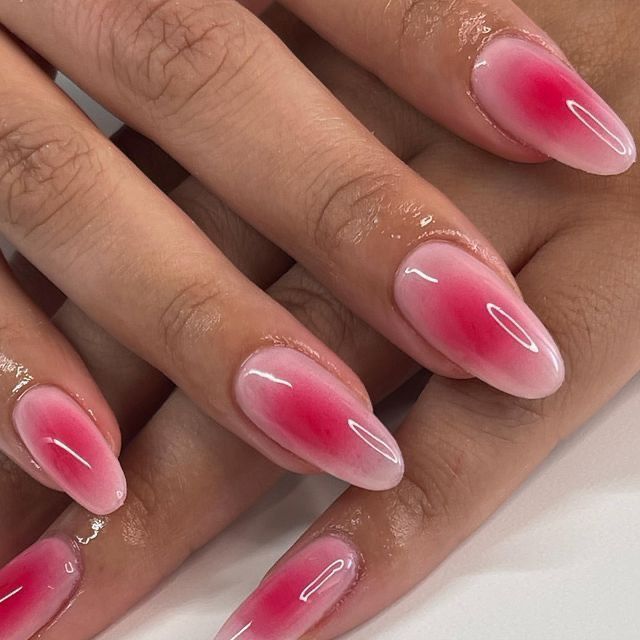
Jelly aura tips offer a perfect marriage of whimsy and dreamy mystique. This beauty features translucent acrylic nails glazed with soft gradient dashed colours, delivering a glowing aura effect, along with edge! Jelly aura tips are the ideal set of nails if you’re looking for a lightweight and trendy set of nails that add a fabulously dreamy feeling to your nail style this season.
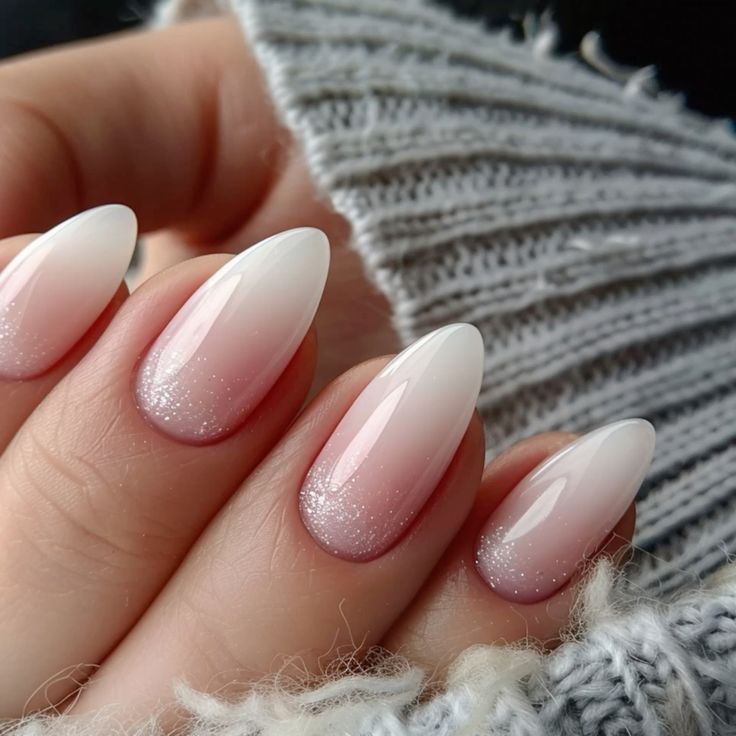
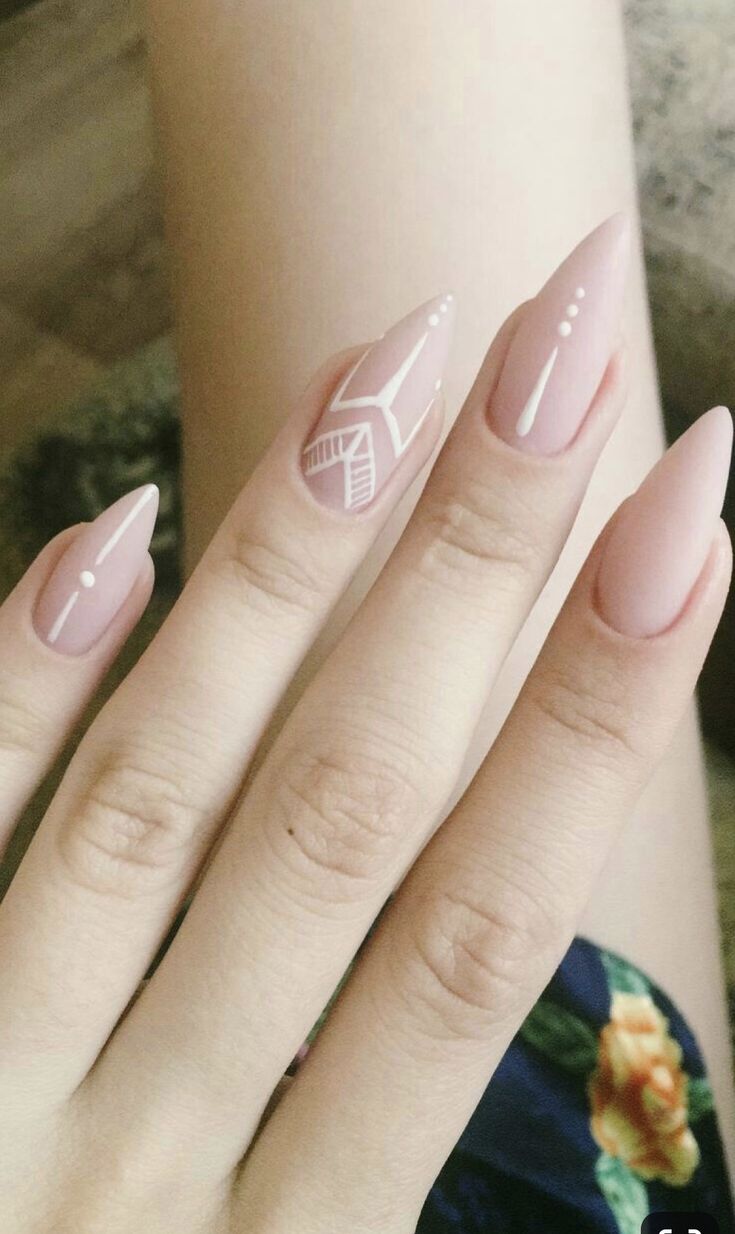
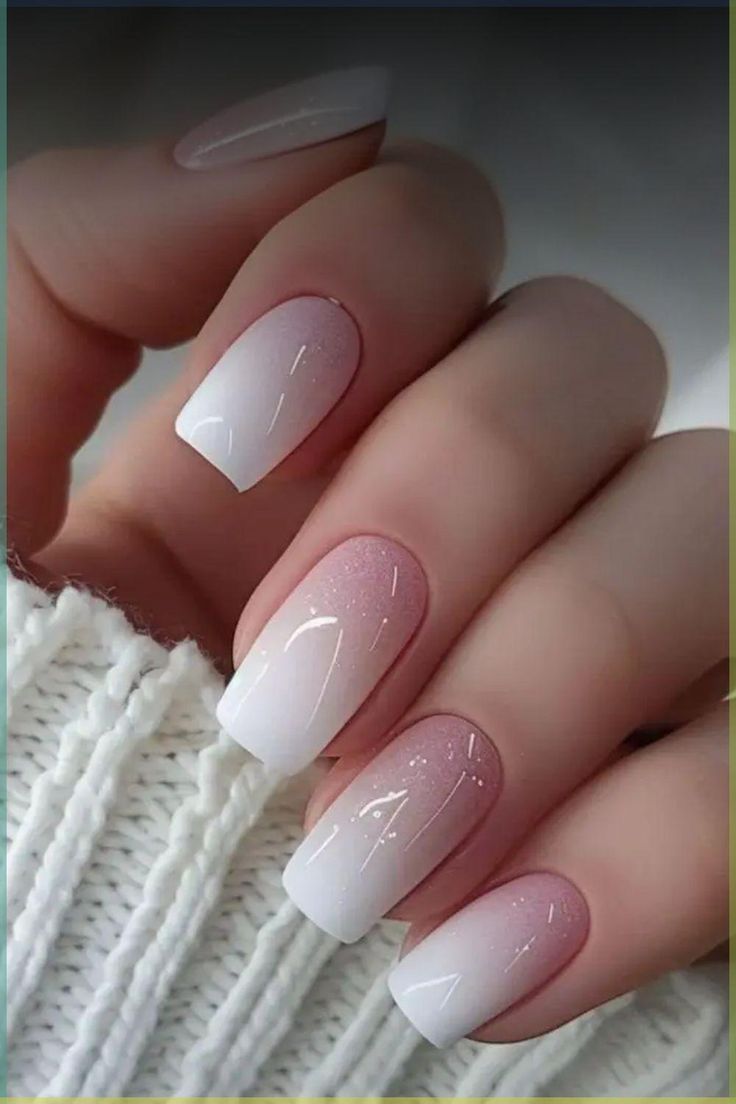
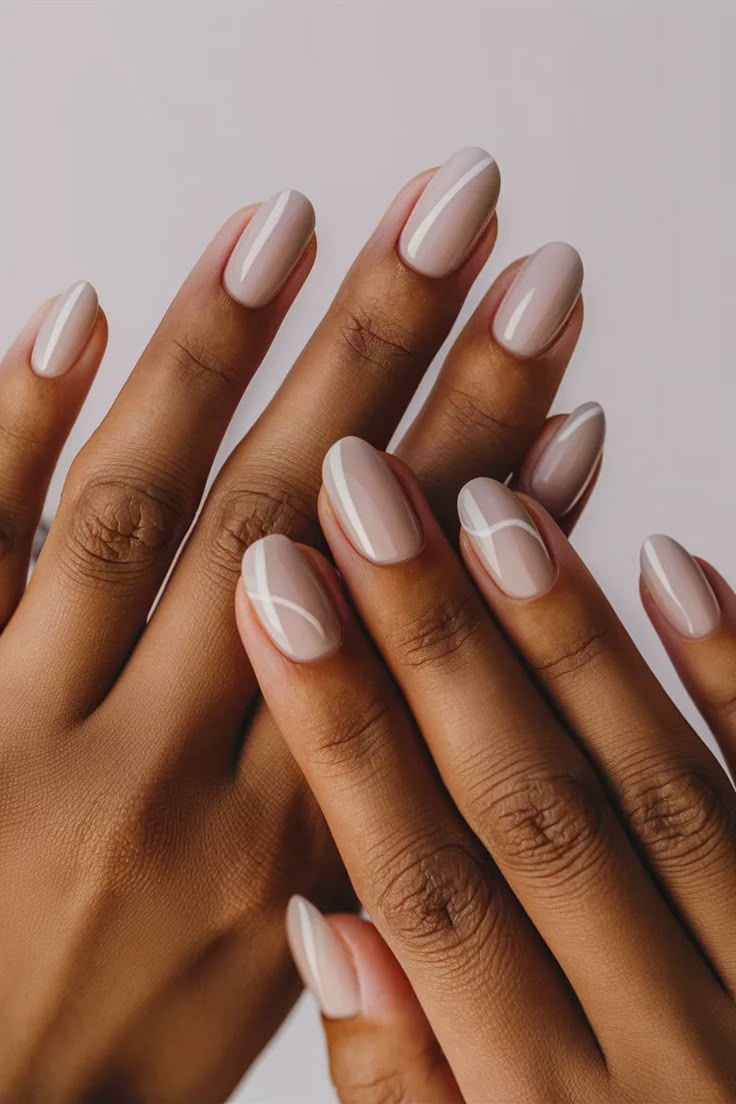
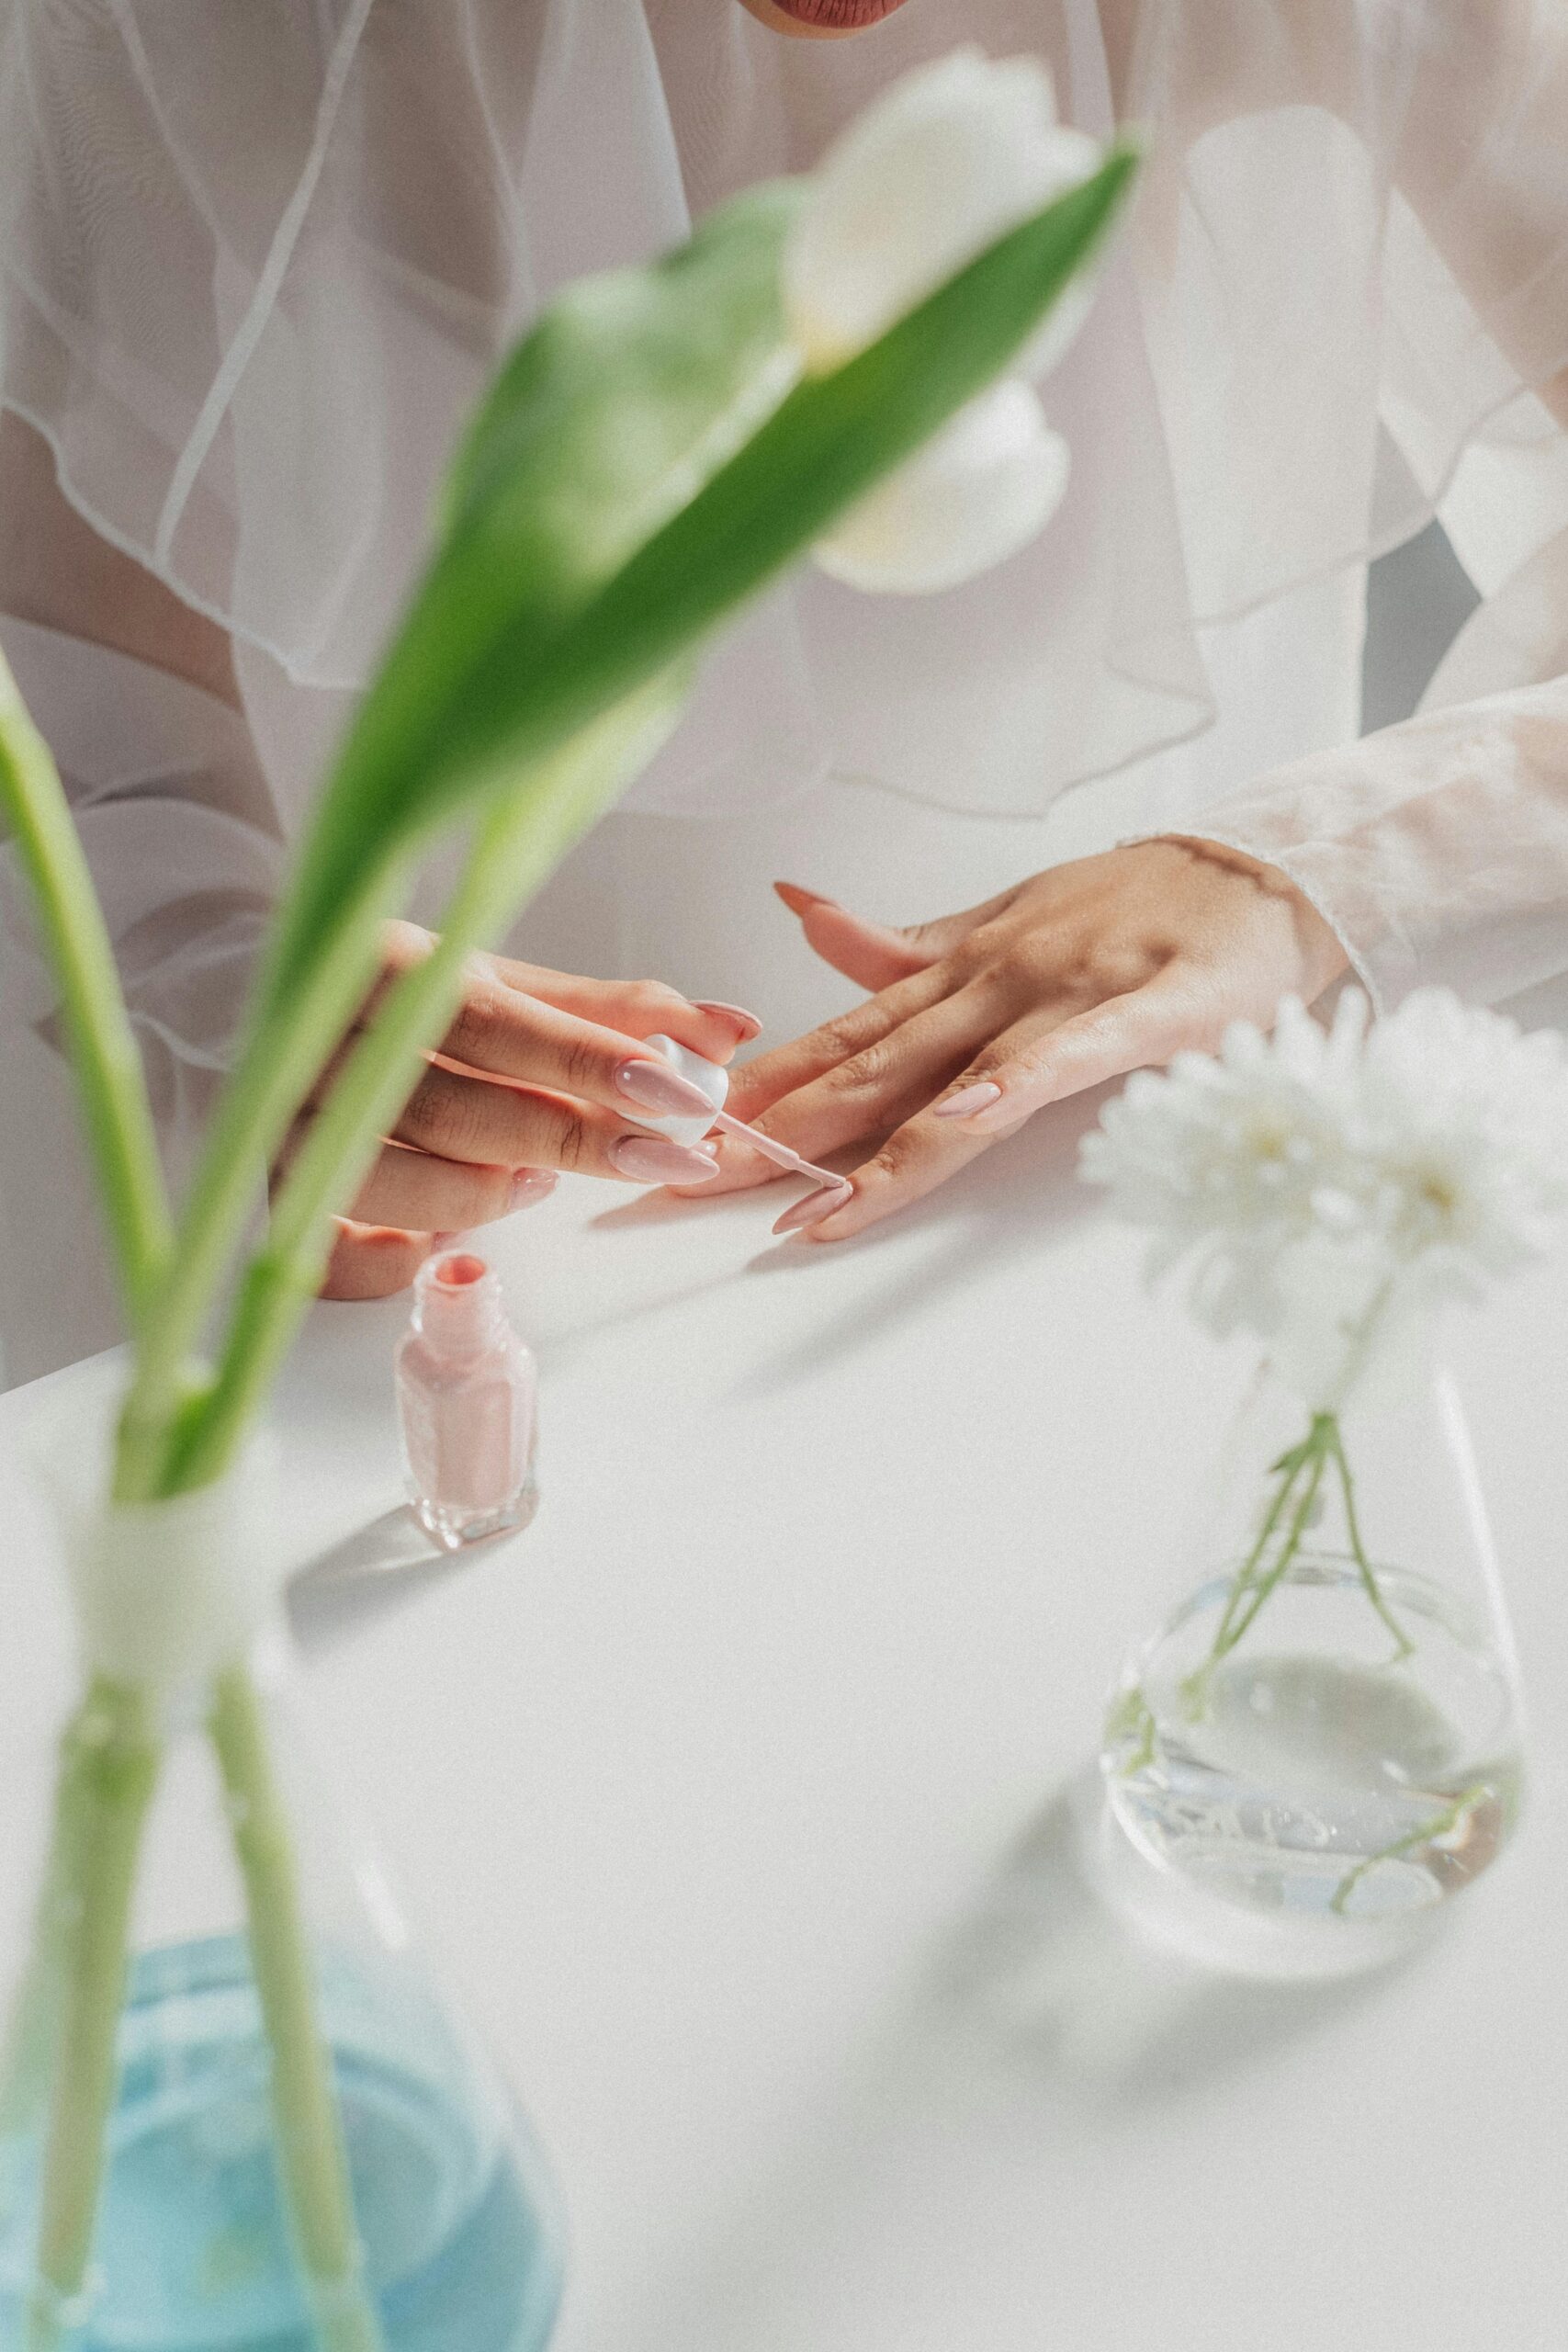
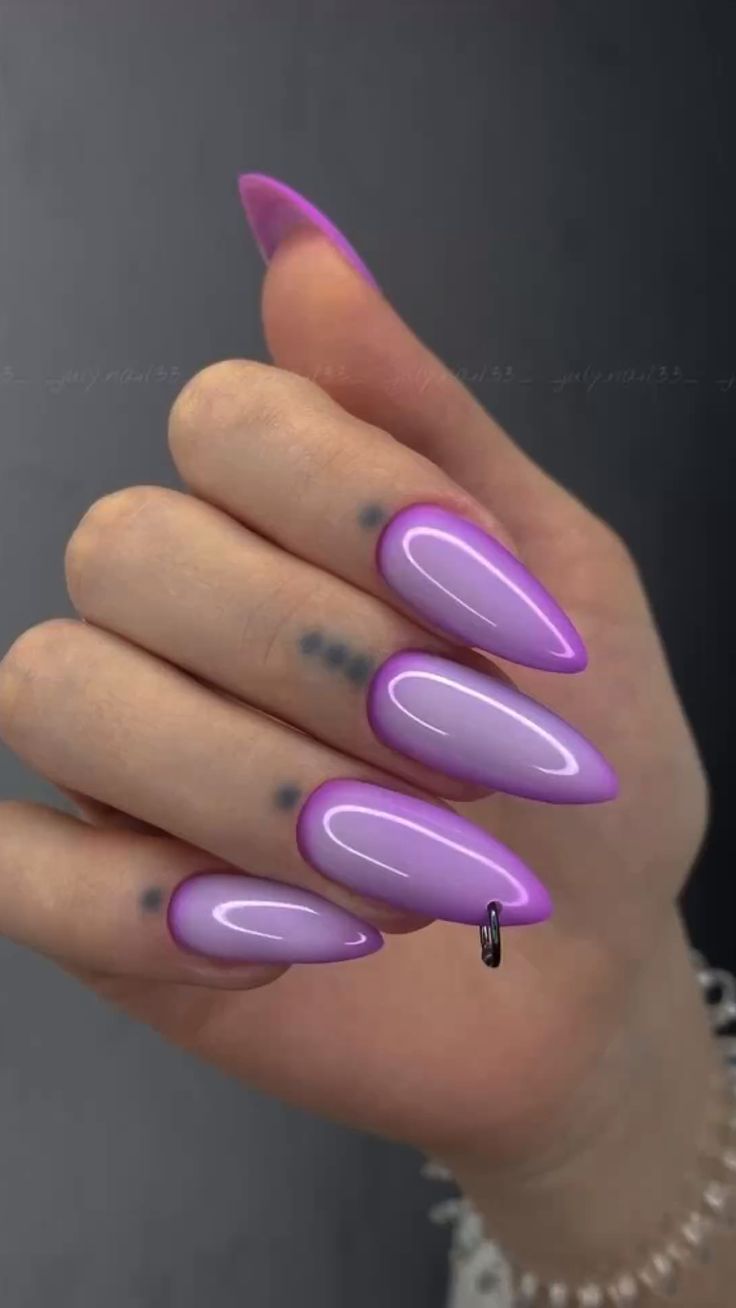
Blush Pink Ombré
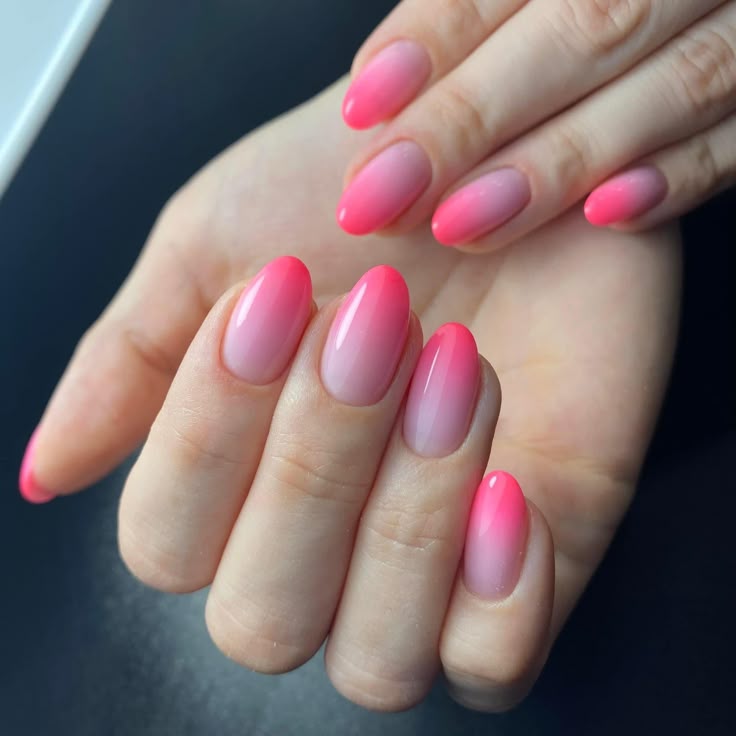
Blush pink ombré acrylic nails are the softest, romantic, and elegant nail style for your next set of acrylic nails. Blush pink ombré nails are shades of natural tones, blending together accented by a subtle fade of pink colour with a lasting impression of warmth and elegance, making it the ideal addition to any elegant every-day look, or an ideal accent to your cherished special occasion. Blush pink ombré nails can transition with you through many events! This classic style with natural similarities will add burst of soft charm and subtle chic sophistication to any accessories in your outfit!
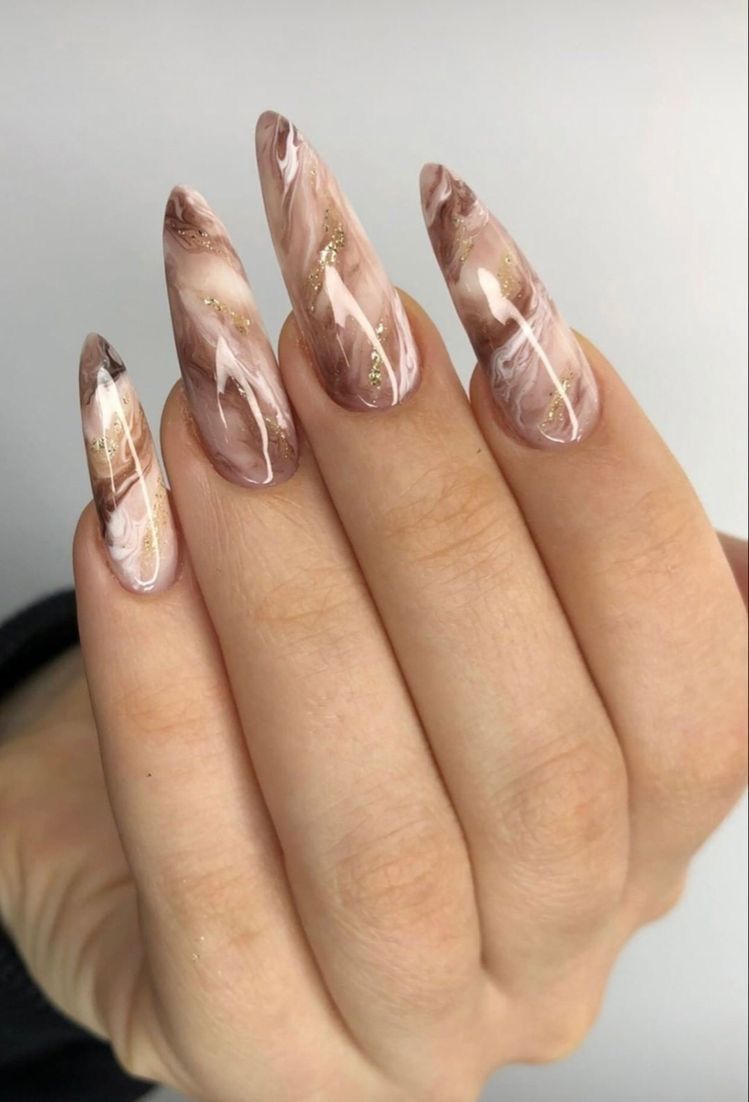
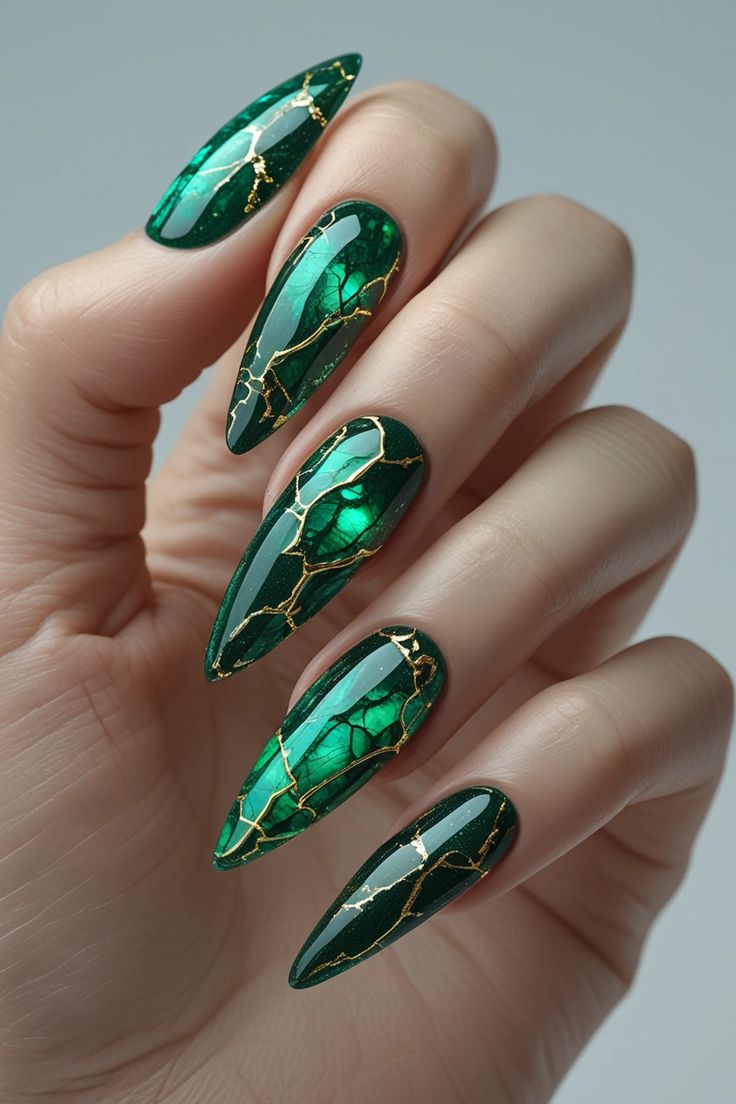
Matte Mocha Marble
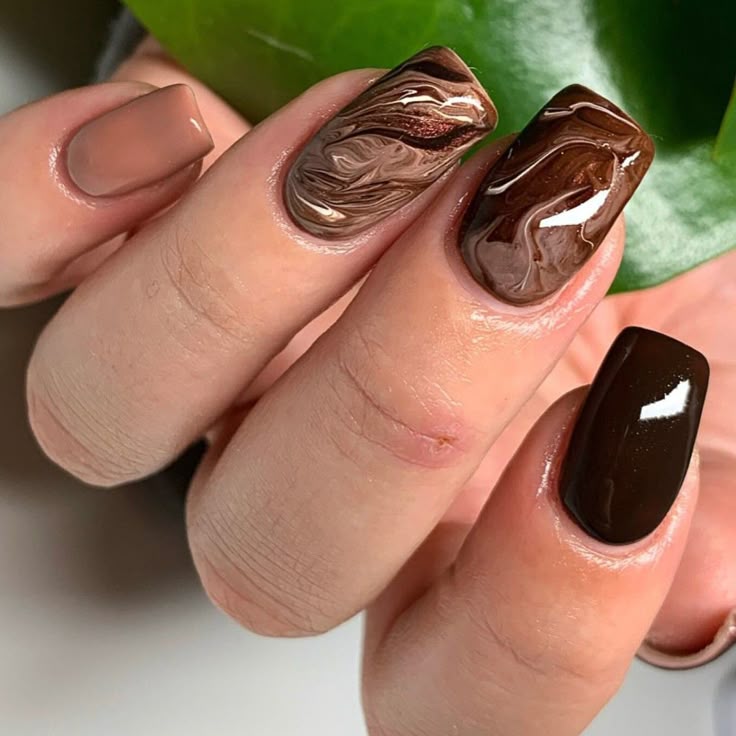
Matte mocha marble nails use deep coffee inspired hues which have a beautiful trendy marbled swirls designed for a chic, cozy vibe. This acrylic nail design takes a matte finish and some marble accents to create a beautiful trendy and timeless nail look. This nail reflects the love of neutral nail polish with a little bit of artistic style.
Neon French Fade
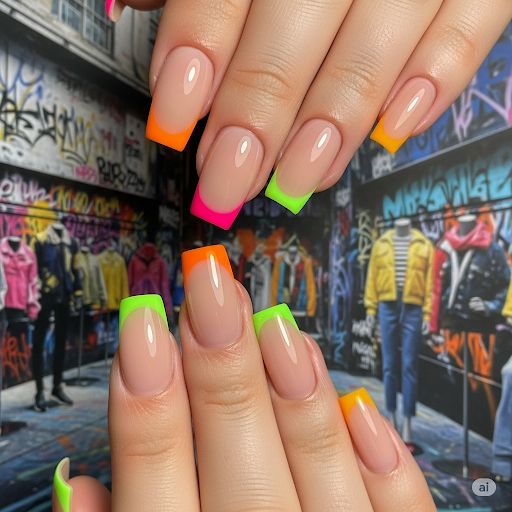
Neon french fade nails may seem like the biggest twist on a classic french manicure. These acrylic nail designs use vibrant neon tips that blend nicely into a natural base. The attached nails offer a fun and eye catching design. Neon french fade nails are ideal for having fun while staying trendy and modern.
Starry Sky Glitter
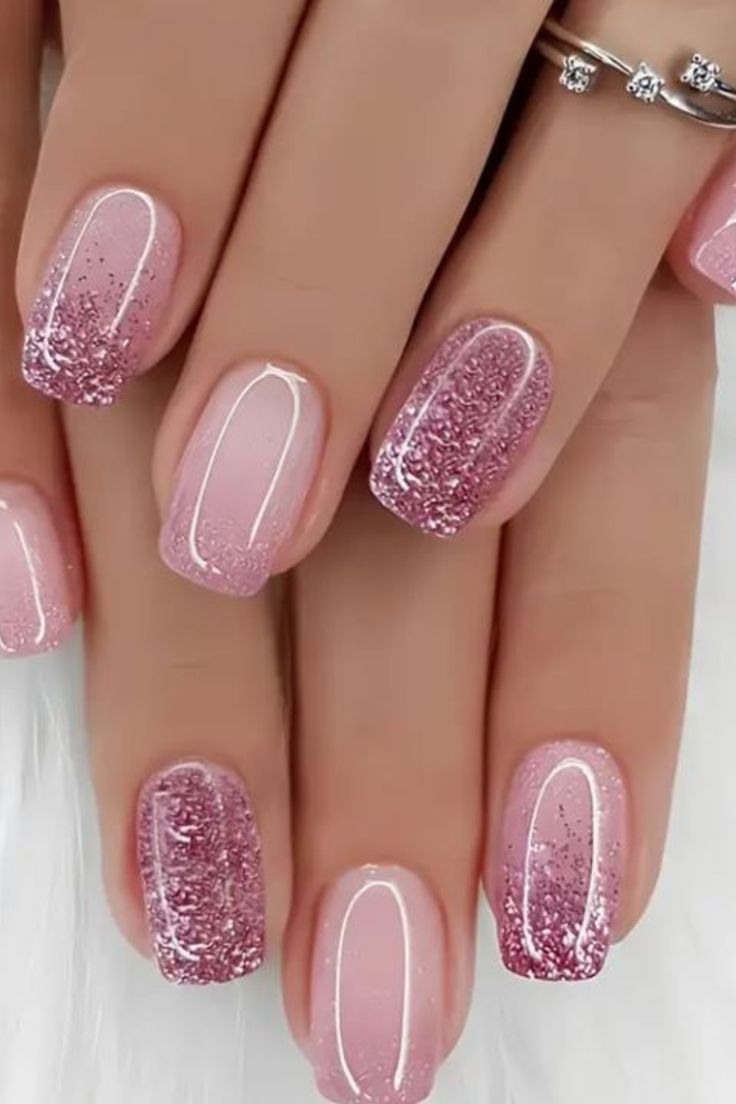
Starry sky glitter nails bring the magic of the night sky to your nails. These acrylic nails have nice deep dark bases with little glitter speckled over the nail. Starry sky glitter nails truly are cosmic beauty at its best. Starry sky glitter nails are perfect nail glamour for the evening or for someone who loves a bit of sparkle and fun in their style.
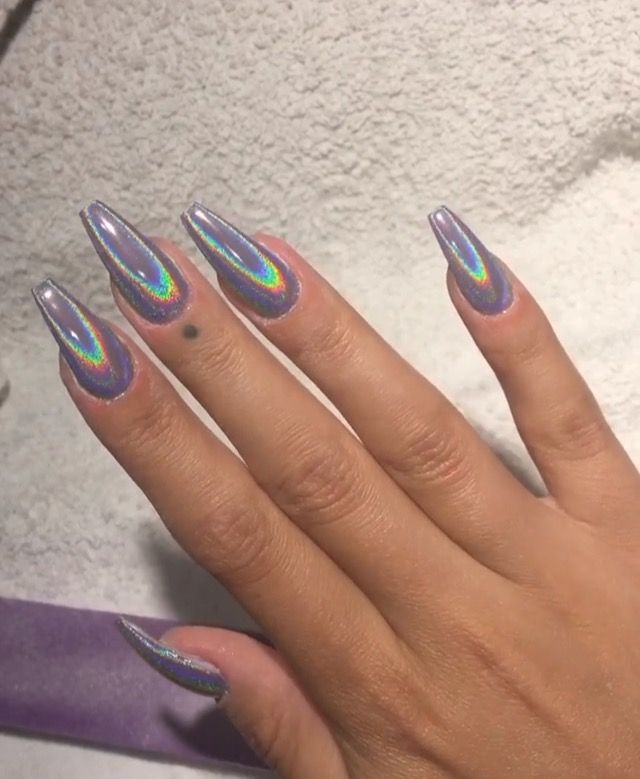
Holographic Spirls
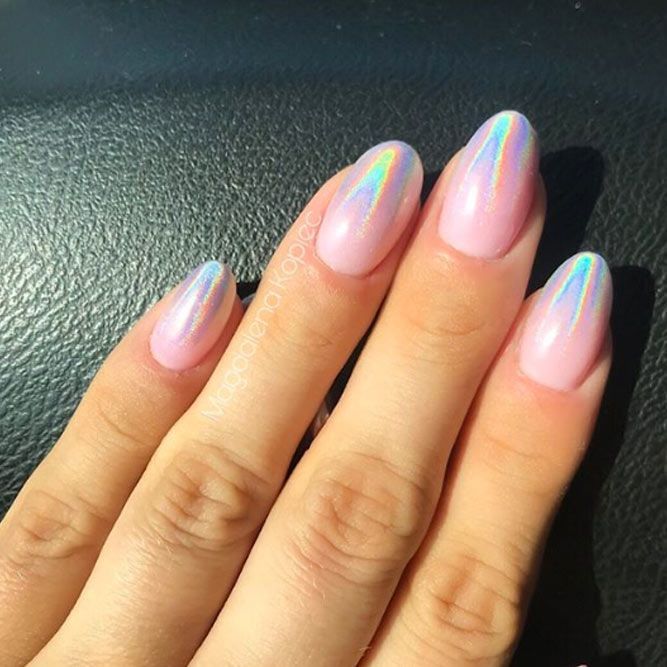
Holographic spirals are a modern acrylic nail art design that shimmers and moves whenever you move. The swirls have a rainbow iridescent undertone, created by the reflective nature of acrylic. When light hits them, you end up with an eye-catching, magical nail inspired by a prism. Holographic spirals are for the risk takers who thrive on the attention drawn by their adventurous approach to nail art!
Peach Sorbet Acrylic Nails
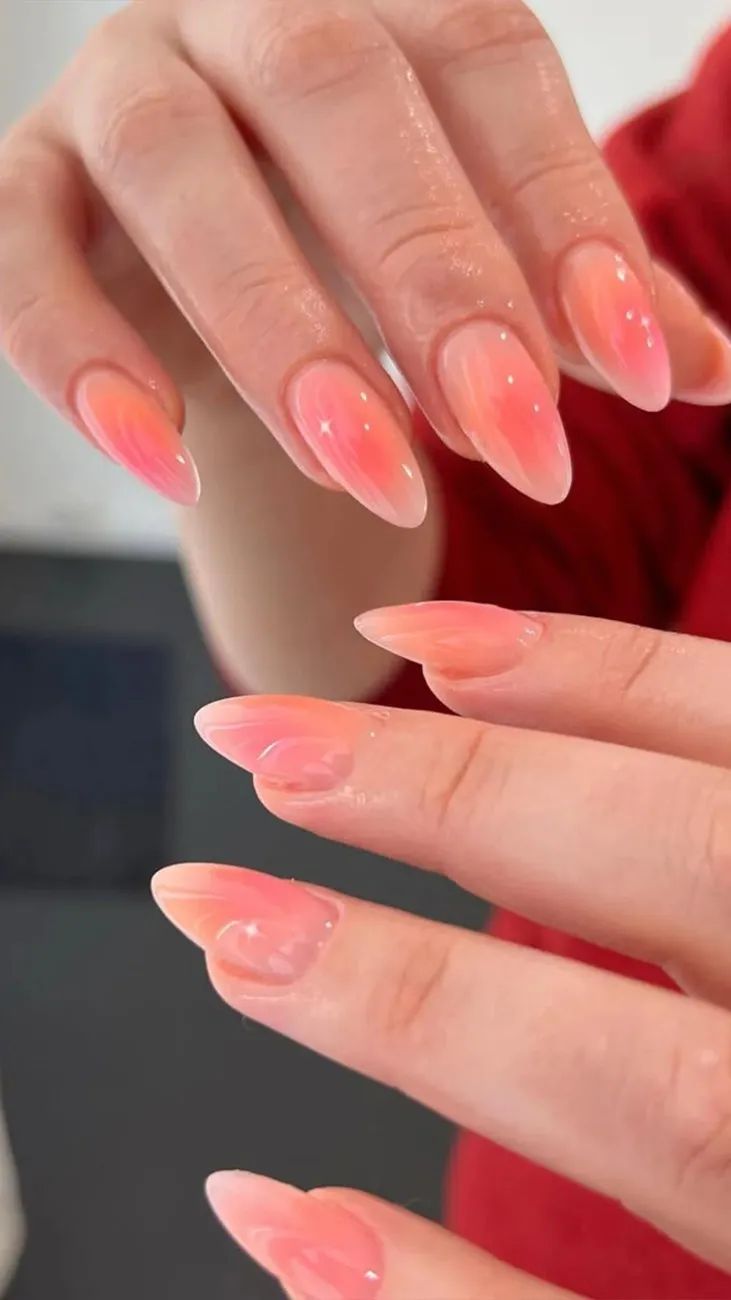
Summer’s on the way, so it’s time to revel in peach sorbet shine nails! Peach sorbet shine nails represent sweet, juicy chromes that get you excited for summer! You’ll find a gorgeous shiny peach color with a print that catches the light, almost glowing. A fruity fresh pop of color complements any look—bright, fun, and gives off a summer vibe!
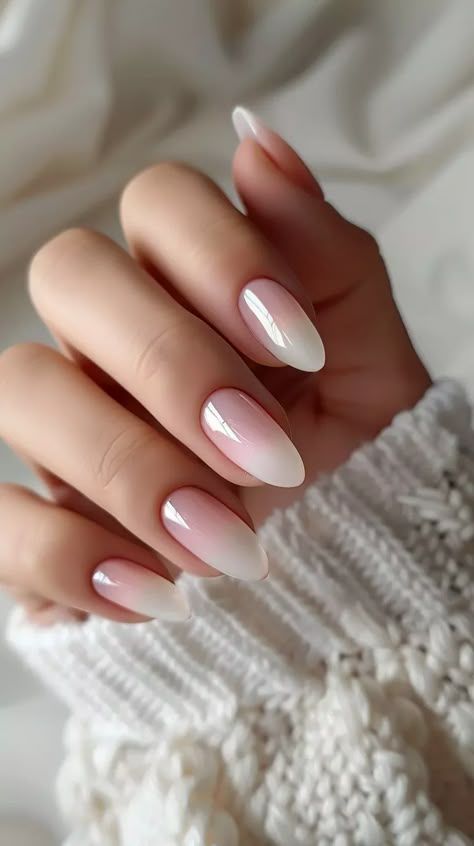
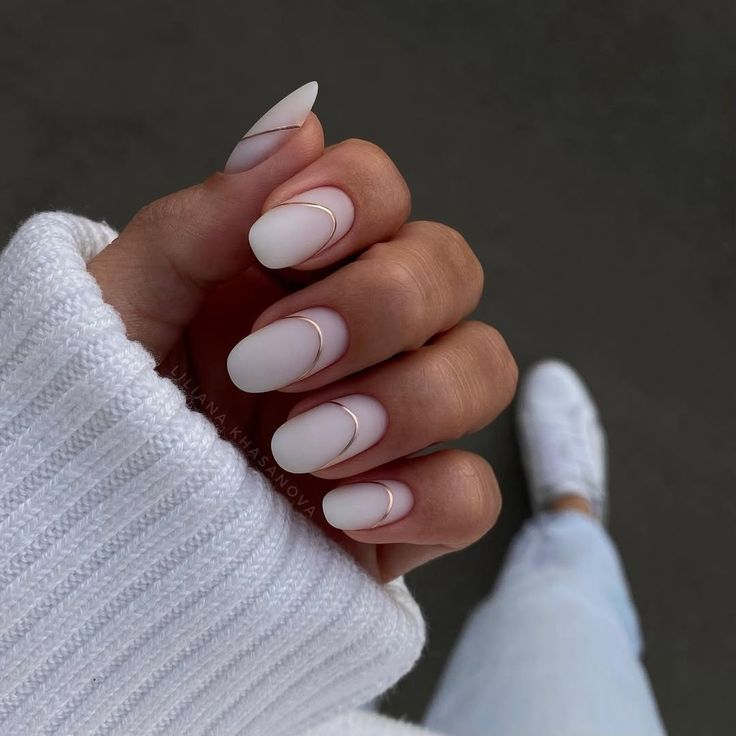
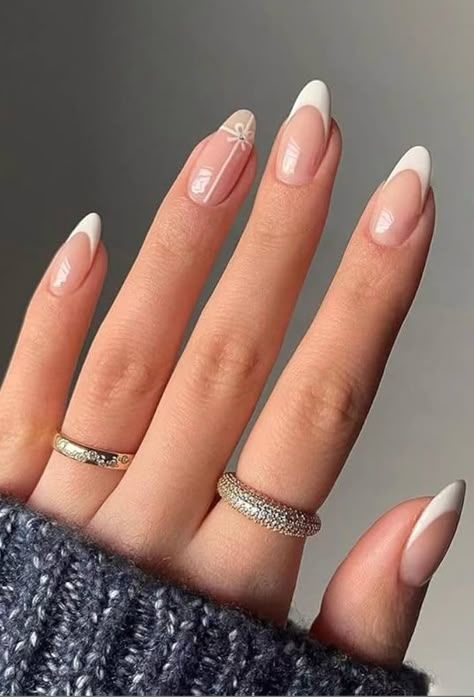
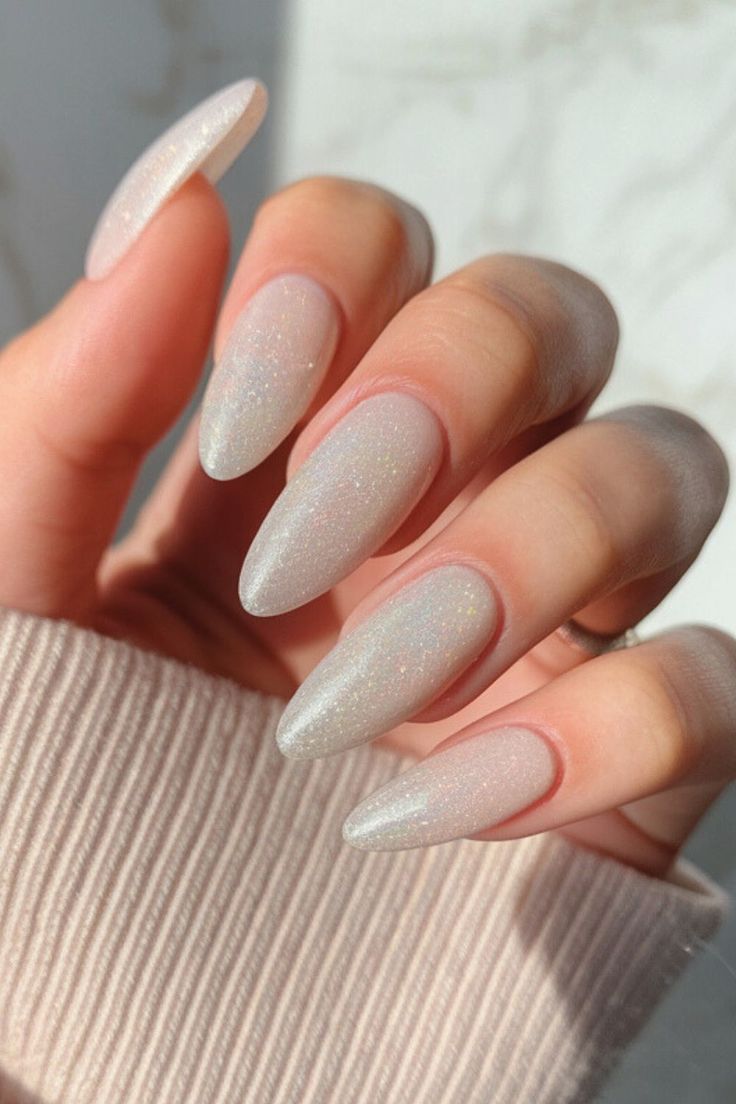
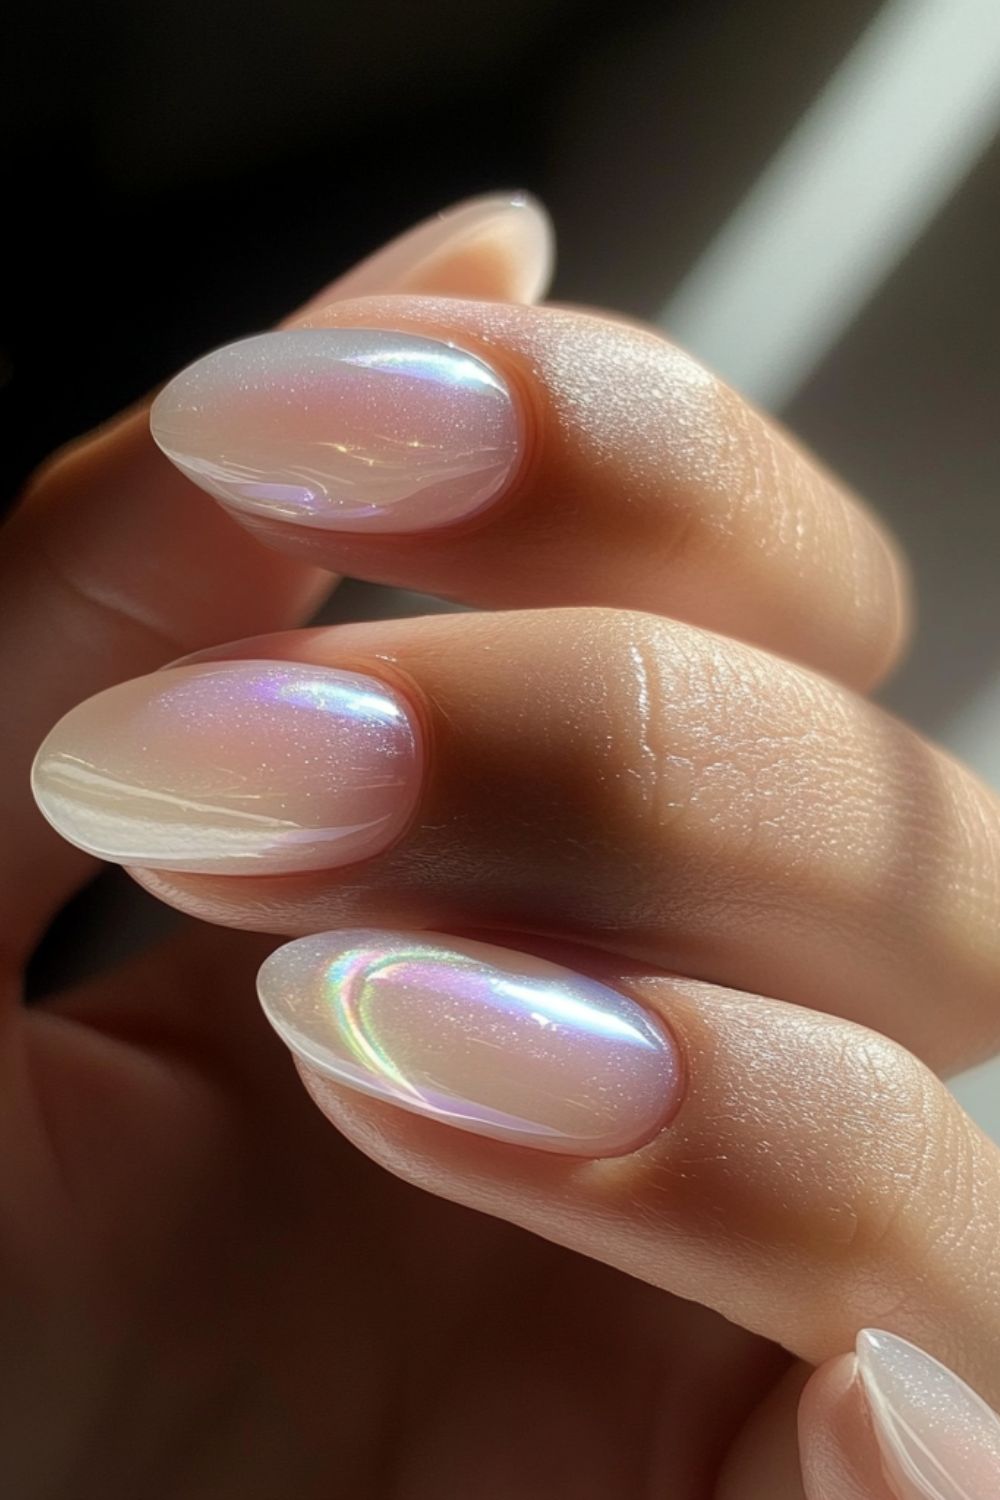
Almond Glazed Donut
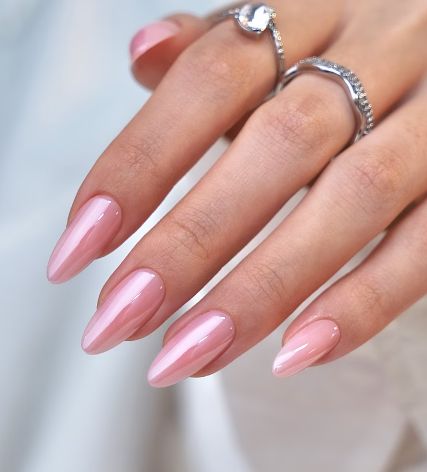
Almond glazed donut nails add a nice touch of elegance and style for trendy nails. The “glazed” look hit went viral, and the peach sorbet shine is gorgeous but smooth! Almond glazed donut nails include a soft almond shape and style that boasts a pearly, pristine finish. Almond glazed donut nails are clean, chic, simple, and glam. Perfect for any event!
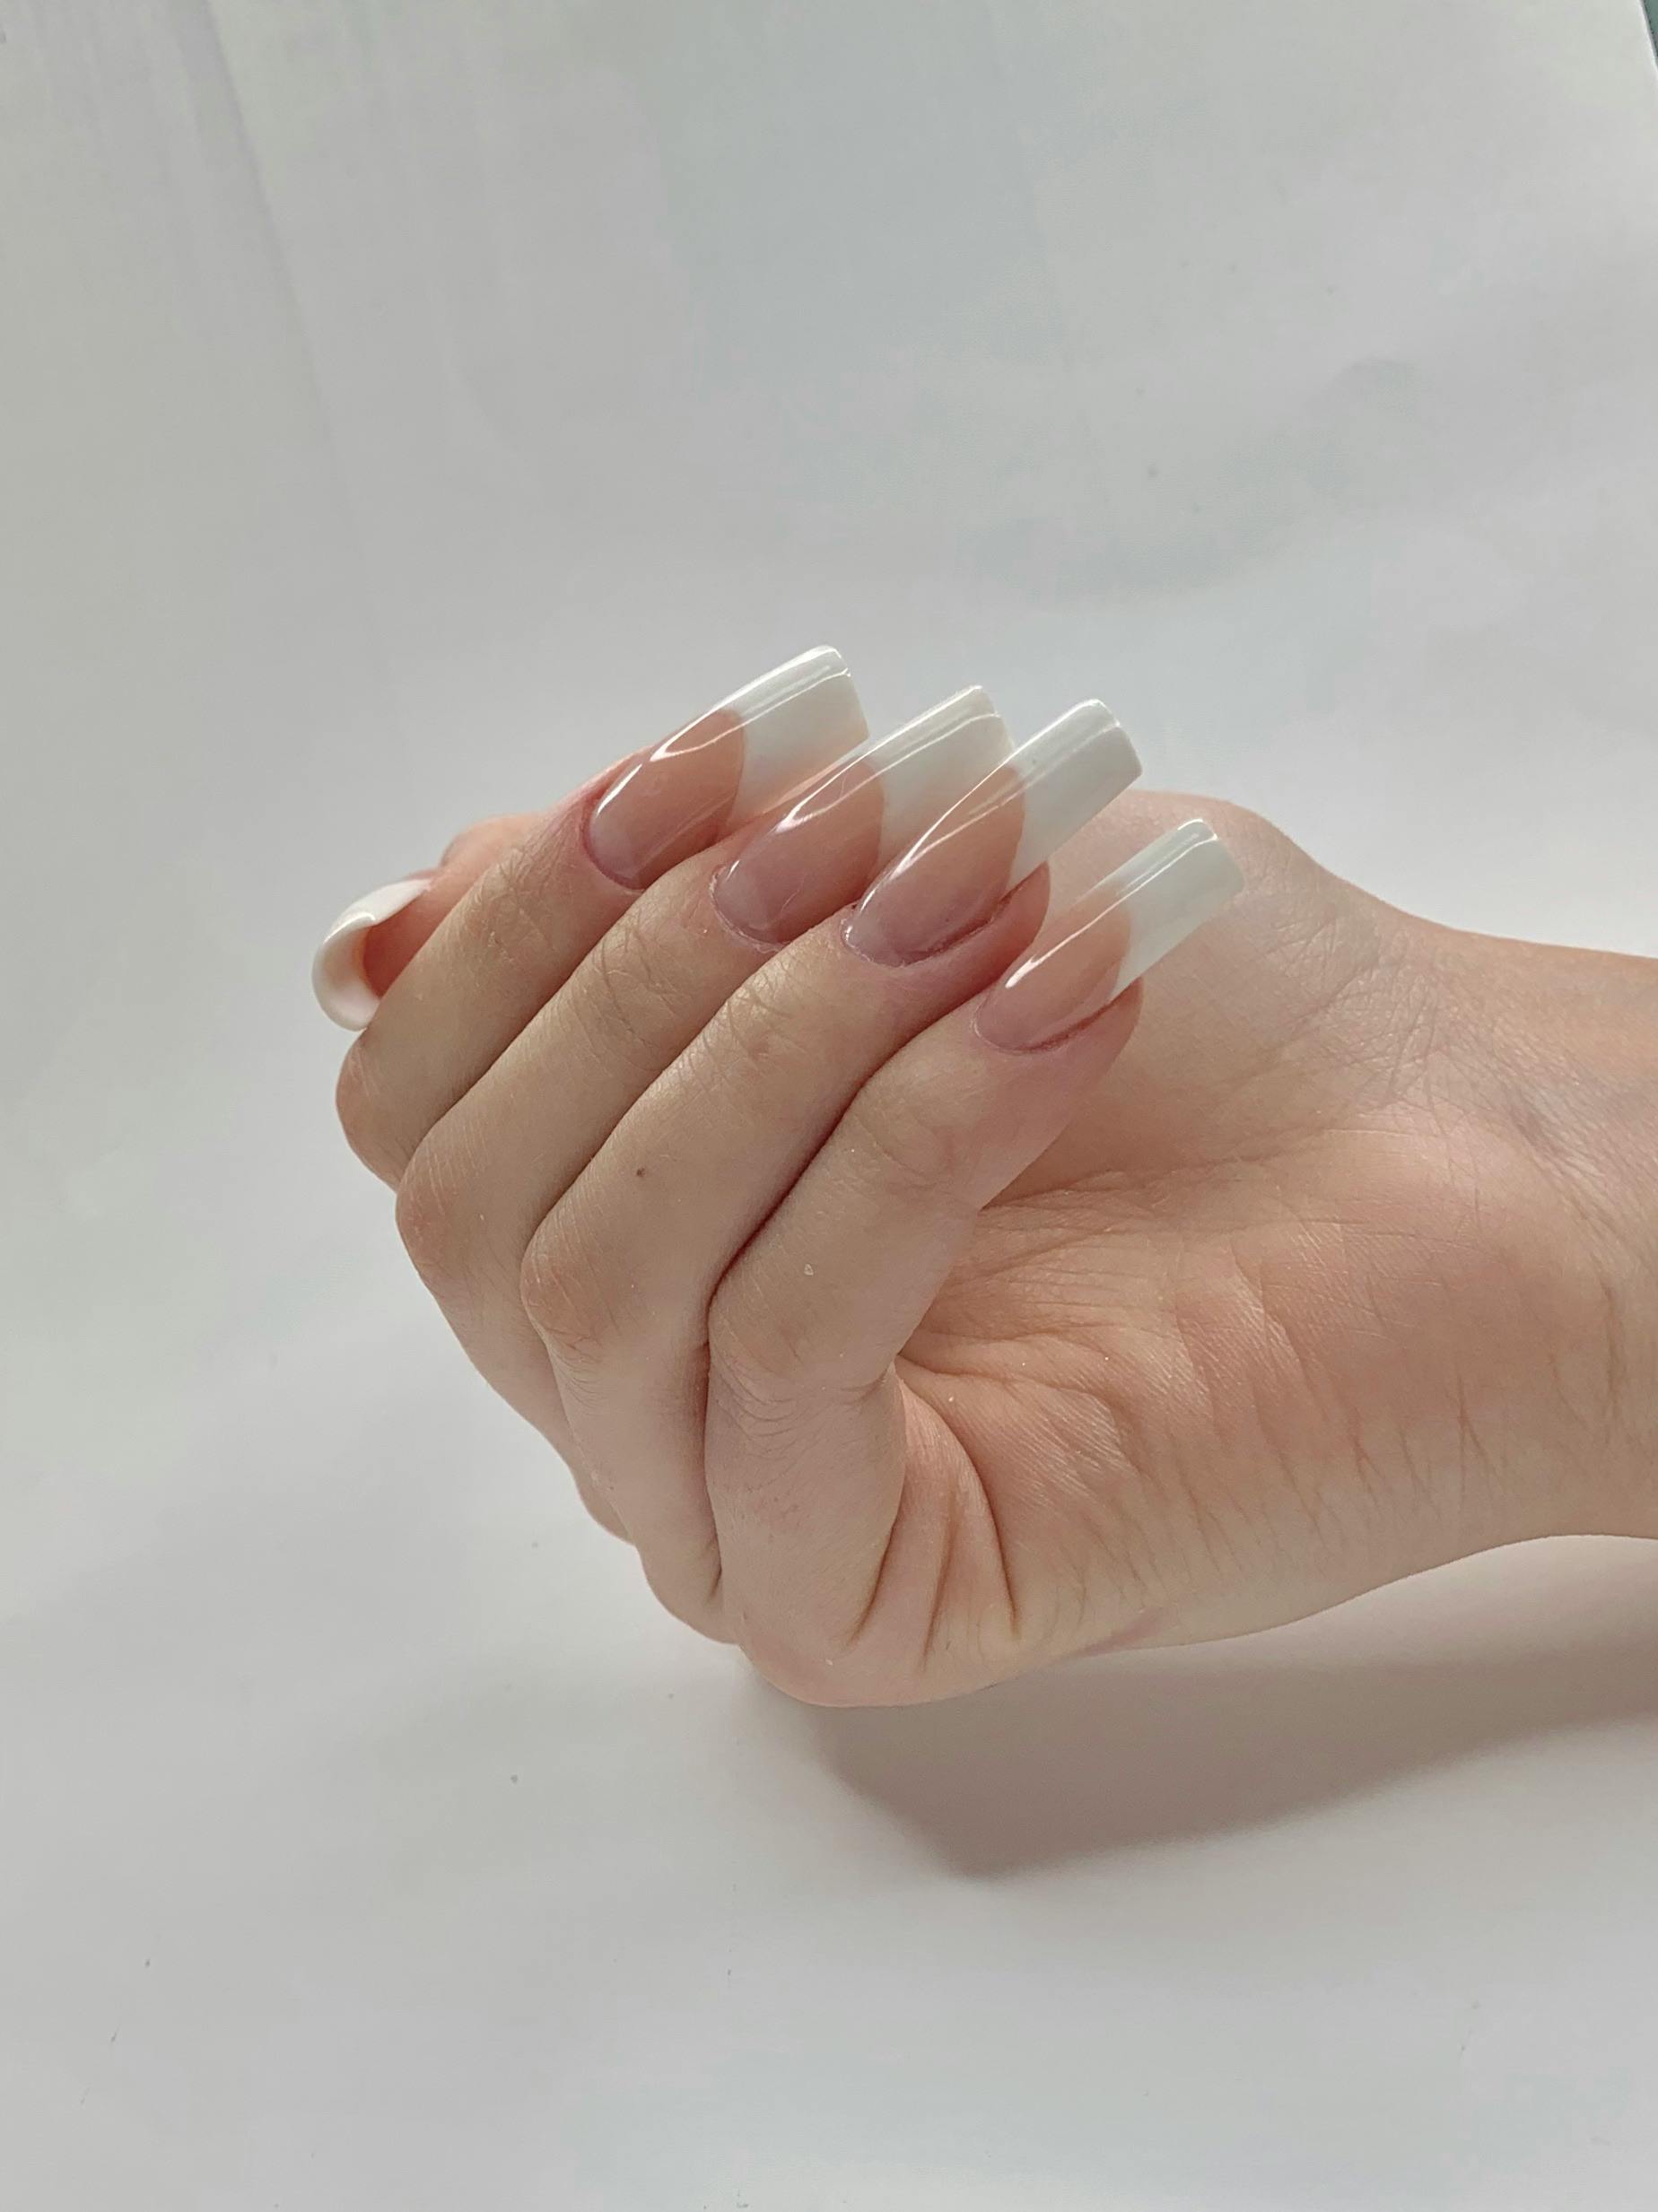
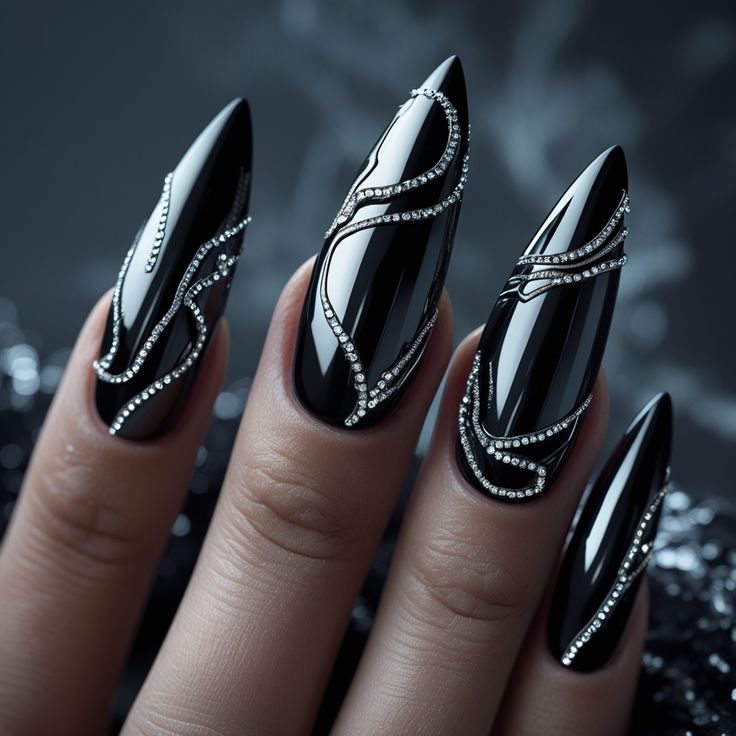
Matte Black Tips
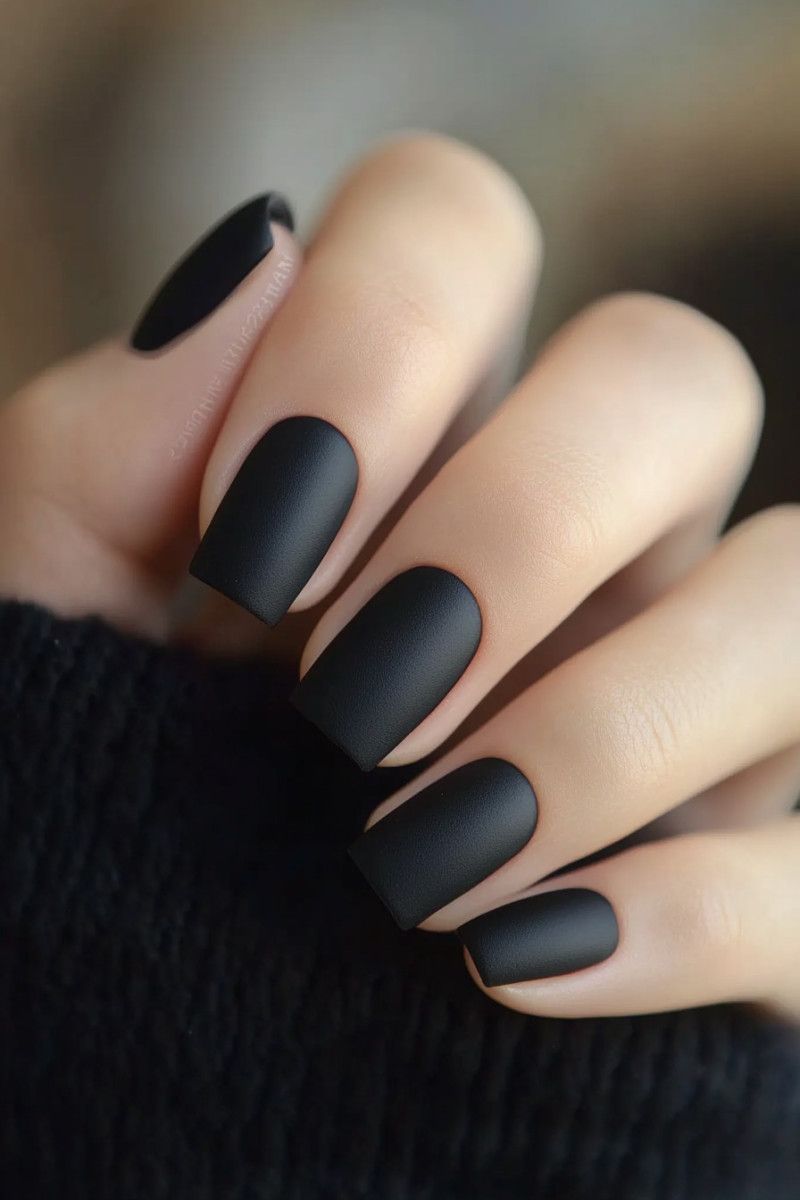
Matte black tips are the boldest adaptation of the French manicure. This acrylic nail design features clean, sleek ends with matte black tips. Perfect for lovers of minimalism with style, matte black tips are extremely striking, modern and will never go out of style.
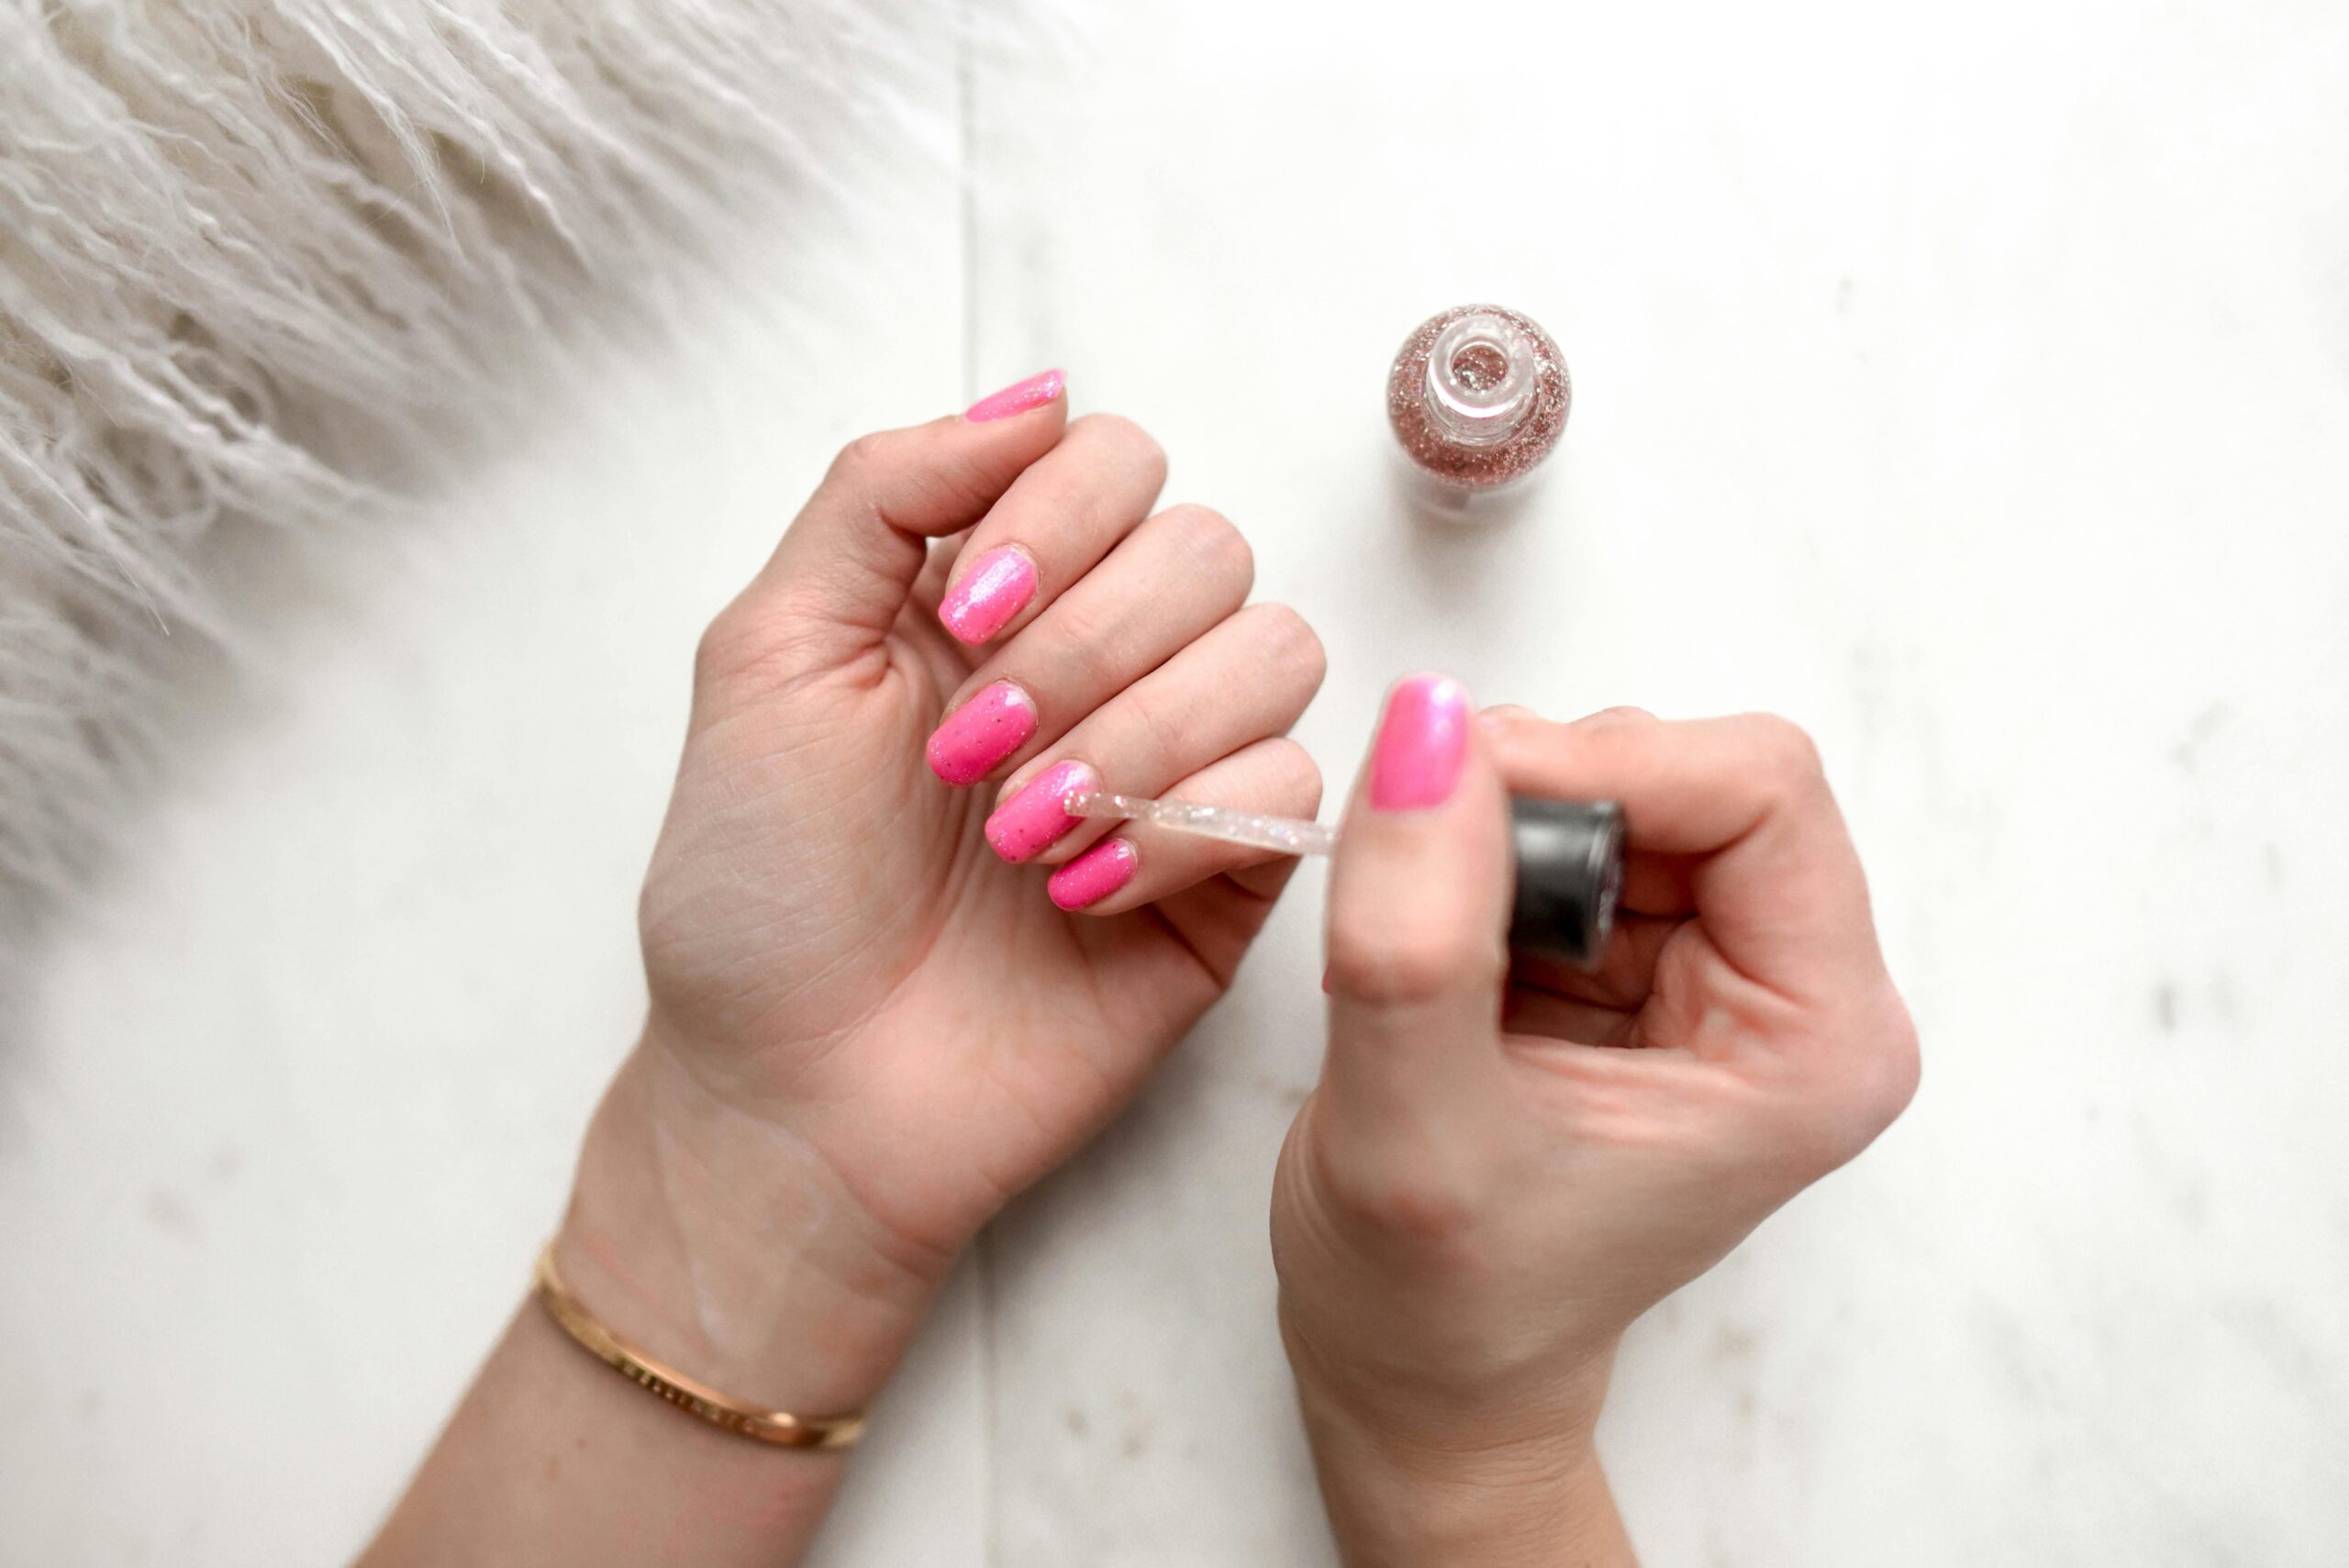
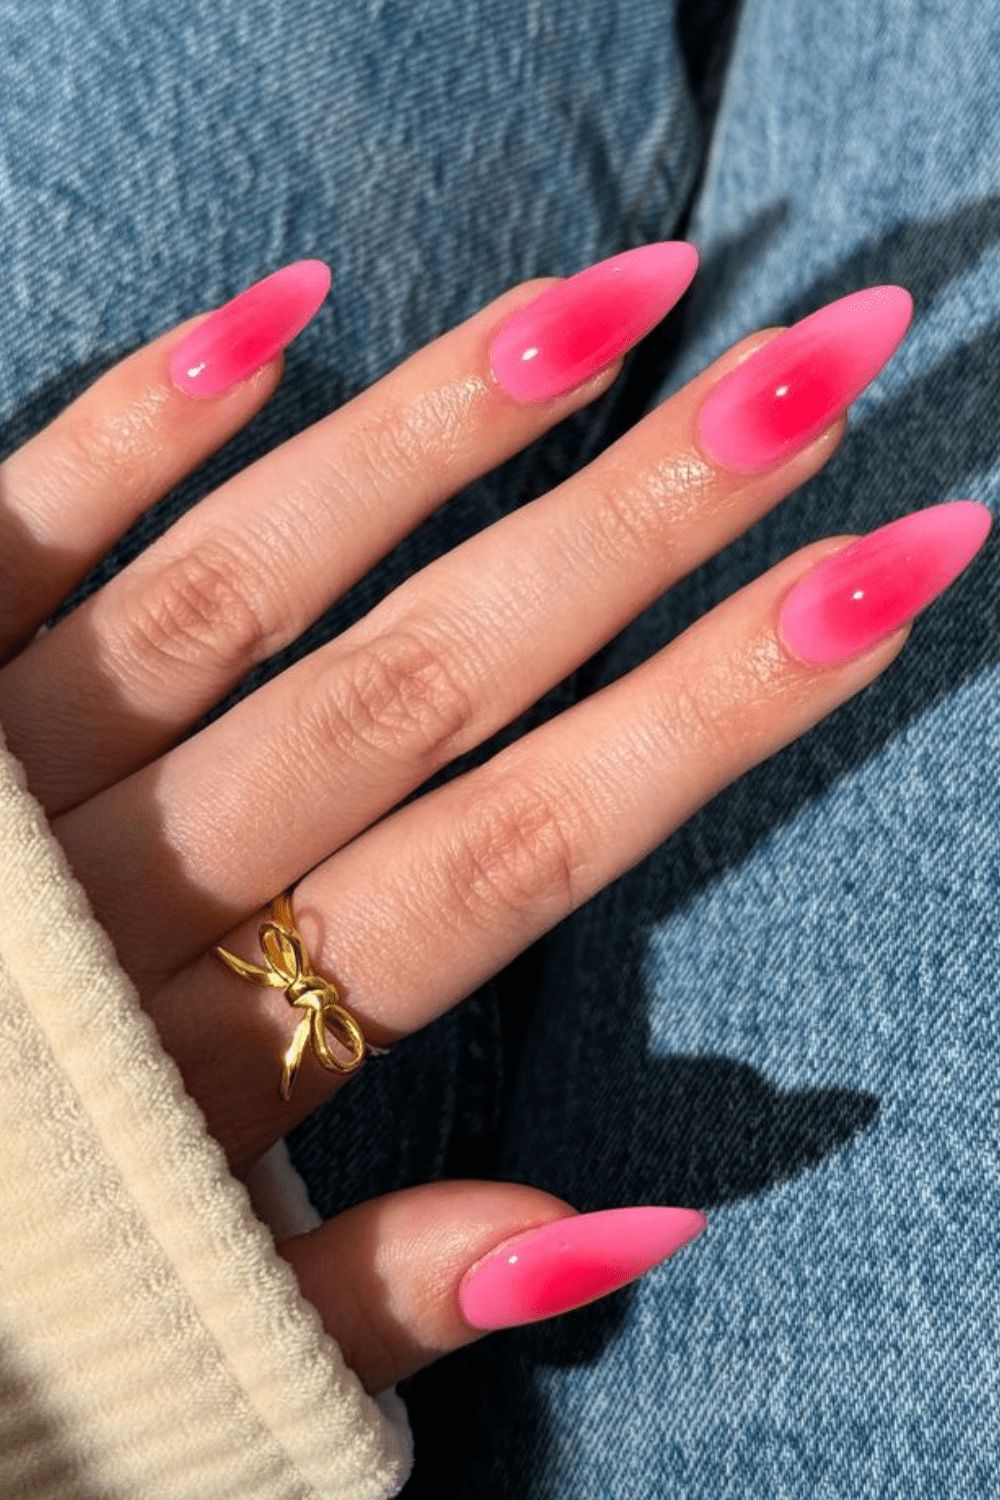
Barbiecore Pink Pop
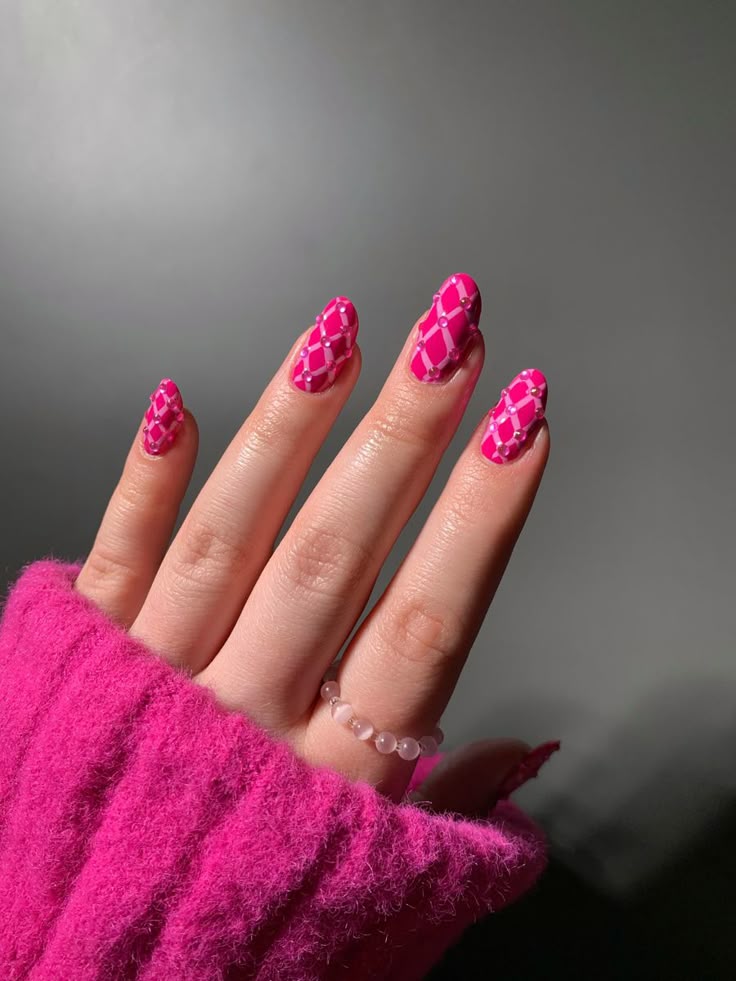
Barbiecore pink pop nails are flashy, bold, straight glam-loving nails. This attention-getting acrylic nail design features hot pink hues with a modern Barbie twist. Barbiecore pink pop nails are perfect for those who want to have fun with their looks, and is an excellent choice for when you want to express fearless style that stands out in any crowd.
Blueberry V-Tips

Blueberry V-tips are a fresh, fruity twist on the French manicure. This acrylic nail design features deep blueberry blue in a sharp V-tipped design. The bold V-tipped design utilises some colour while still creating an edgy look. Blueberry V-tips are great for lovers of modern looks, who still want to be fun and cool-toned.
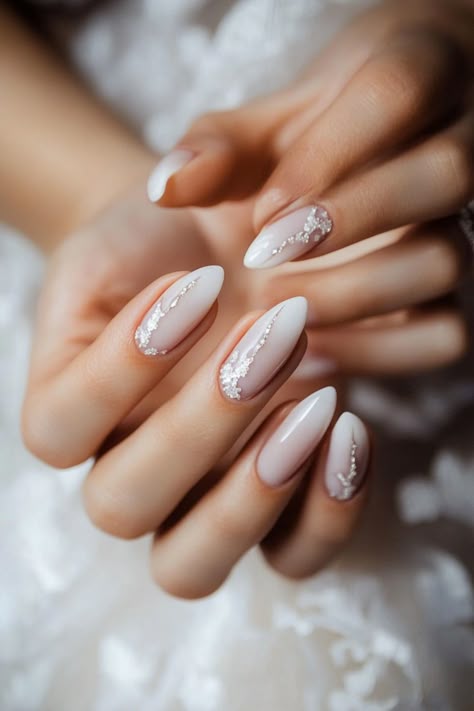
Rose Gold Flakes

Rose gold flakes nail extensions add a layer of luxury and glitter to your acrylic nail design. With the base color in blush or nude and delicate metallic flakes, this is easy to wear with a real touch of elegance. Rose gold flakes nails are great for a wedding, party, or any occasion where you want sparkle with understated glamour.
Glossy Ghost White
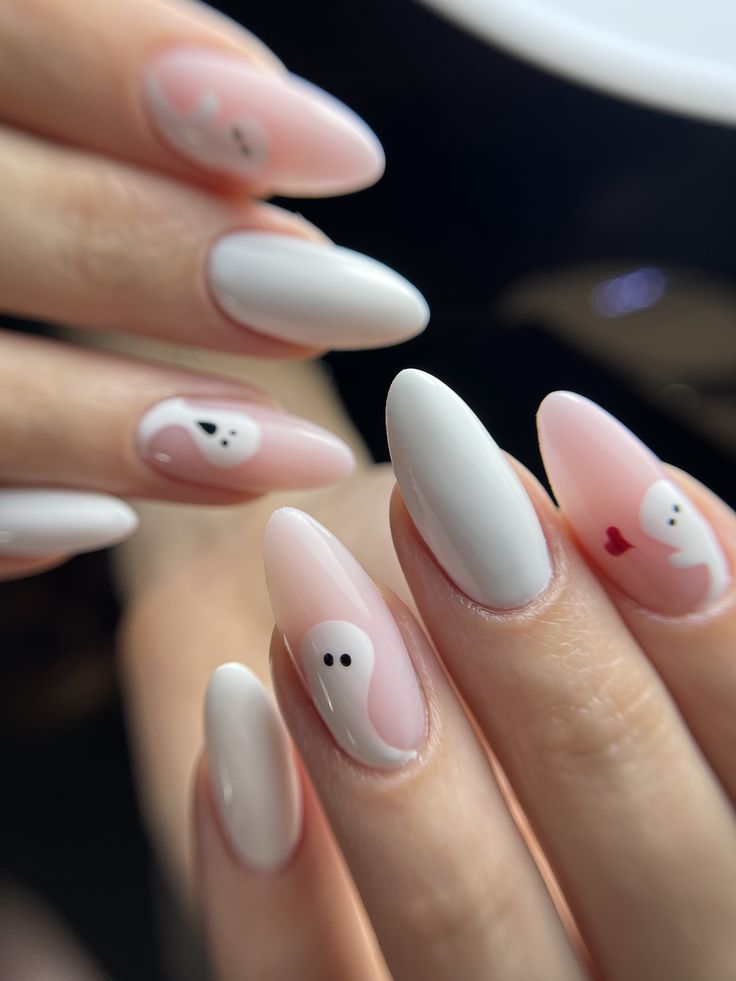
Glossy ghost white nails offer a slick and ghostly alternative to minimal beauty. They consist of a bright white lucent coat and a high-shine finish. Glossy ghost white nails are a bold and contemporary look that feels slightly ethereal and unbothered.
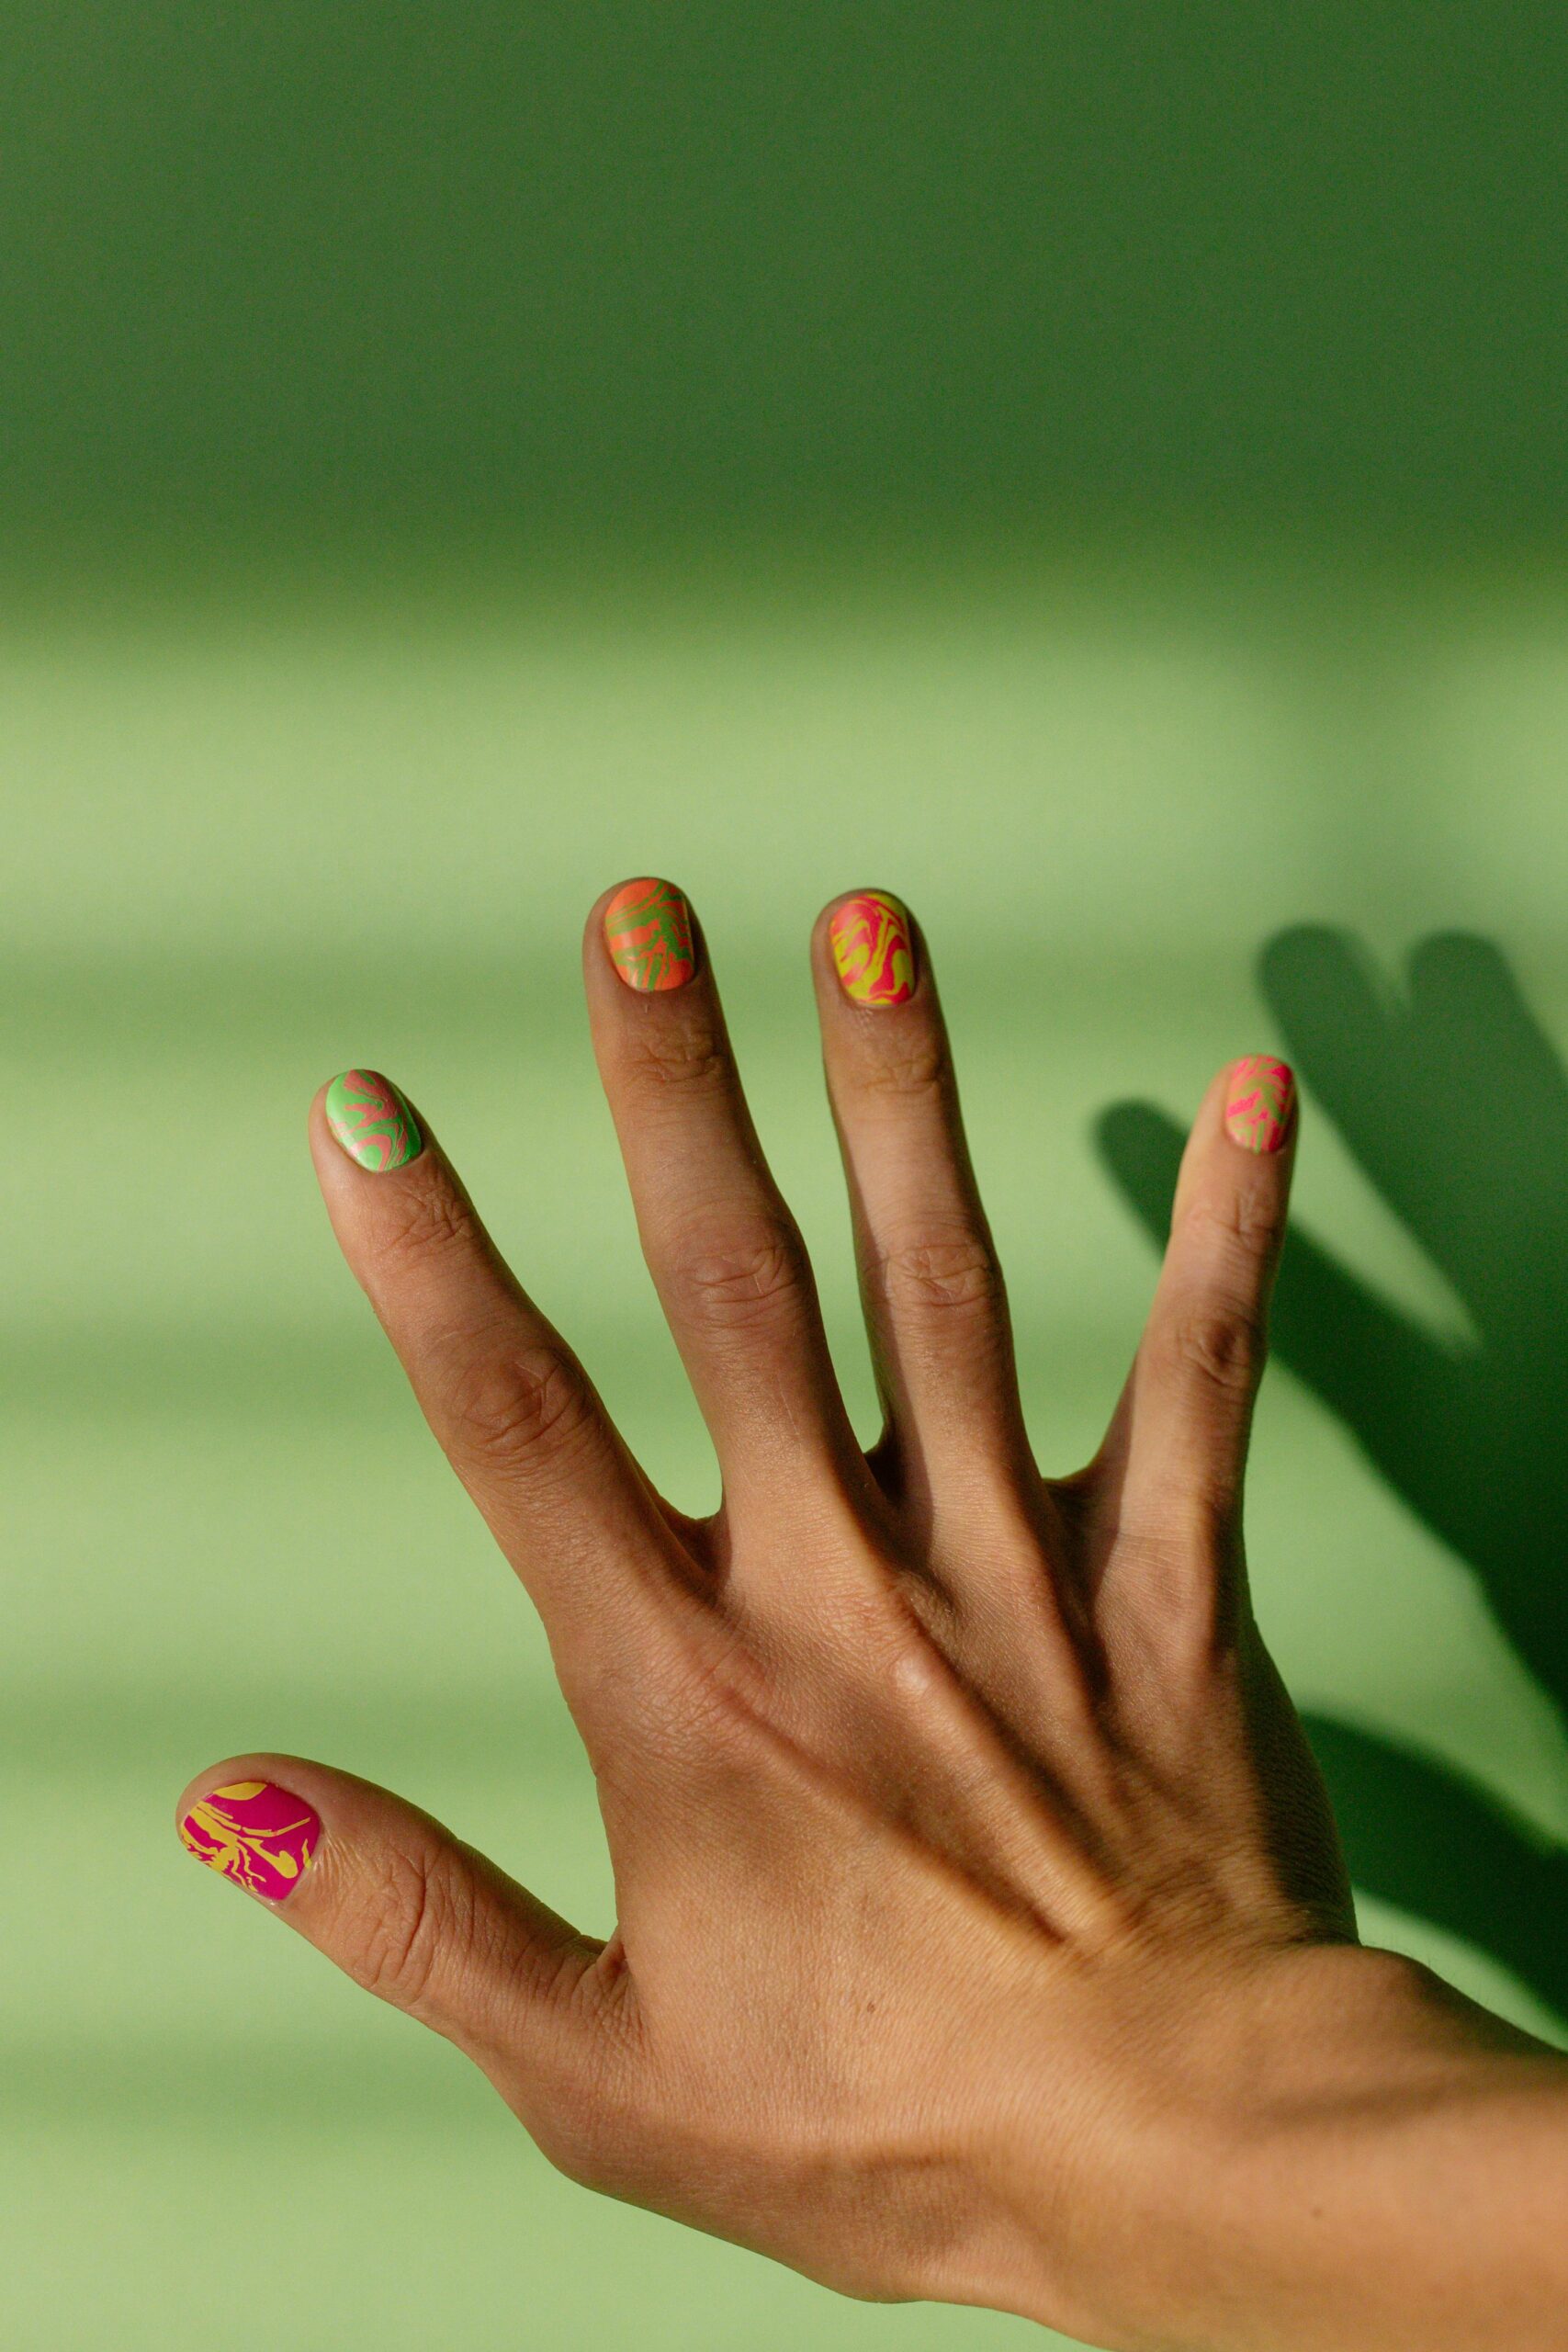
Citrus Neon Clash
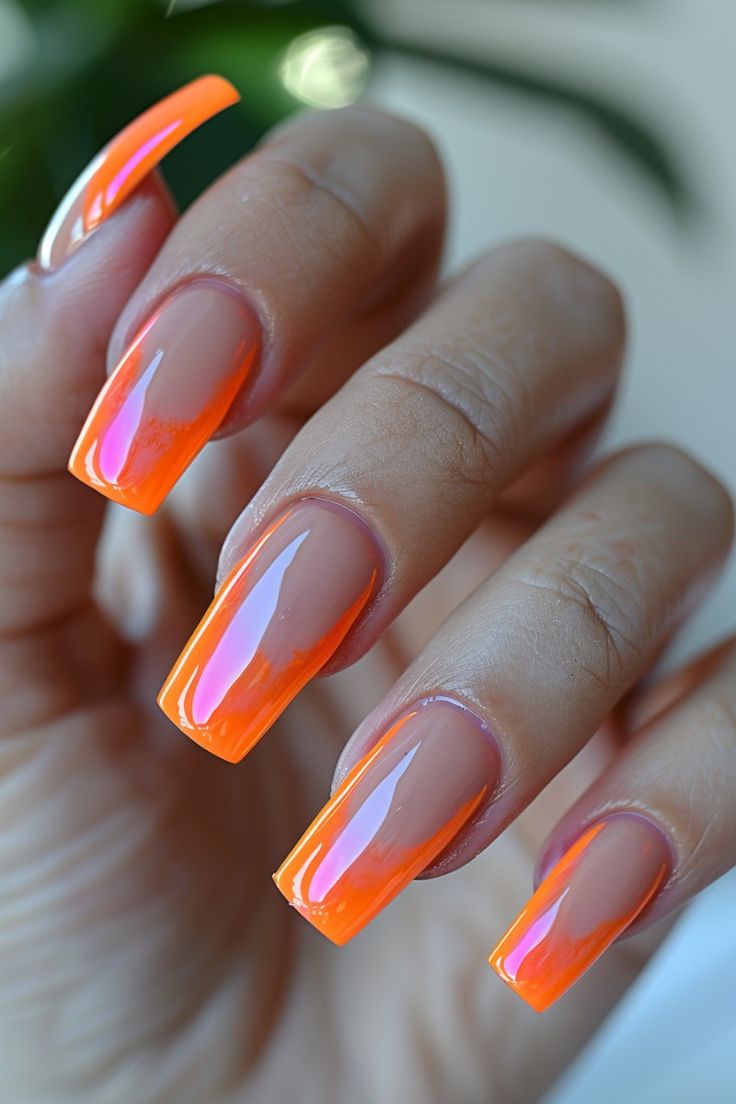
Citrus neon clash nails are a fruity explosion of color and exuberance. They consist of a combination of fluorescent oranges, yellows, and greens into a fun neon design. Similar to sticky summer days, or fun music festivals, citrus neon clash nails are designed for anyone daring enough to make a bold statement in color.
Chrome Flame French

Chrome flame French nails are turning up the heat on this classic style! This daring acrylic nail design features a reflective chrome finish for the flame tips, resulting in the perfect combination of bold and chic. Chrome flame French nails are an ideal choice for those who enjoy a little drama and shine in their manicure.
Butterfly Wings Art

Nail art butterfly wings reflect nature’s elegance fostering an artistic and gentle look, living up to its name, ‘Butterfly wings art nails’. This whimsical look, which is perfect for spring and summer, makes use of acrylic nails and is every bit dreamy and feminine. Just like women who cherish artistry, butterfly wings art nails are ideal for someone who loves a whimsical and dreamy, creative touch.
Oil Slick Hologram
This eye-catching, transparent style draws its inspiration from the sheen of oil slicks on water. Featuring deep iridescent hues, the nails glimmer and glow with every turn. Oil slick hologram nails epitomizes high glam appeal and is perfect for the modern day woman with an edge.
Velvet Matte Dust
Nail art with the name ‘Velvet Matte Dust’ is perfect for the modern day woman who loves elegance. Offering muted, dusty shades, these nails release classiness with every touch. ‘Velvet Matte Dust’ nails are for women who adore minimalistic style infused with modern luxury, making them ideal for parties and an everyday opulent use.
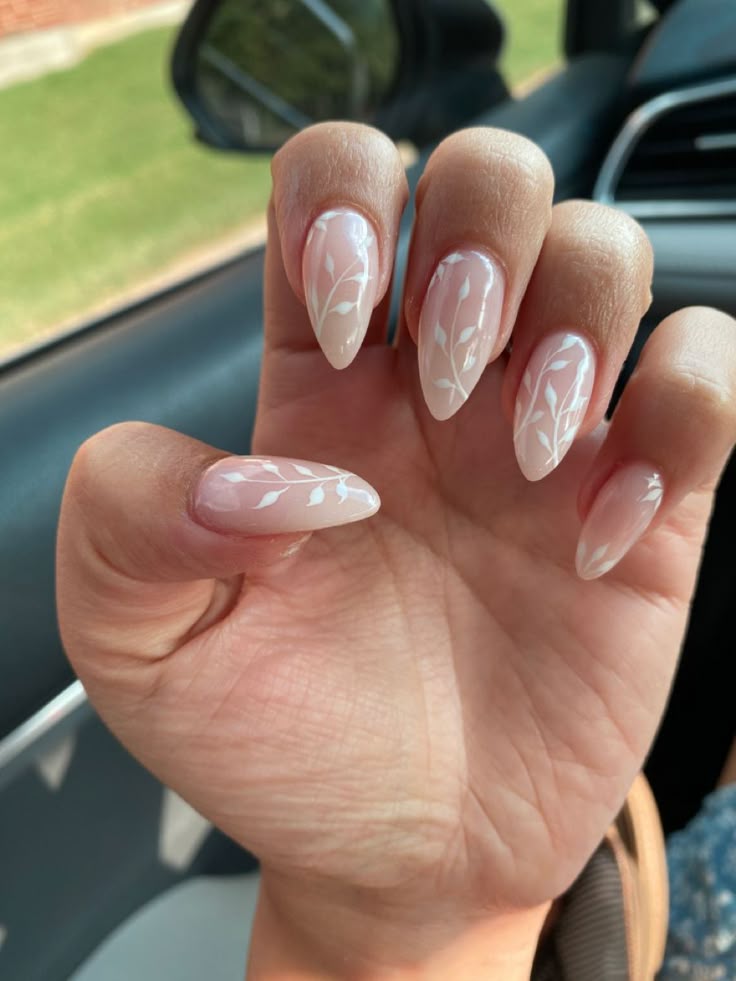
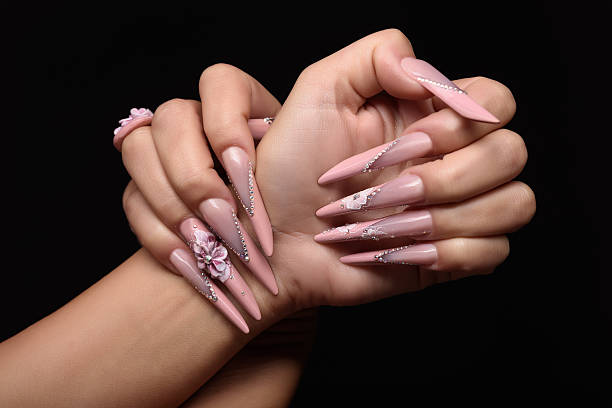
Floral Lace Embeds
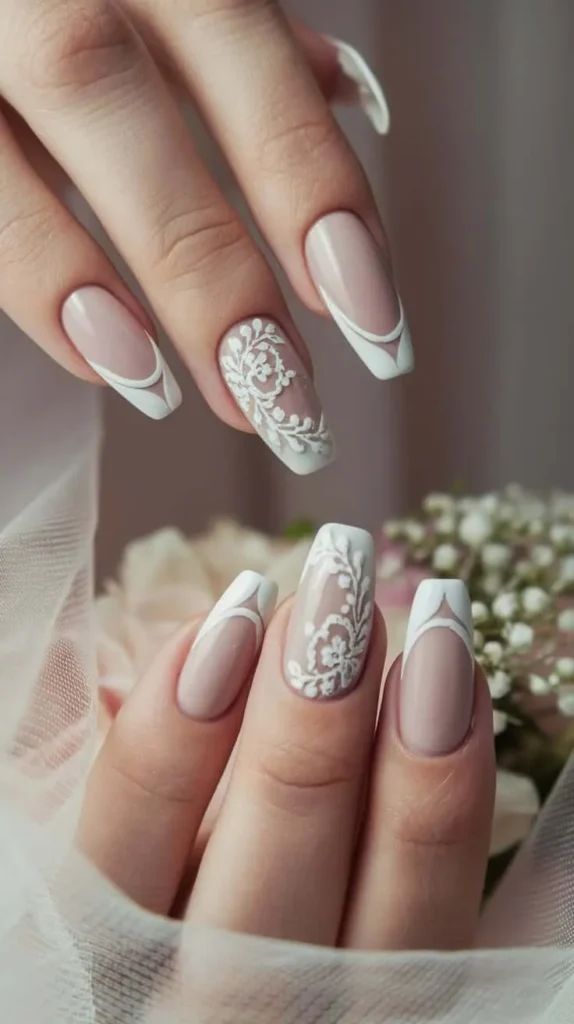
Floral lace embeds nails are the ideal blend of beauty and artistry. This acrylic nail design functions delicate lace-like floral styles embedded inside clean or nude bases, growing a timeless, romantic appearance. Floral lace embeds are perfect for weddings, unique events, or all of us yearning smooth, feminine charm with a elegant twist.
3-D Bow Charms
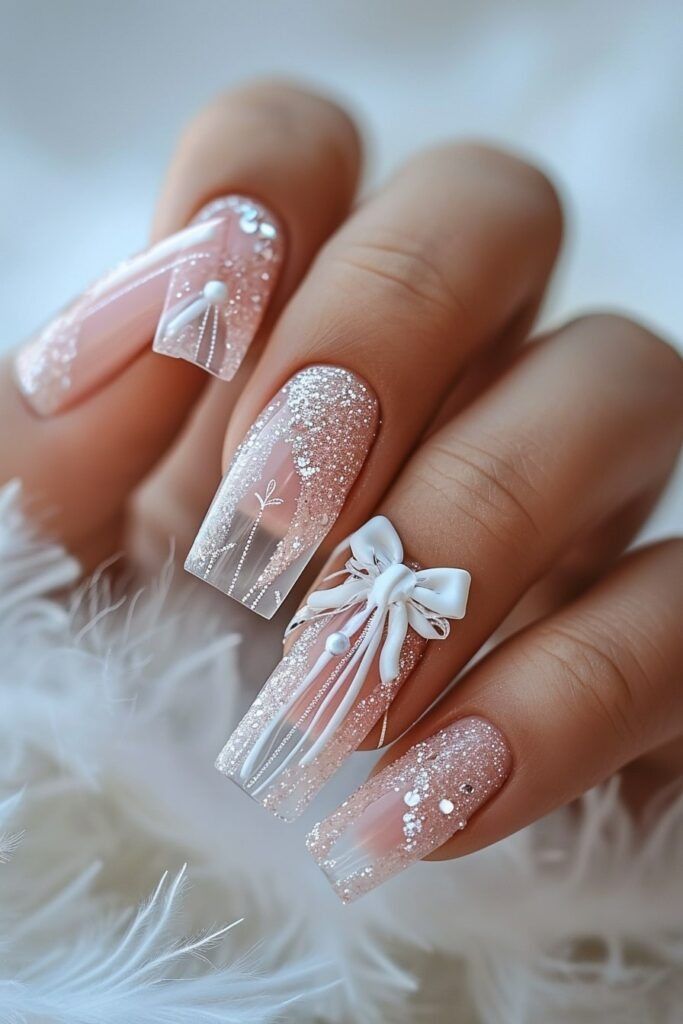
3-D bow charms nails add a playful and glamorous touch to your acrylic nail filing. Featuring raised, ornamental bows in various colors and textures, this layout stands out with cute, captivating detail. 3-D bow charms are ideal for unique activities or ordinary glam that feels candy, elegant, and mostly on-trend.
Pastel Smoke Art
Pastel smoke artwork nails create a dreamy, watercolor impact that’s tender yet putting. This acrylic nail layout blends delicate pastel sun shades in swirling, smoke-like patterns for a completely unique and artistic look. Pastel smoke artwork nails are perfect for those who love diffused shade with a creative, ethereal twist.
Metallic Chain Accents
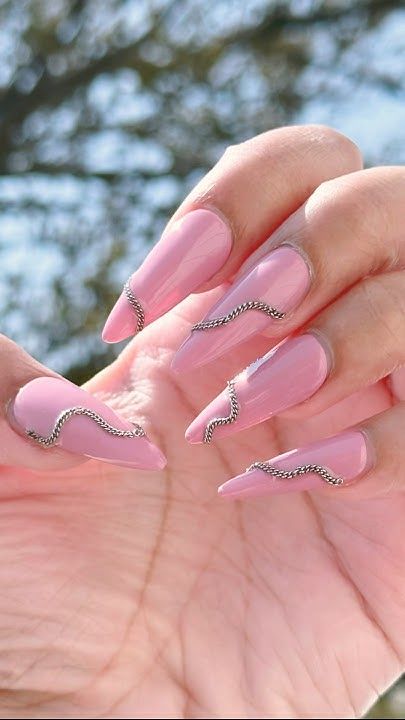
Metallic chain accents nails carry formidable, edgy fashion instantly for your fingertips. This acrylic nail layout functions tiny metal chains embedded or draped across the nails for a statement-making appearance. Metallic chain accents are ideal for trendsetters who love mixing glam with mind-set and excessive-style part.
Nude Marble Mix
Nude marble mix nails blend smooth neutrals with elegant marble patterns for a complicated, versatile look. This acrylic nail design functions swirling tones of beige, cream, and white, creating a herbal stone impact. Nude marble mix nails are ideal for folks who love timeless beauty with a contemporary twist.
Sunset Aura Fade
Sunset aura fade nails seize the beauty of a sparkling sky at nightfall. This acrylic nail layout blends warm shades like orange, purple, and crimson in a smooth gradient for a dreamy, radiant impact. Sunset charisma fade nails are best for including a touch of heat and serenity in your style.
Milky Way Sparkles
Milky Way flickers nails bring cosmic splendor to your acrylic nail layout. Featuring a tender, milky base with scattered glitter and shimmer, this appearance mimics the dreamy glow of stars across the night time sky. Milky Way sparkles nails are perfect for stargazers and anybody who loves a hint of celestial magic.
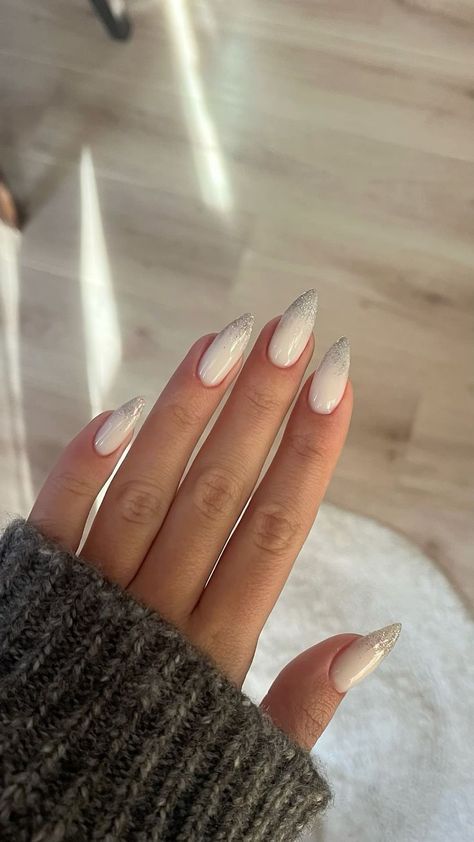
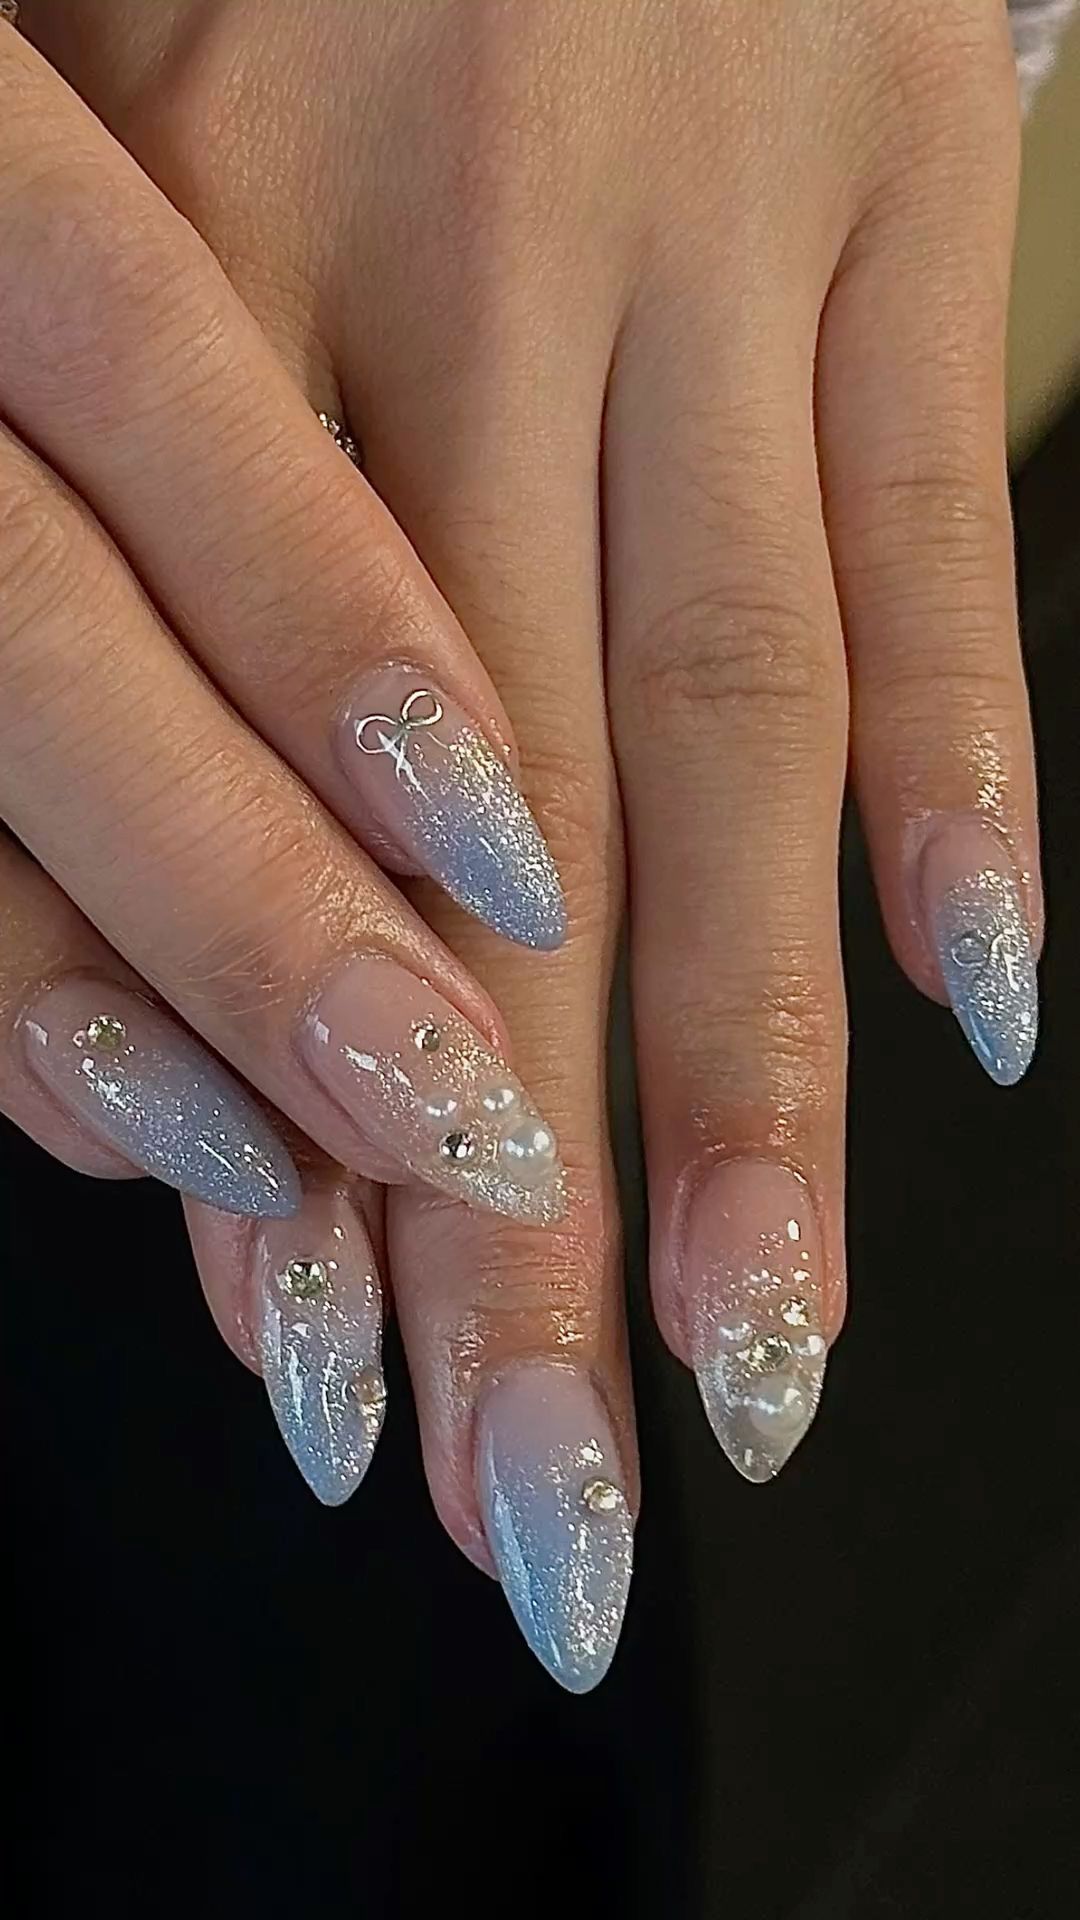
Frozen Silver French

Frozen silver French nails positioned an icy twist at the conventional French nail cutting. This acrylic nail design functions cool-toned bases with shimmering silver suggestions, developing a frosty, stylish appearance. Frozen silver French nails are perfect for wintry weather vibes, holiday events, or anybody yearning a graceful, glamorous area.
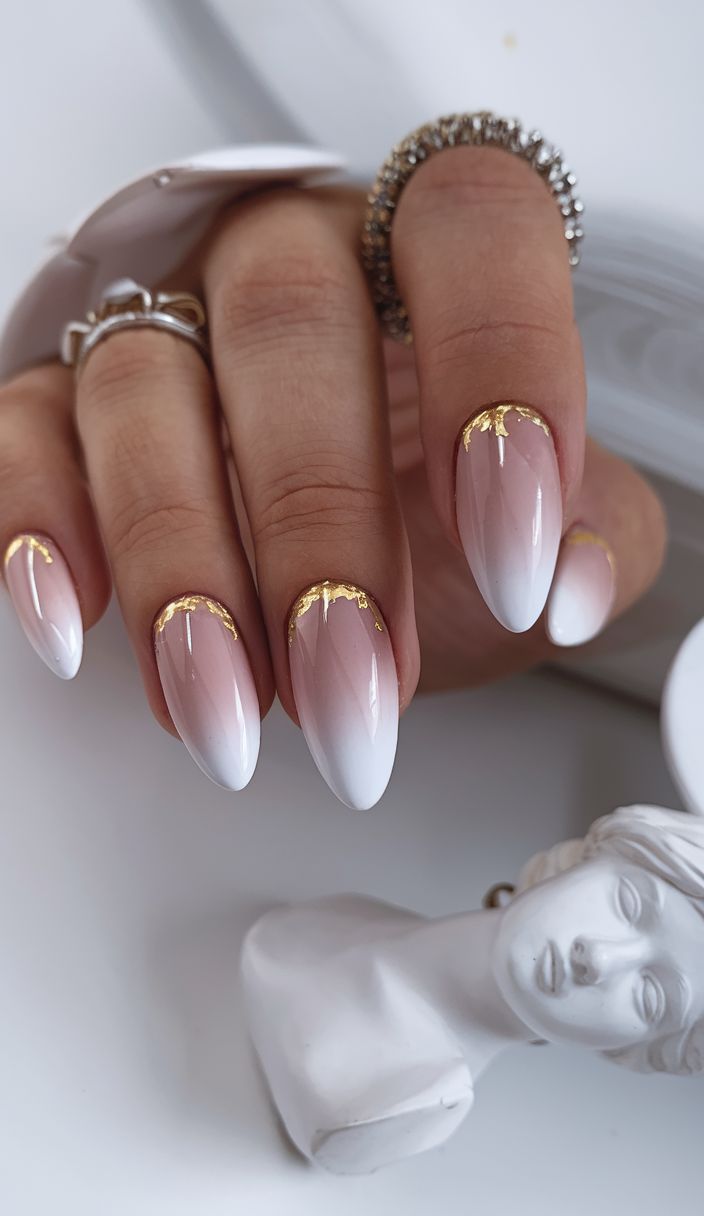
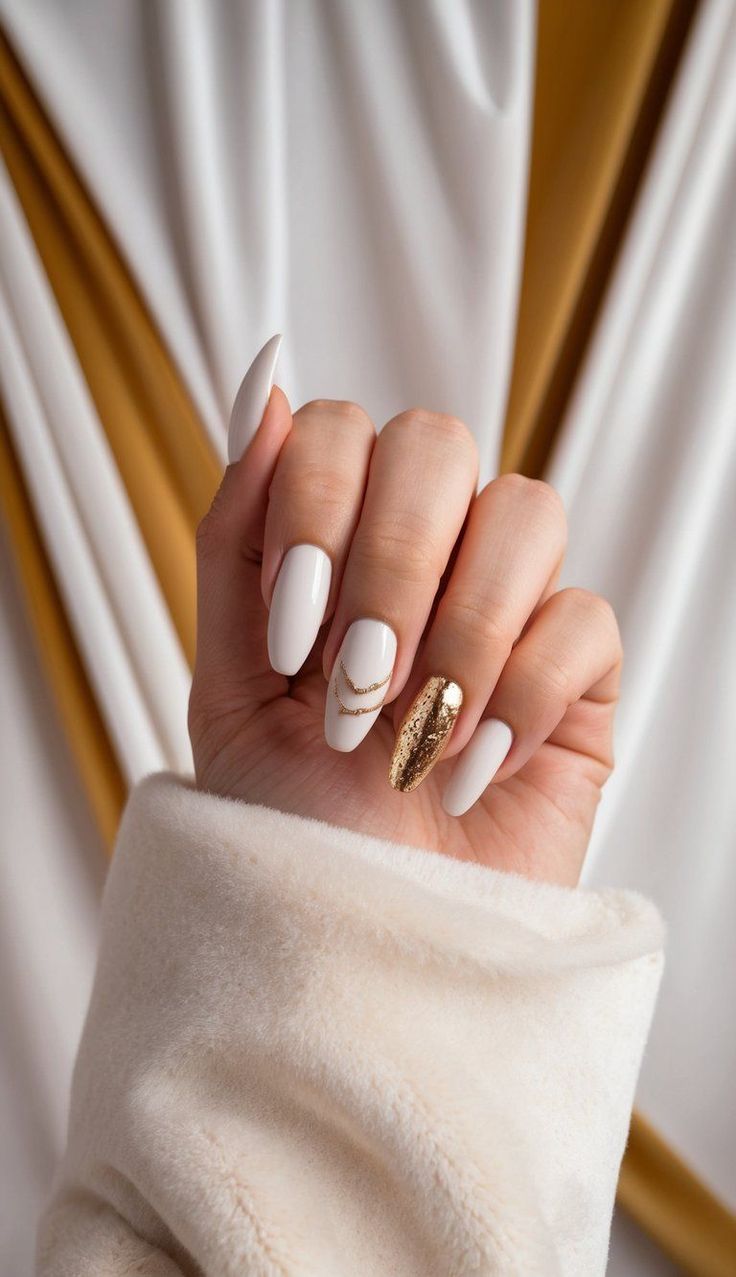
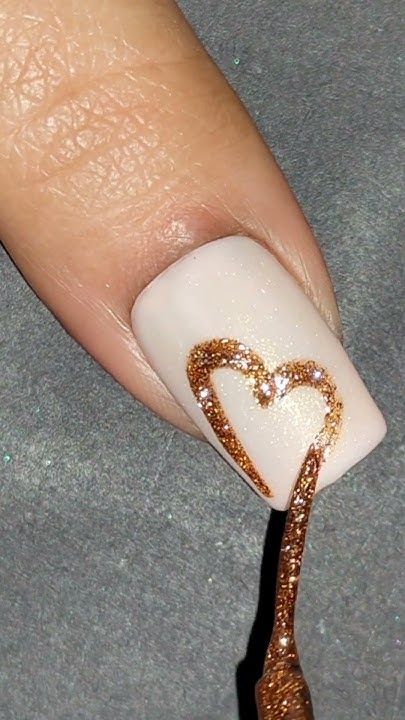
Gold Leaf Glam
Gold leaf glam nails are the remaining in luxury and shine. This acrylic nail layout capabilities delicate gold foil accents over nude or tender-colored bases, adding a touch of beauty and opulence. Gold leaf glam nails are ideal for special activities or every time you want to sense instantly polished and complex.
Rainbow Confetti Dots
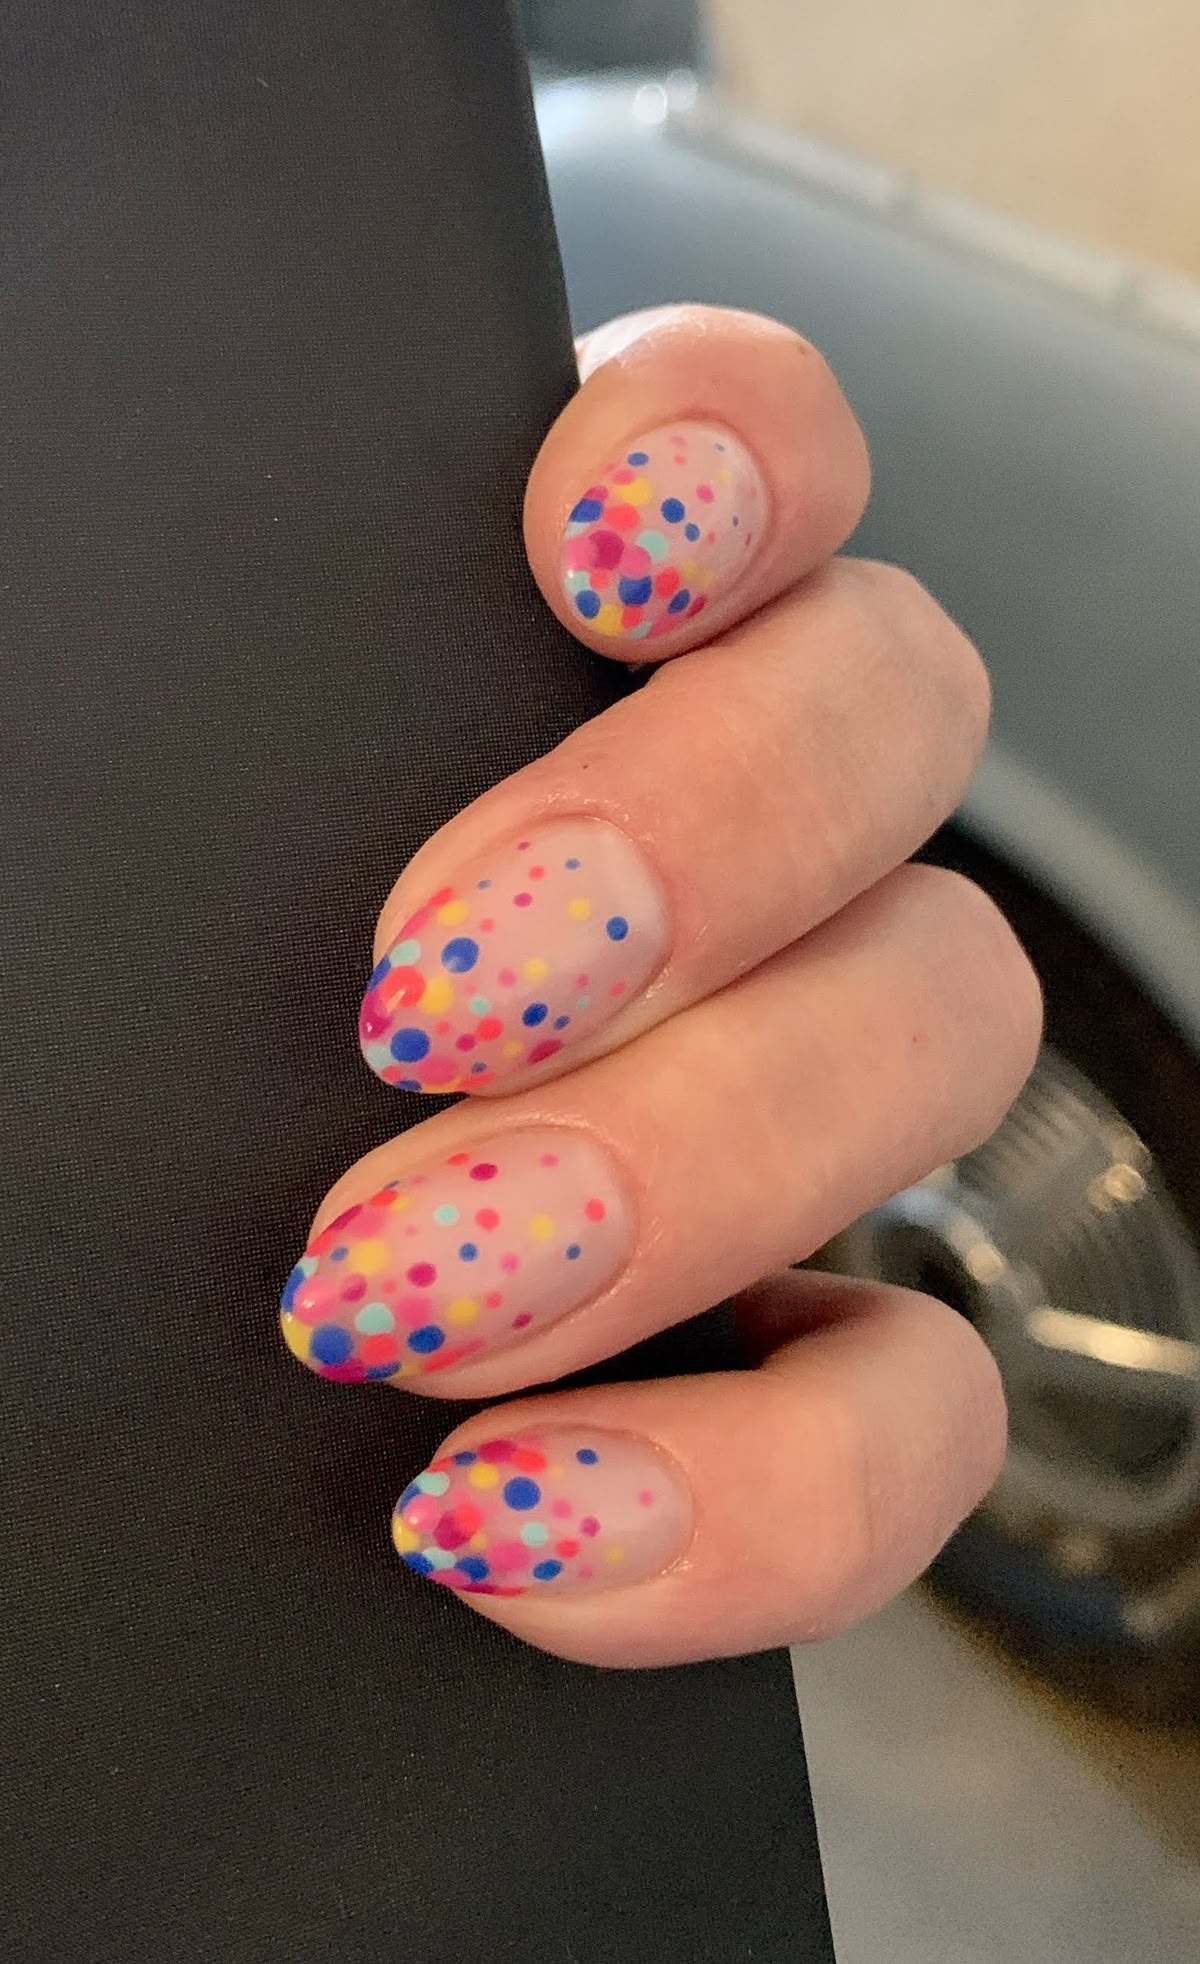
Rainbow confetti dots nails are playful, colourful, and full of amusing. This acrylic nail layout capabilities vivid, multicolored dots scattered throughout a clean or impartial base, growing a celebration-equipped vibe. Rainbow confetti dots nails are best for celebrations, festivals, or everybody who loves a contented, desirable nail cropping.
Cloudy Pastel Skies
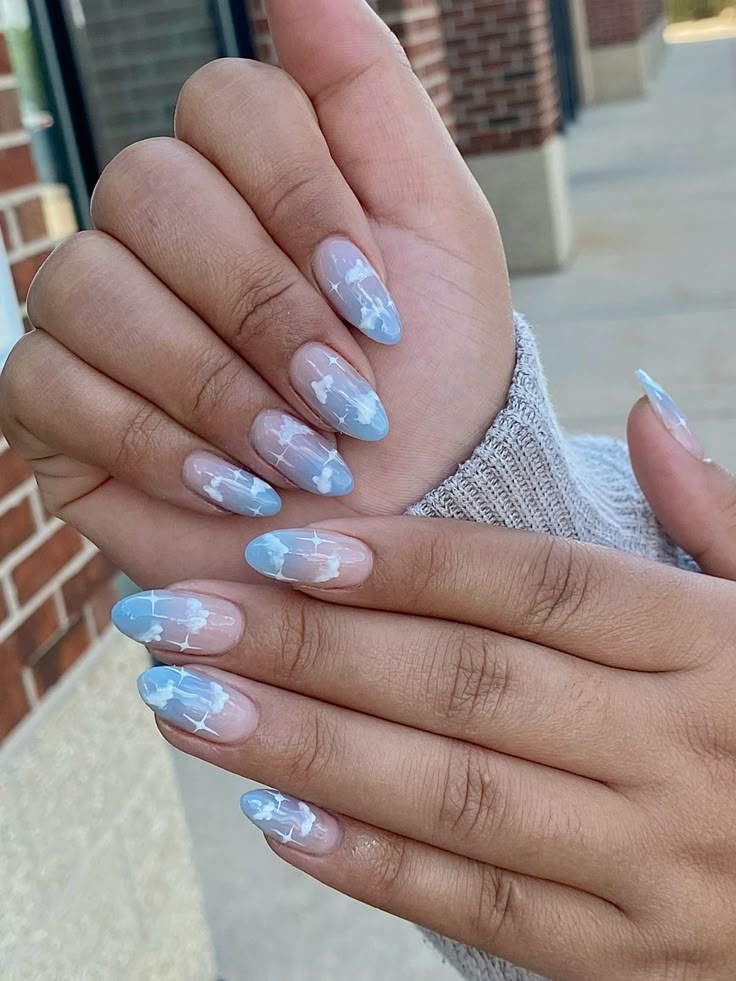
Cloudy pastel skies nails seize the smooth splendor of a dreamy day. This acrylic nail design blends mild pastel colors with ethereal, cloud-like patterns for a calming, ethereal effect. Cloudy pastel skies nails are best for spring vibes, serene styles, or absolutely everyone who loves a mild pop of color.
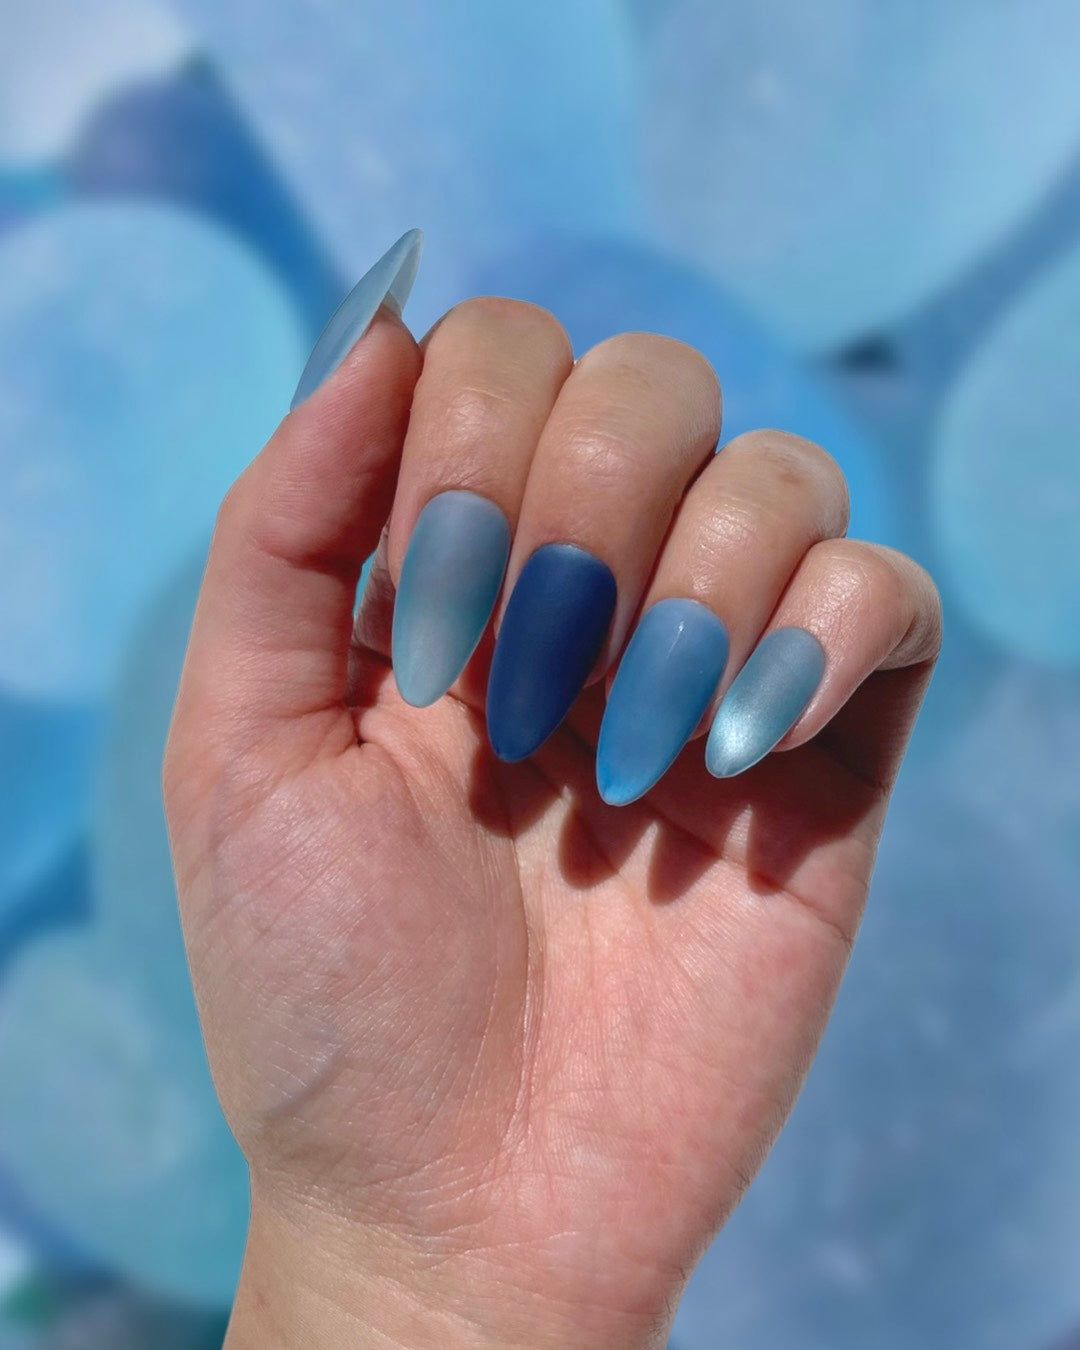
Ice Blue Glow
Ice blue glow nails bring a fab, frosty vibe to your acrylic nail fashion. Featuring a faded blue base with a radiant, glowing end, this design is each refreshing and elegant. Ice blue glow nails are best for iciness seems or everybody who loves a crisp, luminous touch of shade.
Disco Ball French
Disco ball French nails upload sparkle and retro aptitude to a conventional layout. This acrylic nail appearance functions shimmering, reflective silver tips that mimic a disco ball, paired with a impartial or sheer base. Disco ball French nails are ideal for events, night time outs, or every person who loves to shine.
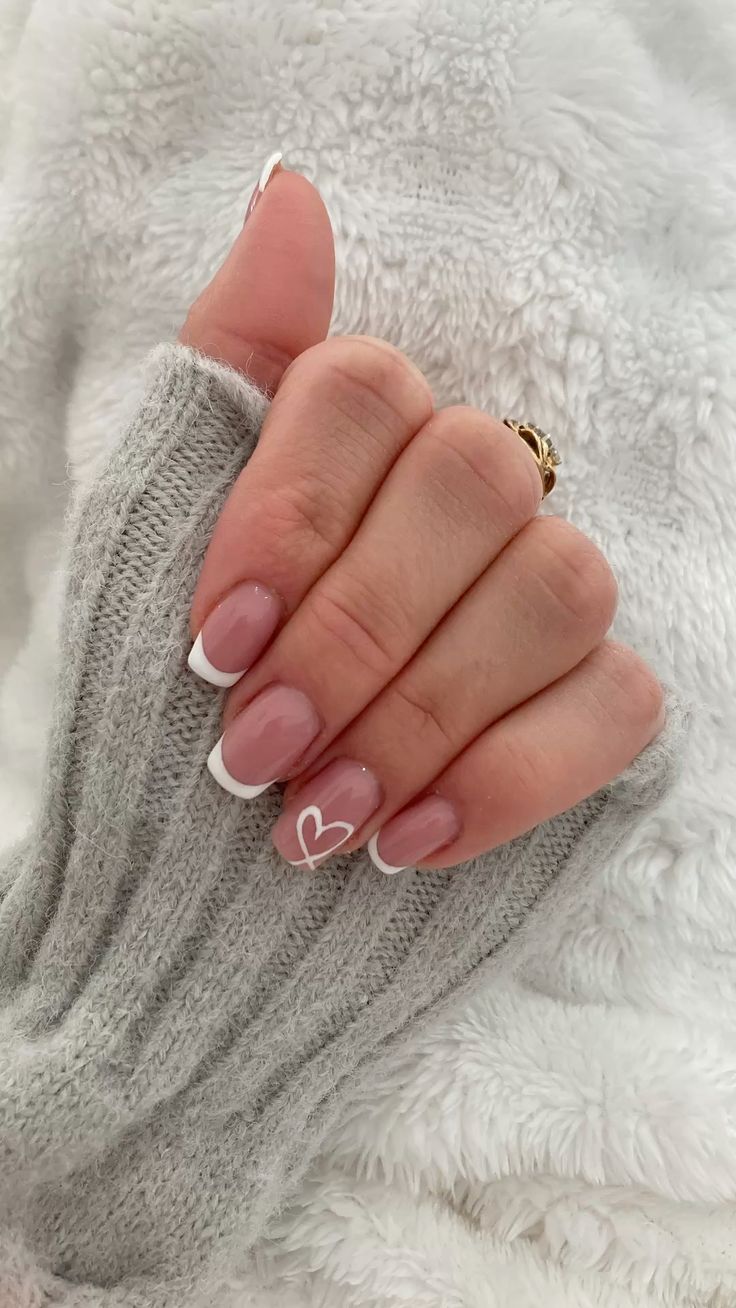
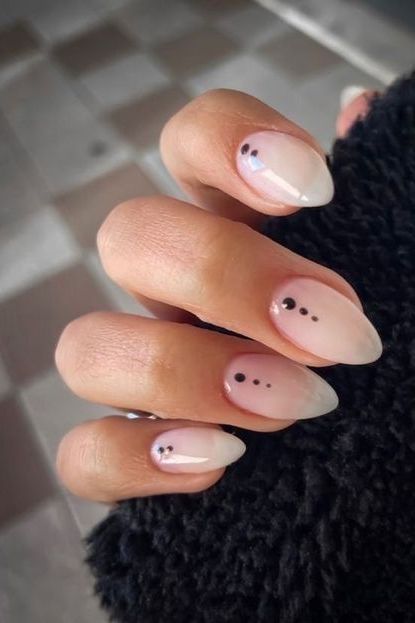
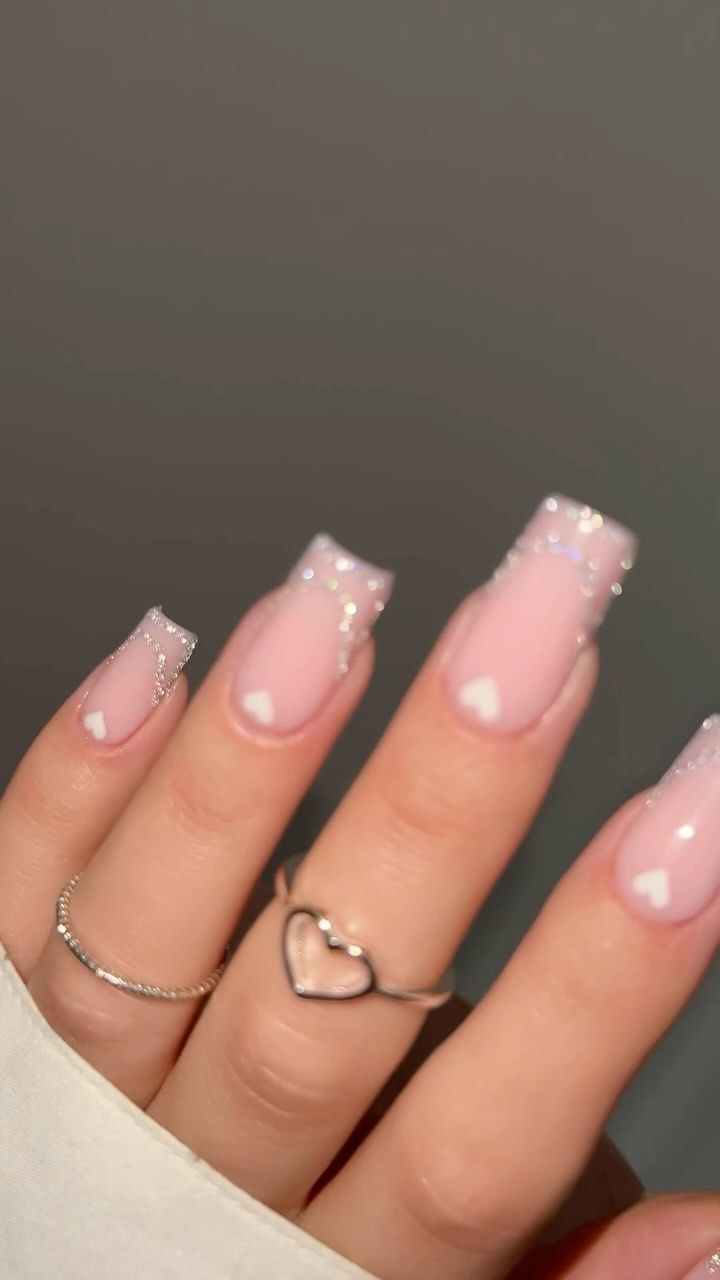
Minimal Heart Tips
Minimal heart recommendations nails are candy, diffused, and effects adorable. This acrylic nail design functions tiny heart shapes delicately placed at the pointers, often in gentle or contrasting hues. Minimal coronary heart hints are best for a romantic contact that continues things smooth, elegant, and modern—best for normal wear or date nights.
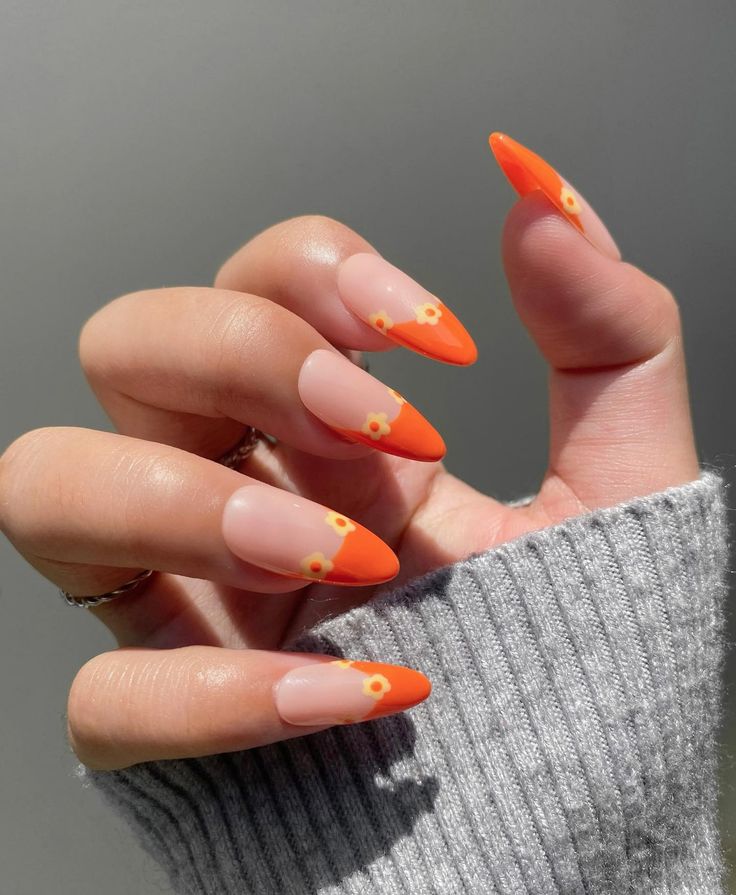
Spring Petal Pop
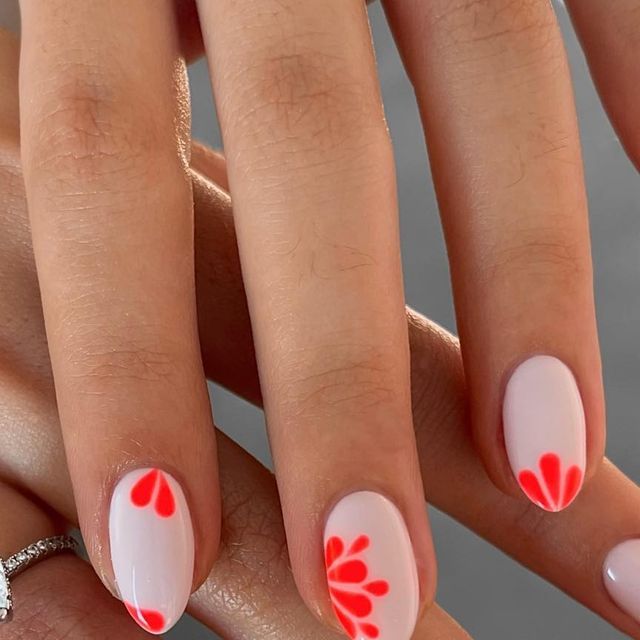
Spring petal pop nails burst with sparkling, floral attraction. This acrylic nail layout functions colorful flower petals in shiny, playful hues, developing a energetic and joyful appearance. Spring petal pop nails are perfect for welcoming warmer weather and adding a colourful touch for your seasonal fashion.
Flame Art Design
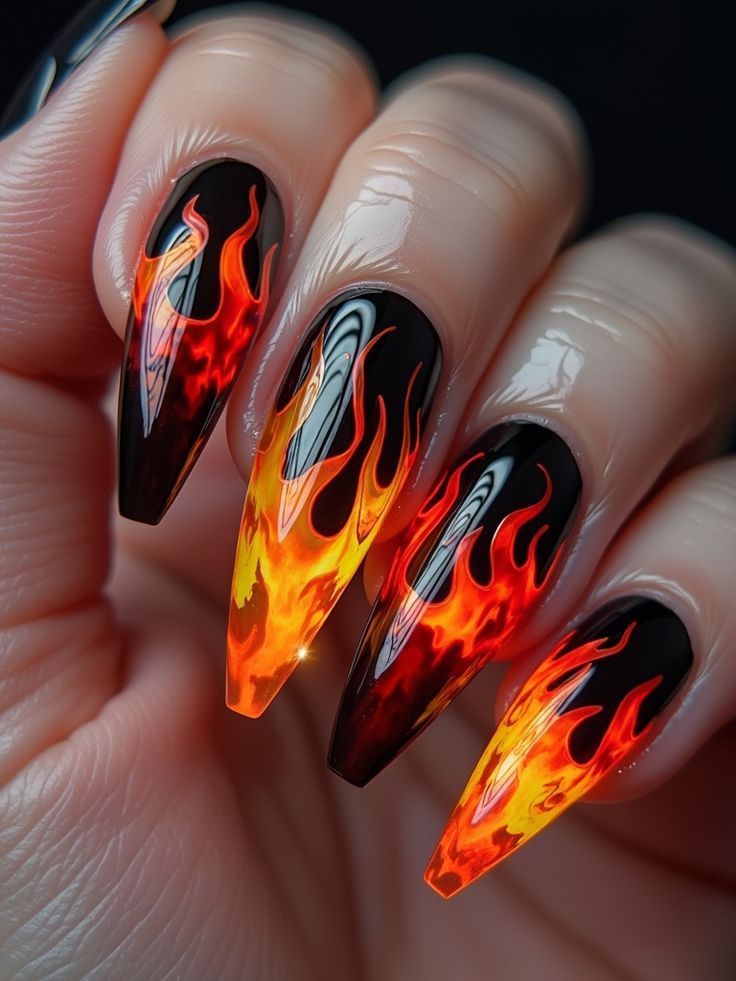
Flame art layout nails deliver ambitious strength and fierce style to your fingertips. This acrylic nail design functions fiery flame styles in vibrant colours like pink, orange, or neon, developing a placing and edgy look. Flame art design nails are best for creating a announcement that’s hot, ultra-modern, and complete of mindset.
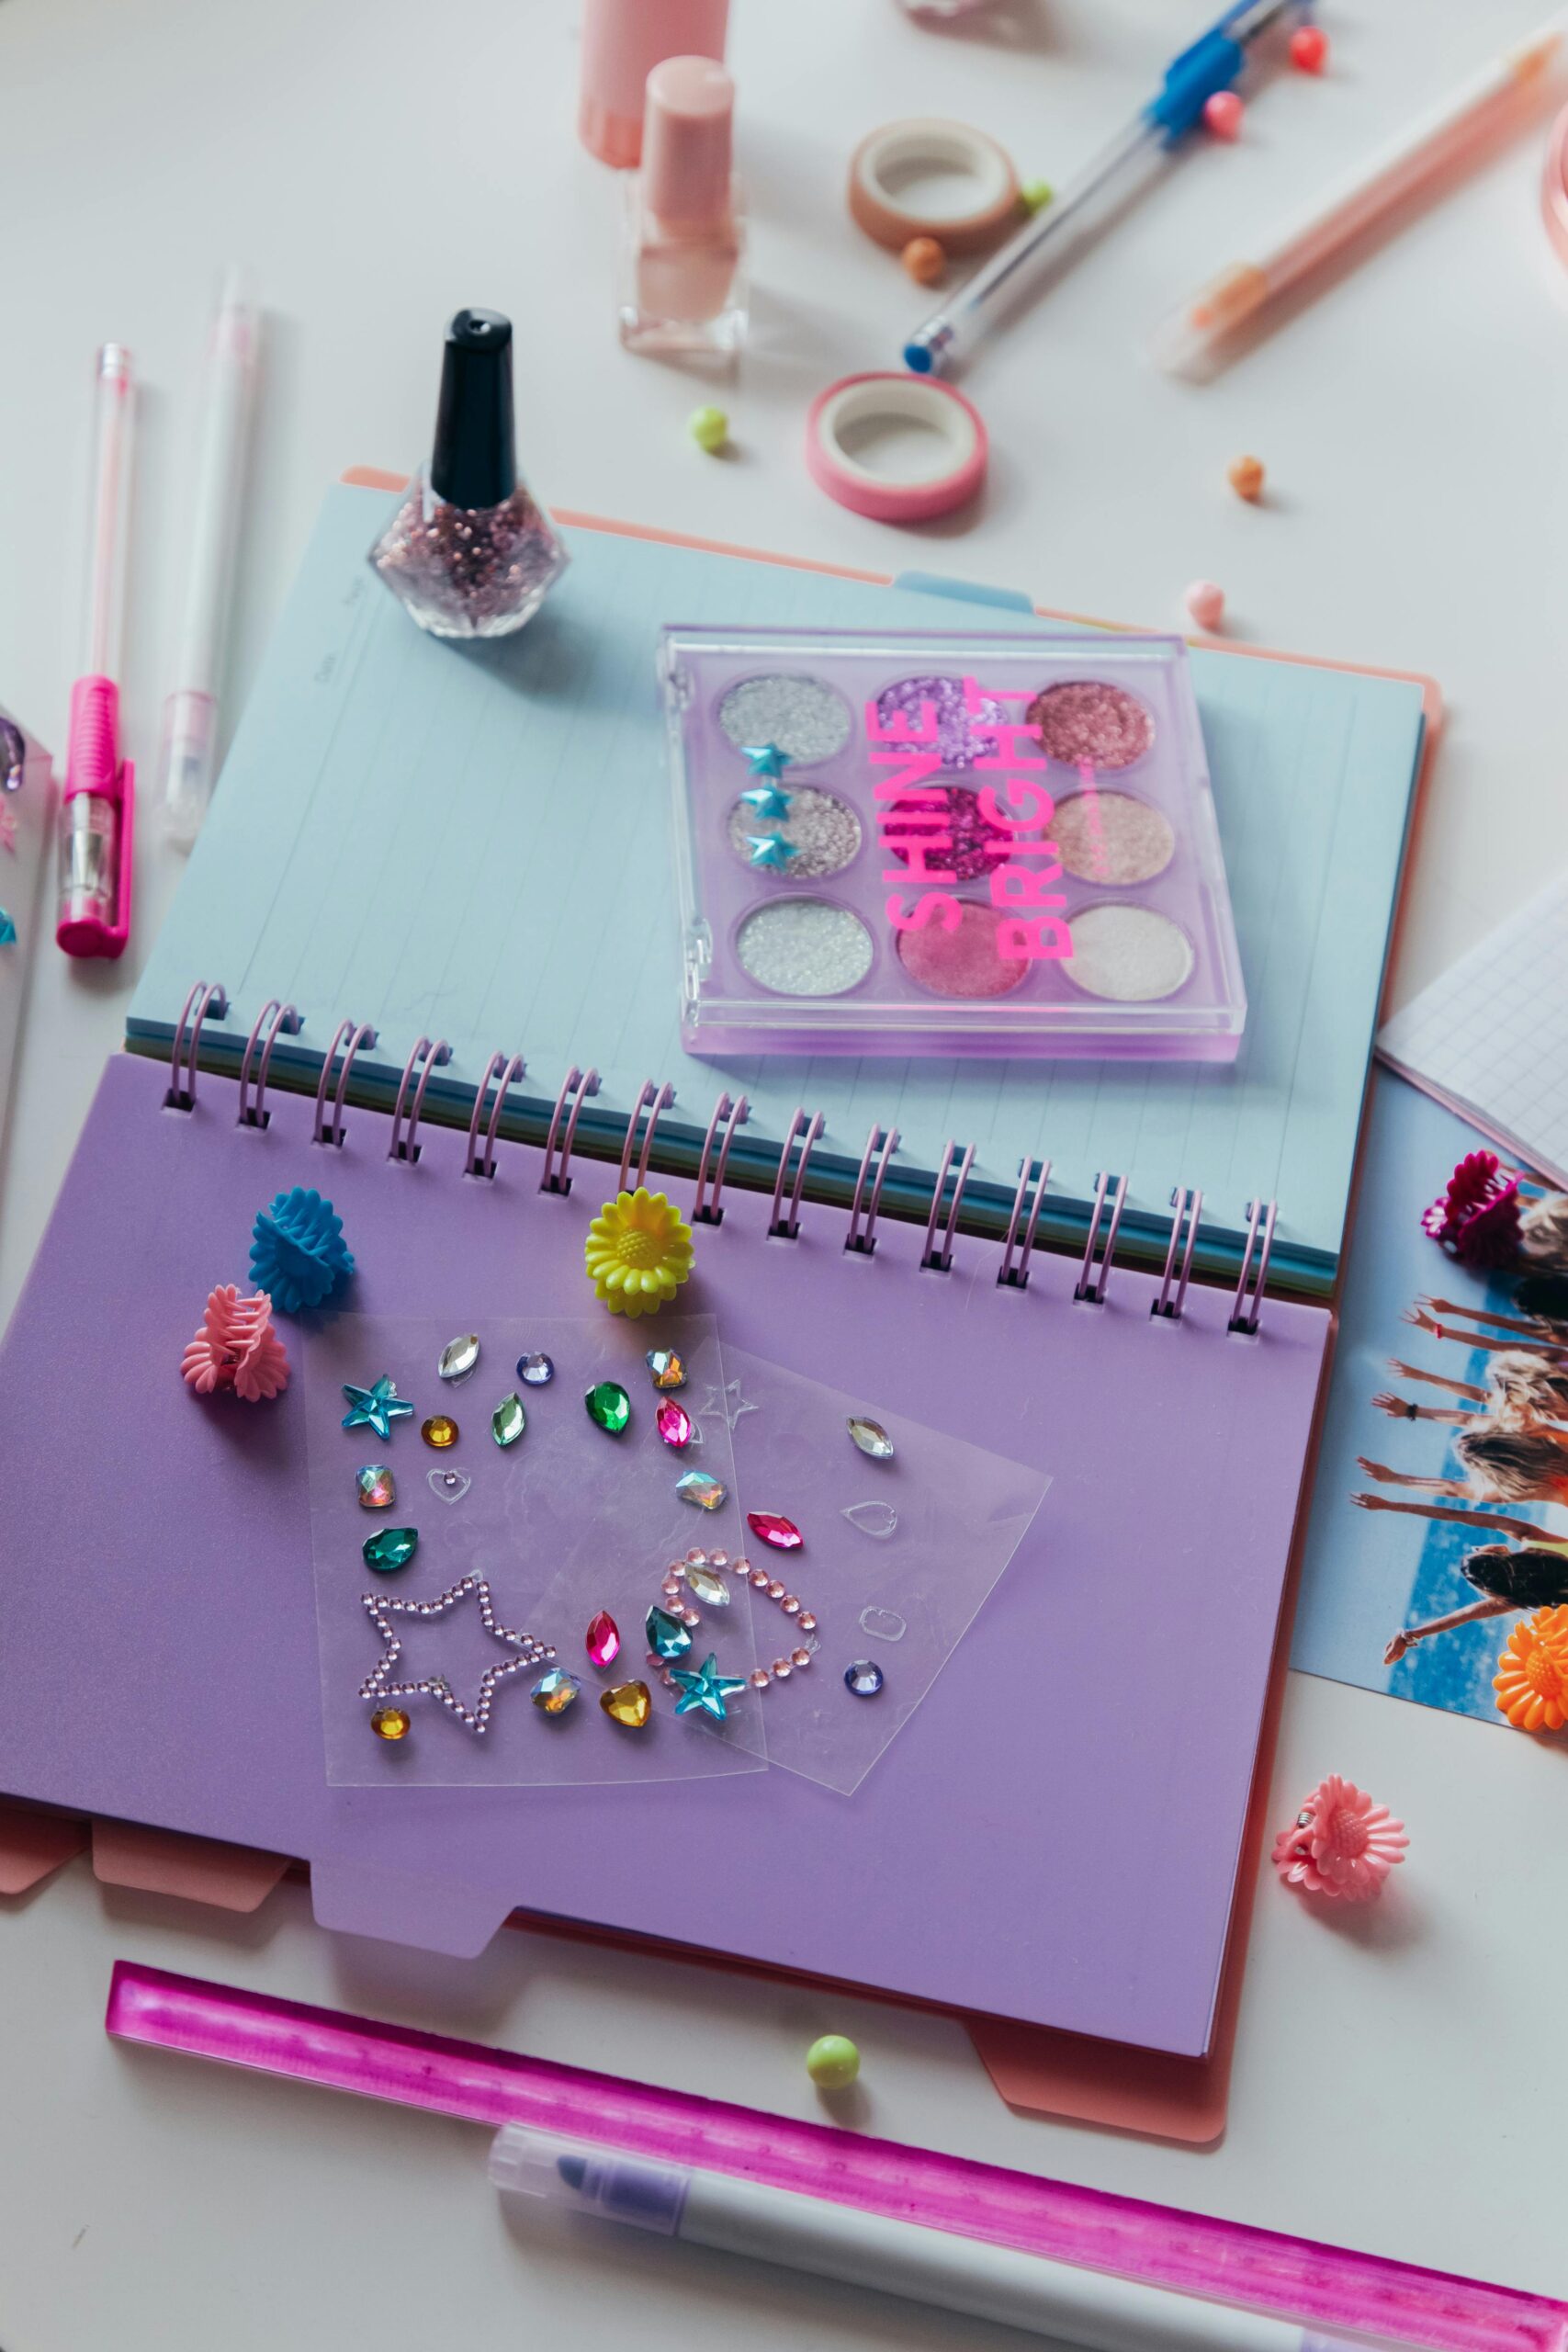
Luxe Gemstone Crystals
Luxe gemstone crystals nails are all approximately high-stop sparkle and elegance. This acrylic nail design features surprising crystal elaborations that mimic actual gem stones, including a costly touch to any nail cropping. Luxe gemstone crystals nails are best for unique activities or everyone who loves glamorous, jewel-inspired nail artwork.
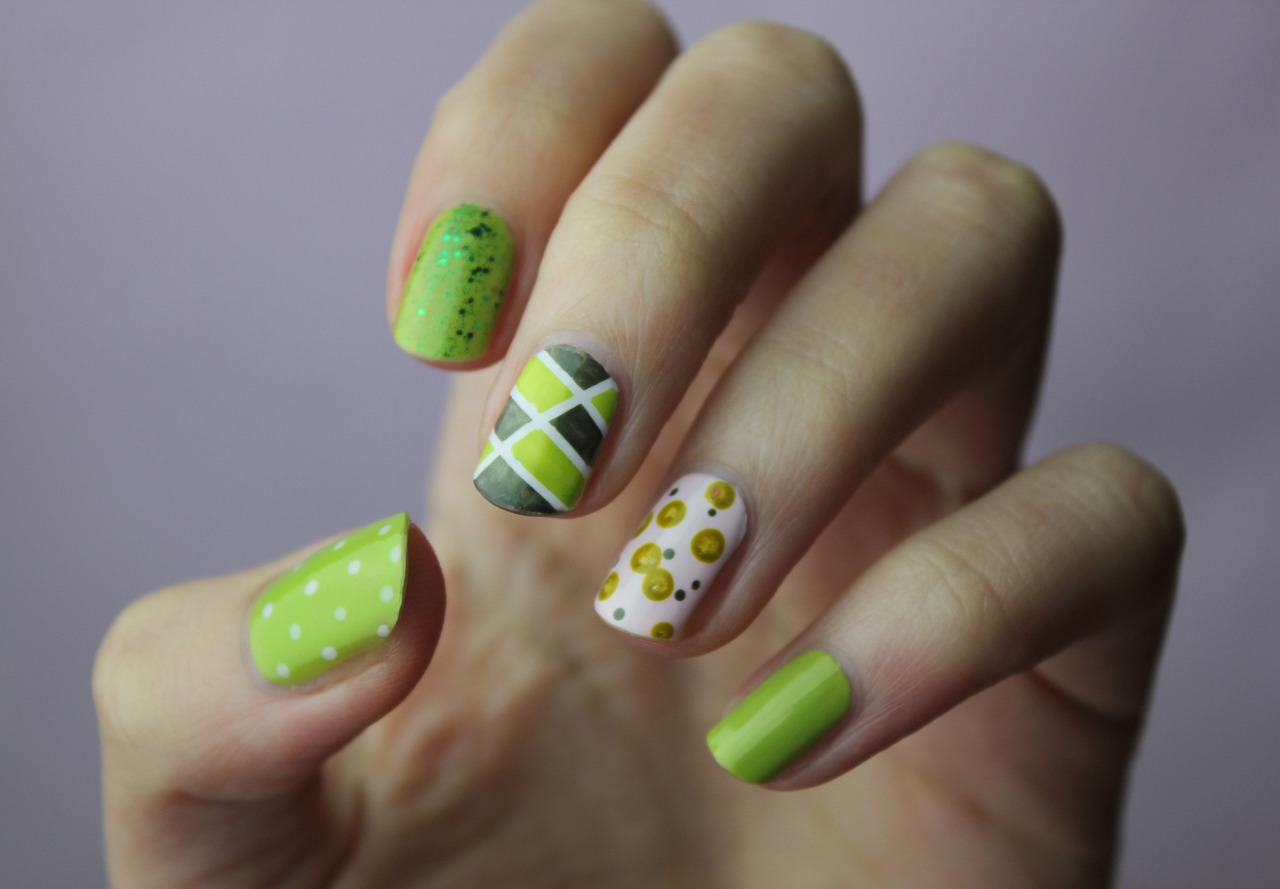
Edgy Spike Chrome
Geometric pastel grid nails combine modern-day art with gentle, playful tones. This acrylic nail layout functions smooth lines and pastel colour blocks arranged in fashionable grid styles. Geometric pastel grid nails are best for individuals who love a ultra-modern, minimalist look with a pop of colour and creativity.
Geometric Pastel Grid
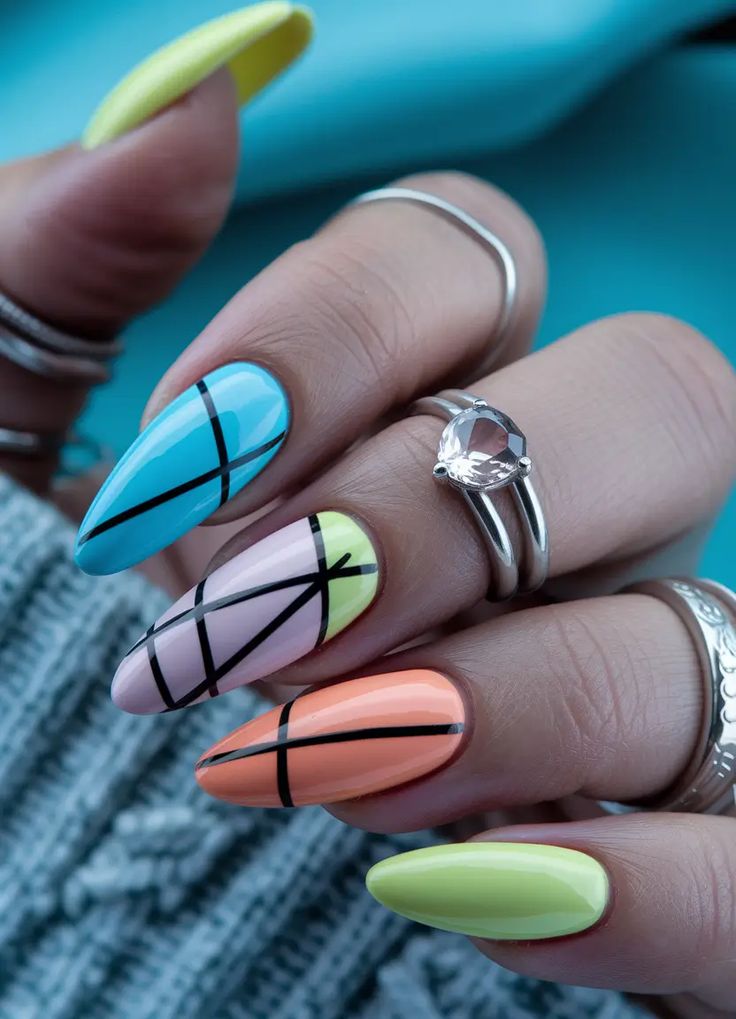
Geometric pastel grid nails integrate contemporary artwork with soft, playful tones. This acrylic nail design features clean traces and pastel colour blocks arranged in elegant grid patterns. Geometric pastel grid nails are ideal for folks that love a brand new, minimalist appearance with a pop of shade and creativity.
Cobalt Electric Shine
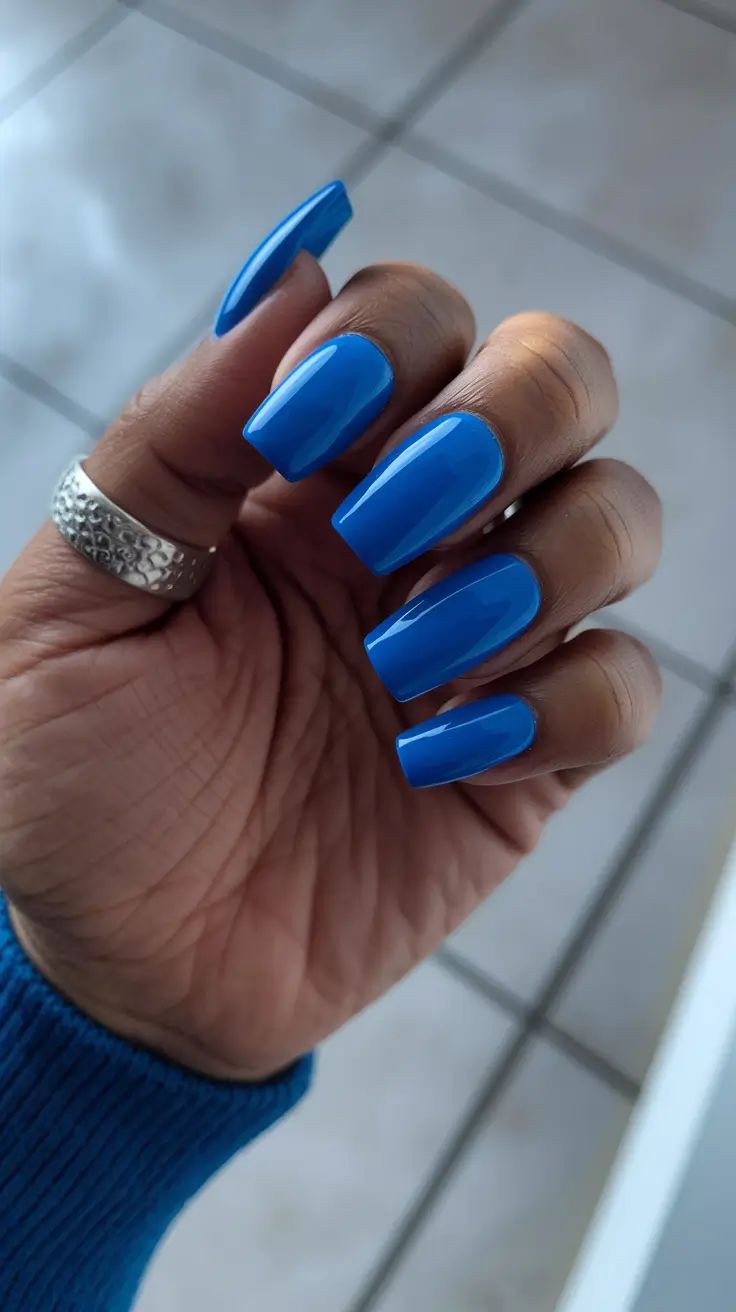
Cobalt electric powered shine nails supply a ambitious jolt of color and gloss. This acrylic nail design features a hanging cobalt blue color with a high-shine end that catches the light superbly. Cobalt electric shine nails are perfect for making a powerful announcement it’s smooth, modern-day, and complete of self assurance.
Sea Glass Matte
Sea glass matte nails deliver coastal serenity for your acrylic nail appearance. Inspired through easy, ocean-washed glass, this layout capabilities smooth, translucent colorations with a velvety matte finish. Sea glass matte nails are perfect for a relaxing, beachy vibe that’s each elegant and resultseasily fresh.
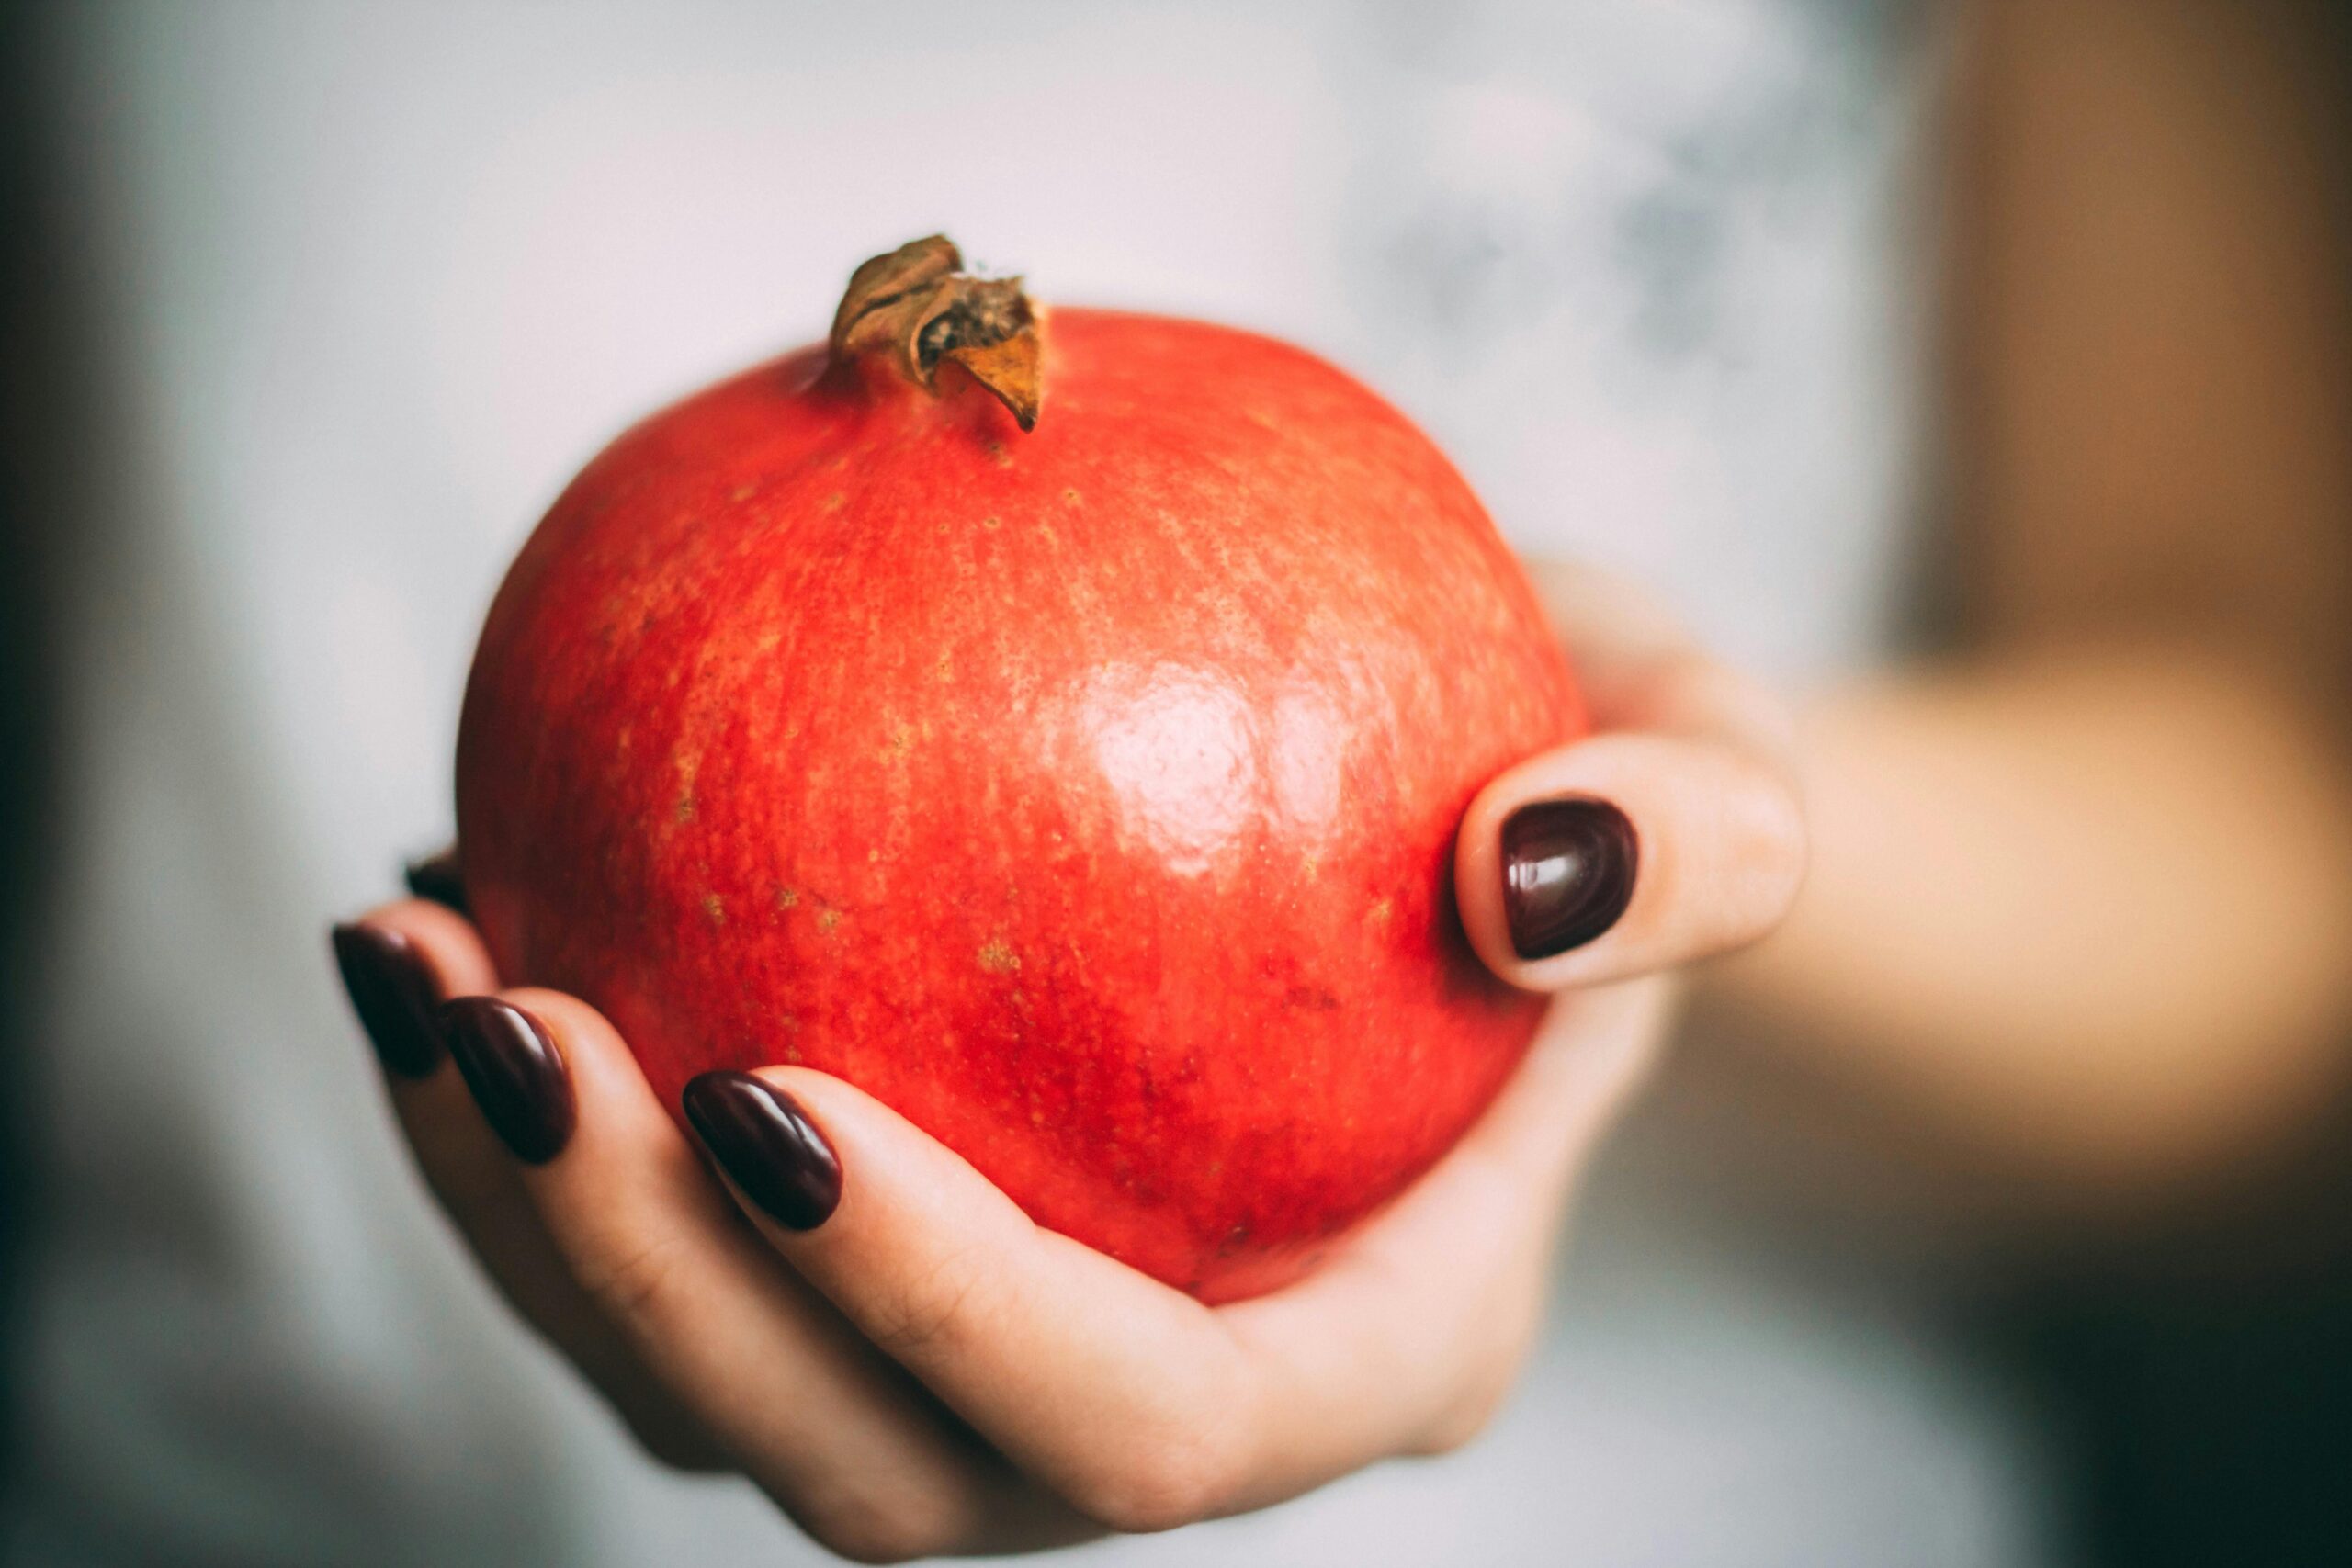
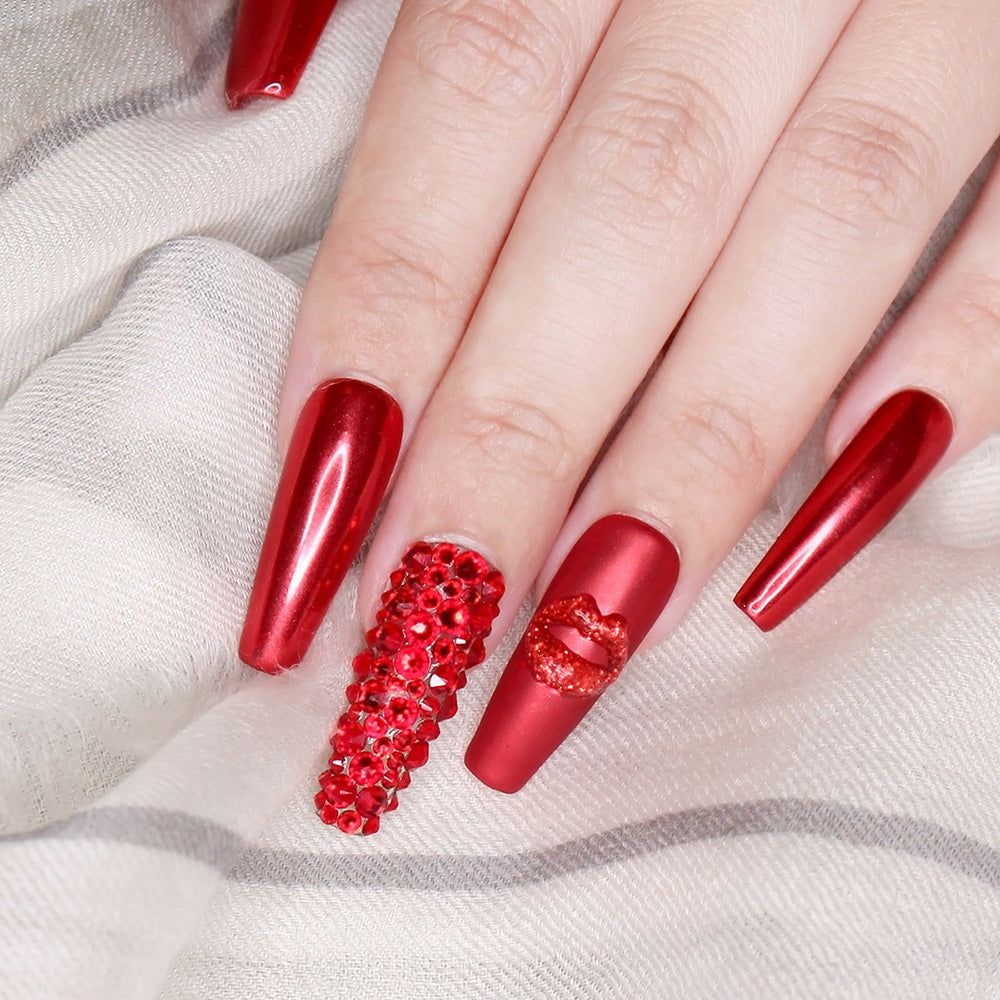
Classic Red Almond
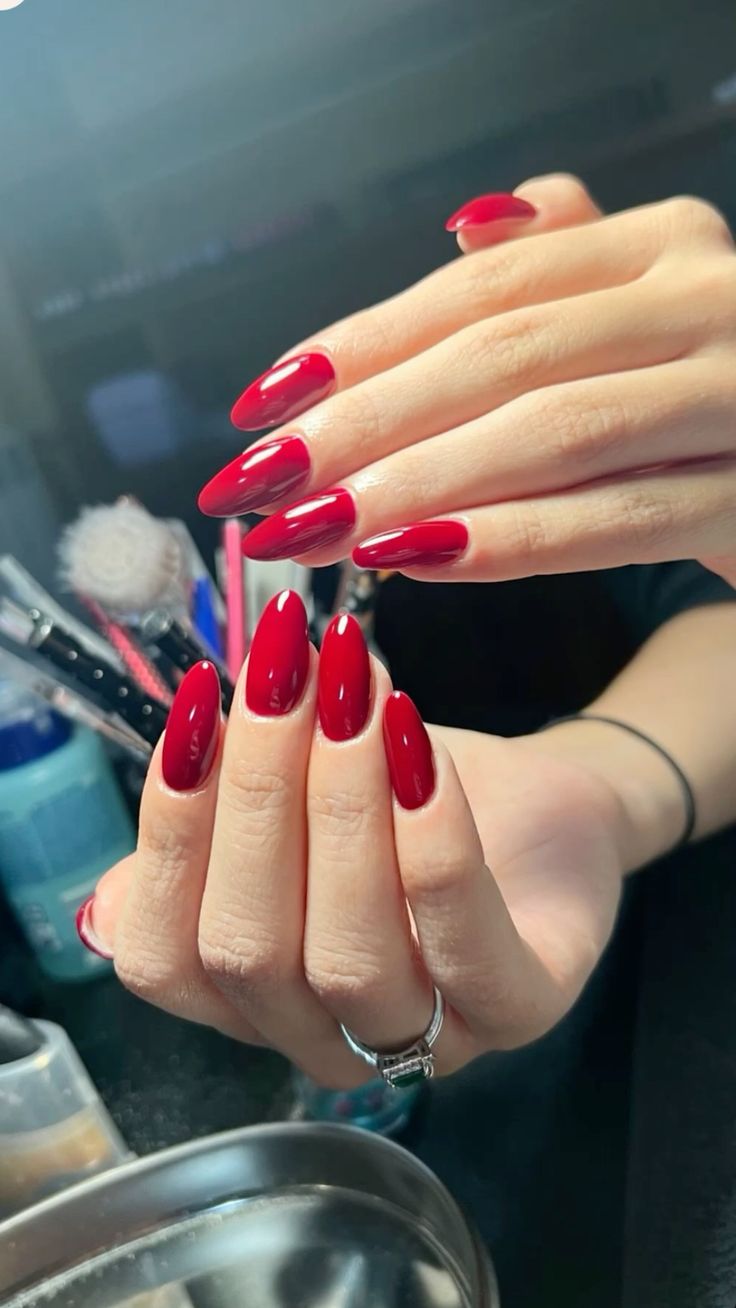
Classic red almond nails are timeless, formidable, and effortlessly chic. This acrylic nail layout features a wealthy red polish on a flattering almond shape, presenting elegance and self belief in a single appearance. Classic purple almond nails are ideal for any occasion—from normal glam to special nights out.
Sassy Zebra Lines

Sassy zebra traces nails upload a fierce, style-ahead part for your acrylic manicure. Featuring bold black-and-white stripes or colorful animal print variations, this design is wild but elegant. Sassy zebra traces nails are perfect for trendsetters who love status out with playful styles and untamed strength.
Abstract Watercolor
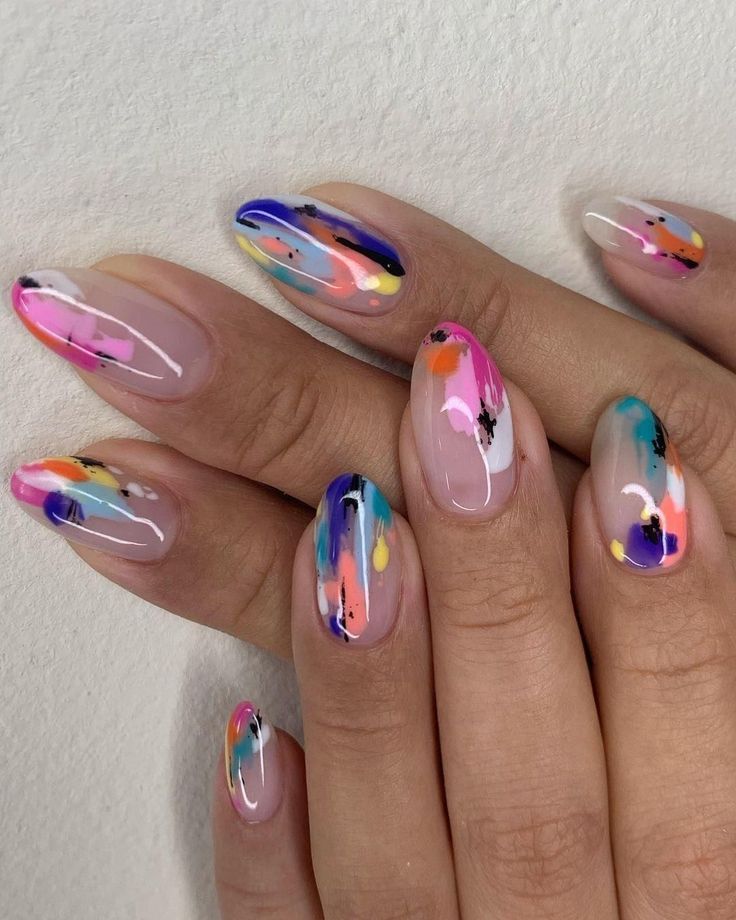
Abstract watercolor nails are a soft, artistic acrylic design that mimics painted brushstrokes in dreamy, mixed colorations. With no nails precisely alike, this appearance is perfect for expressing creativity and elegance. Abstract watercolor nails are perfect for folks that love a diffused splash of color with a unique, hand-painted experience.
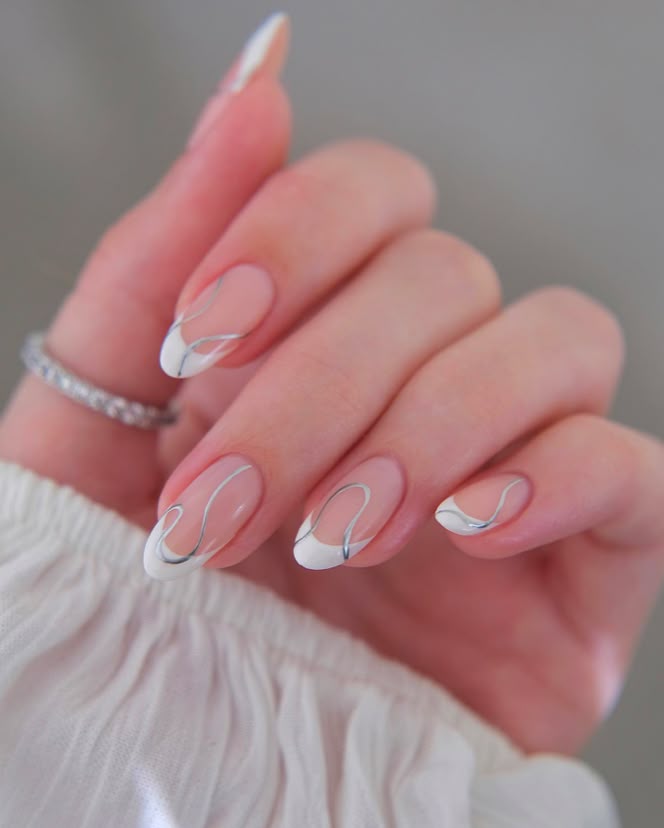
Purple Chrome Swirls
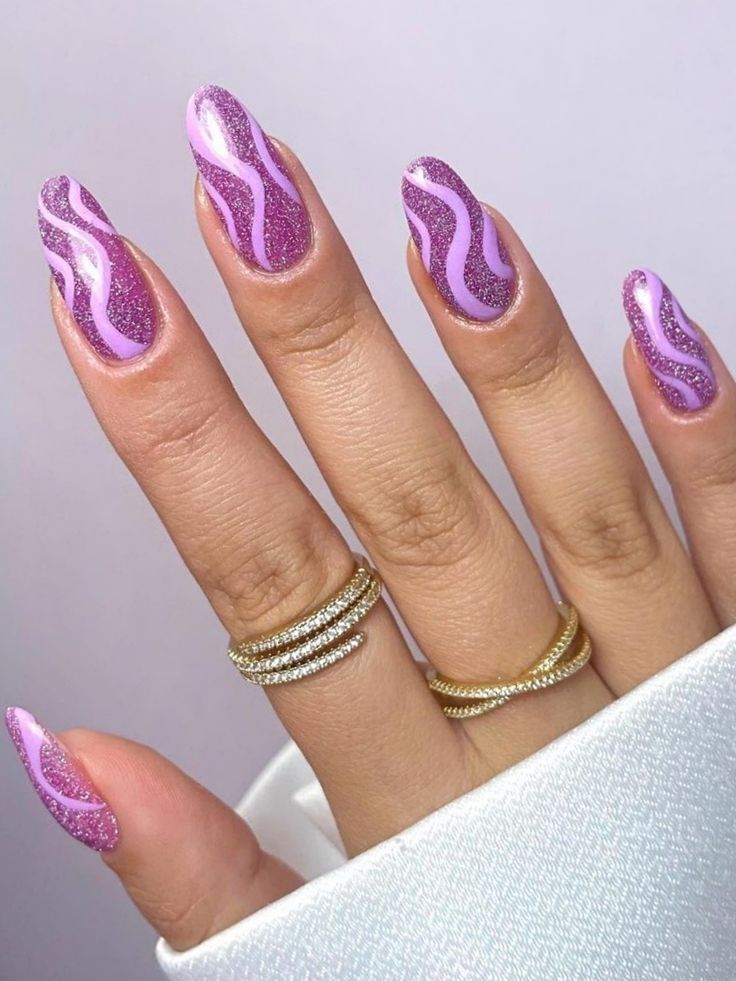
Purple chrome swirls nails combination futuristic shine with inventive flair. This acrylic nail design capabilities steel purple tones swirled in captivating patterns, growing a formidable and captivating impact. Purple chrome swirls nails are best for people who love standout patterns with a touch of glam and creativity.
Golden Hour Fade
Golden hour fade nails seize the warm, glowing beauty of sunset. This acrylic nail layout blends smooth oranges, peaches, and golds in a smooth gradient, mimicking the sky at dusk. Golden hour fade nails are ideal for adding warm temperature, romance, and radiance for your normal style.
Sheer Blush Bubble
Sheer blush bubble nails offer a clean, gentle, and sensitive appearance. This acrylic nail layout functions a translucent blush red base with a smooth, bubble-like finish that provides subtle shine. Sheer blush bubble nails are perfect for a clean, female aesthetic that feels mild, natural, and effortlessly pretty.
V-Tip French Remix
V-tip French remix nails positioned a modern-day spin at the classic French nail trimming. This acrylic nail design capabilities sharp, angled tips in formidable or pastel sunglasses, developing a elegant V-shaped twist. V-tip French remix nails are ideal for folks that love timeless elegance with a latest, style-forward edge.
Cyber Neon Grid
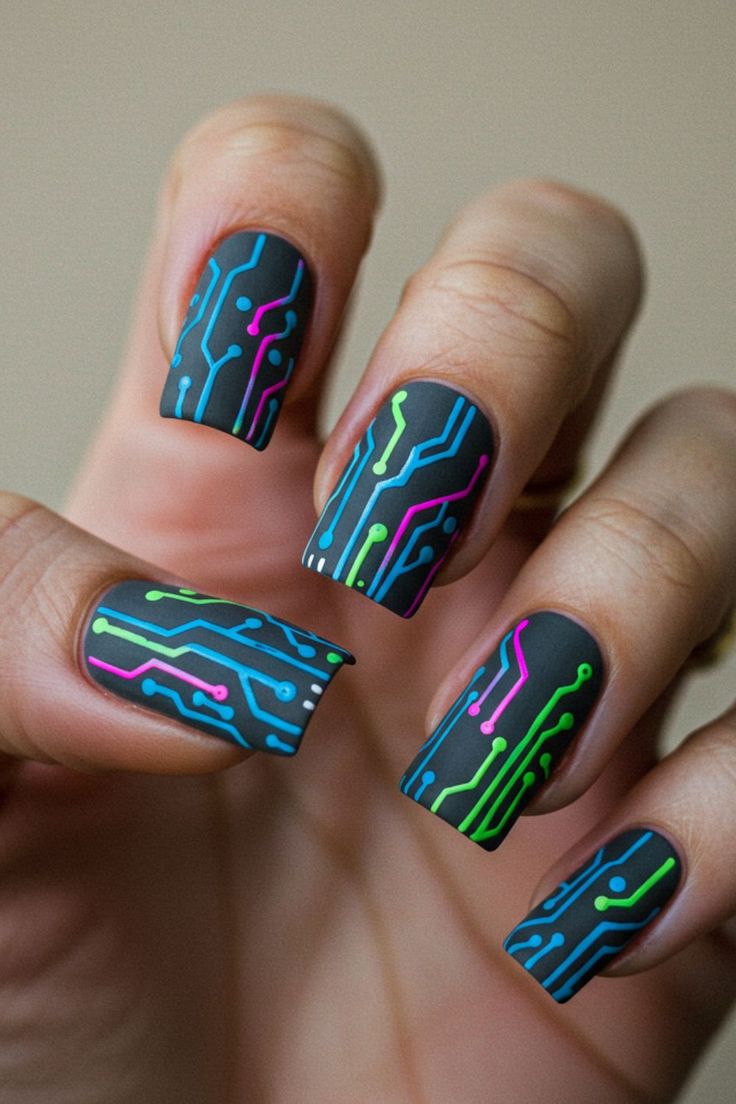
Cyber neon grid nails are a ambitious, futuristic acrylic nail layout that instructions attention. Featuring vivid neon colours intersected by way of sharp grid traces, this appearance channels cyberpunk vibes with excessive-tech flair. Cyber neon grid nails are perfect for edgy fashion fans who want a manicure that’s vibrant, cutting-edge, and completely particular.
Lemonade Pink Chrome
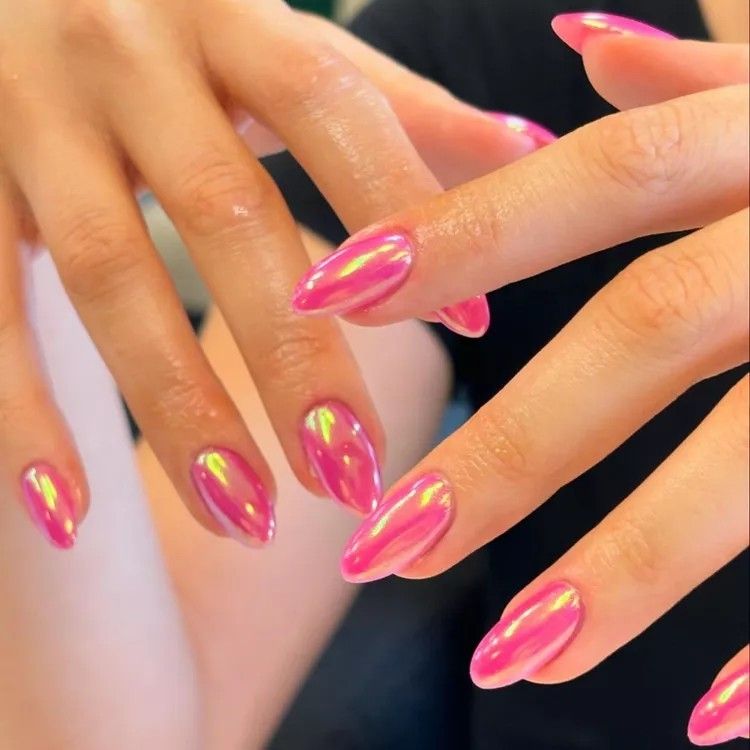
Lemonade crimson chrome nails are candy, vivid, and complete of summertime glow. This acrylic nail layout capabilities a colourful purple hue with a reflective chrome finish, giving your nails a playful but polished look. Lemonade pink chrome nails are ideal for brightening your fashion with a a laugh, fruity twist.
Glossy Cow Print

Glossy cow print nails deliver playful appeal and formidable fashion in your acrylic nail clipping. Featuring classic black-and-white spots with a shiny topcoat, this design provides a today’s twist to animal print. Glossy cow print nails are ideal for style-forward folks who love amusing, declaration-making nail artwork.
Strawberry Milk Drip
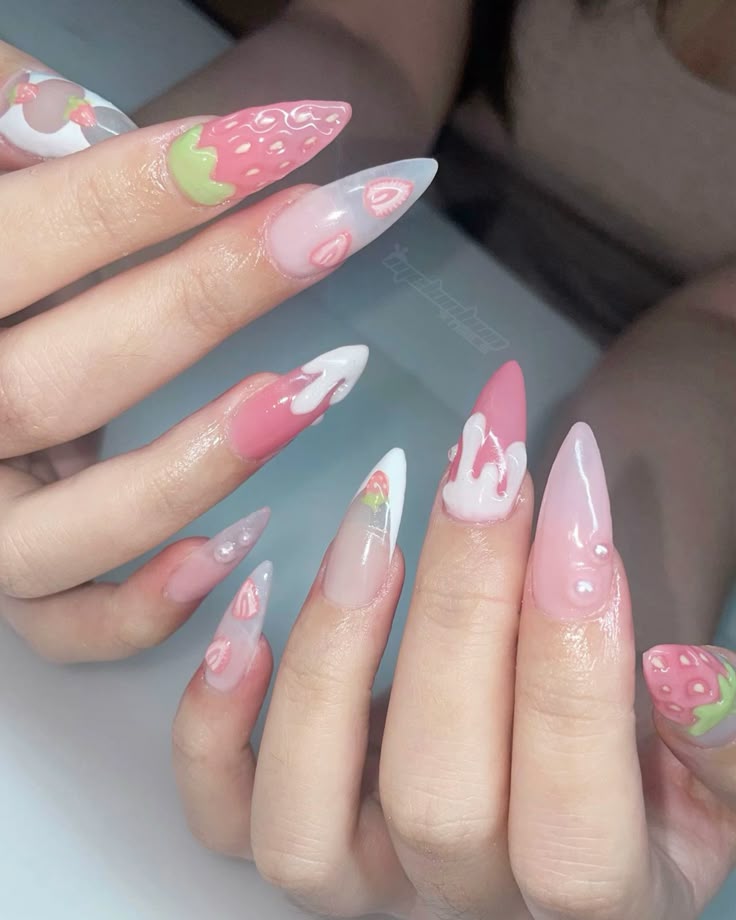
Strawberry milk drip nails are sweet, creamy, and definitely irresistible. This acrylic nail design capabilities tender red tones with glossy drip outcomes that mimic strawberry syrup over milk. Strawberry milk drip nails are perfect for adding a lovable, dessert-inspired contact to your look with playful, pastel allure.
Retro Swirl Combo
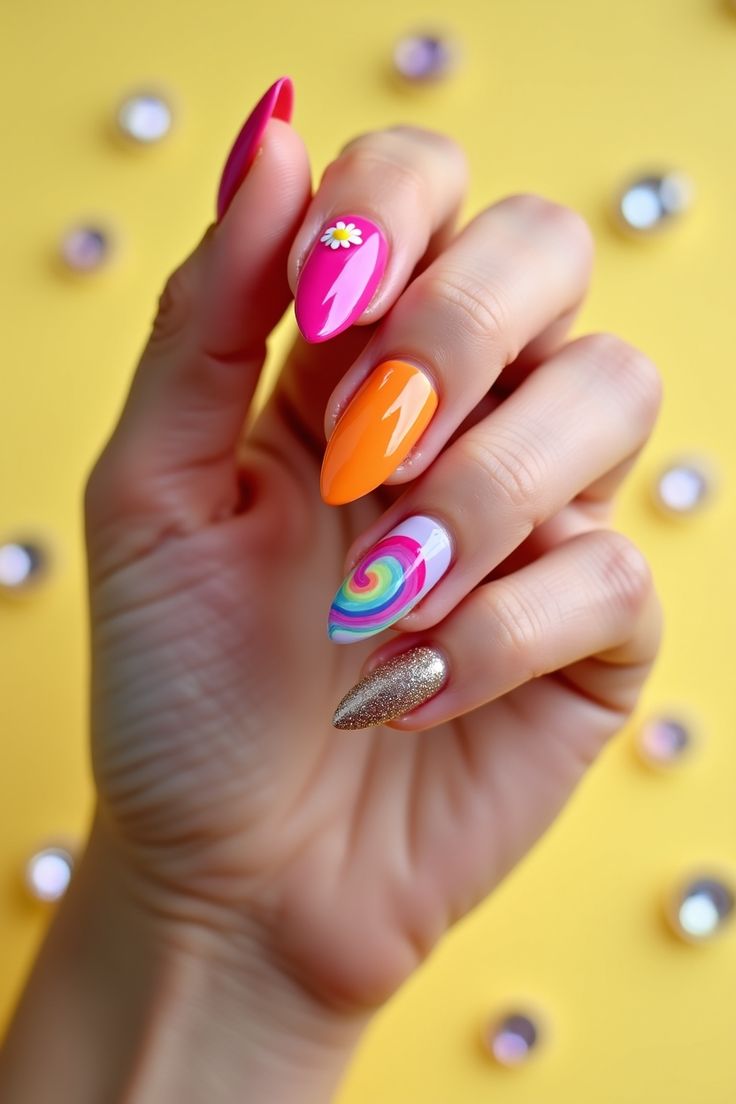
Retro swirl blend nails bring vintage vibes with a bold, colourful twist. This acrylic nail layout functions groovy swirl styles in colourful colorations, stimulated by 70s style and cool aptitude. Retro swirl combo nails are ideal for all people who loves playful, declaration-making styles with a nostalgic aspect.